Two Easy Christmas Table Crafts for a Beautiful Festive Tablescape
One of the things I love most about creating a beautiful table is finding simple ways to make it feel a little more personal.
While I certainly love finding beautiful pieces for our home, I don’t believe you need to go out and buy everything new each time you entertain. Sometimes a simple DIY project can give you exactly the look you’re after — often for much less money and with far more character.
When I was putting together my natural and vintage-inspired Christmas tablescape, there were two things I wanted but couldn’t find in the shops.
The first was a tablecloth with a subtle Christmas pattern in the earthy greens and browns I was using throughout my decorating.
The second was a collection of brass candlesticks in different shapes and heights for the centre of the table.
So, of course, I decided to make them myself!
Both of these Christmas table crafts were surprisingly easy, and I was so happy with how they turned out.
Christmas Table Crafts #1: A DIY Stencilled Christmas Tablecloth
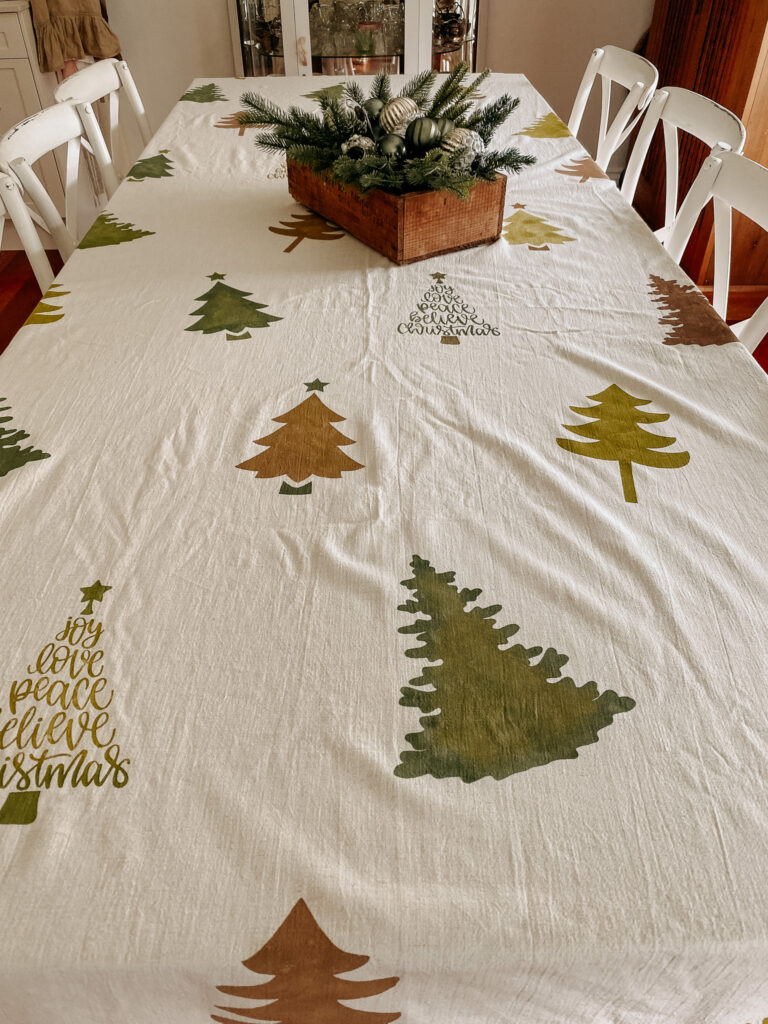
For the foundation of my Christmas table, I wanted something natural and relaxed rather than a traditional Christmas tablecloth.
I found a simple, inexpensive linen-look tablecloth from H&M Home that was exactly the colour and texture I wanted.
It was lovely on its own, but I thought adding a subtle Christmas tree pattern would make it much more interesting — and turn a very simple tablecloth into something unique.
What I Used
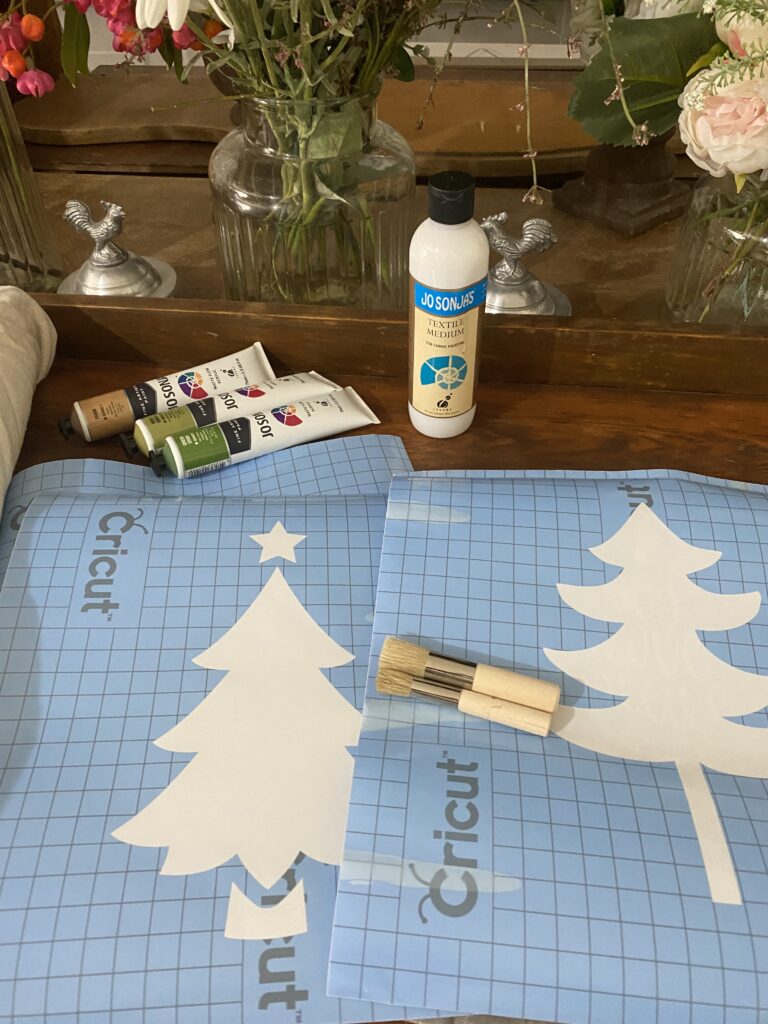
For this project, I used:
- a plain linen-look tablecloth to fit your table
- Cricut machine
- removable stencil vinyl
- simple Christmas tree designs
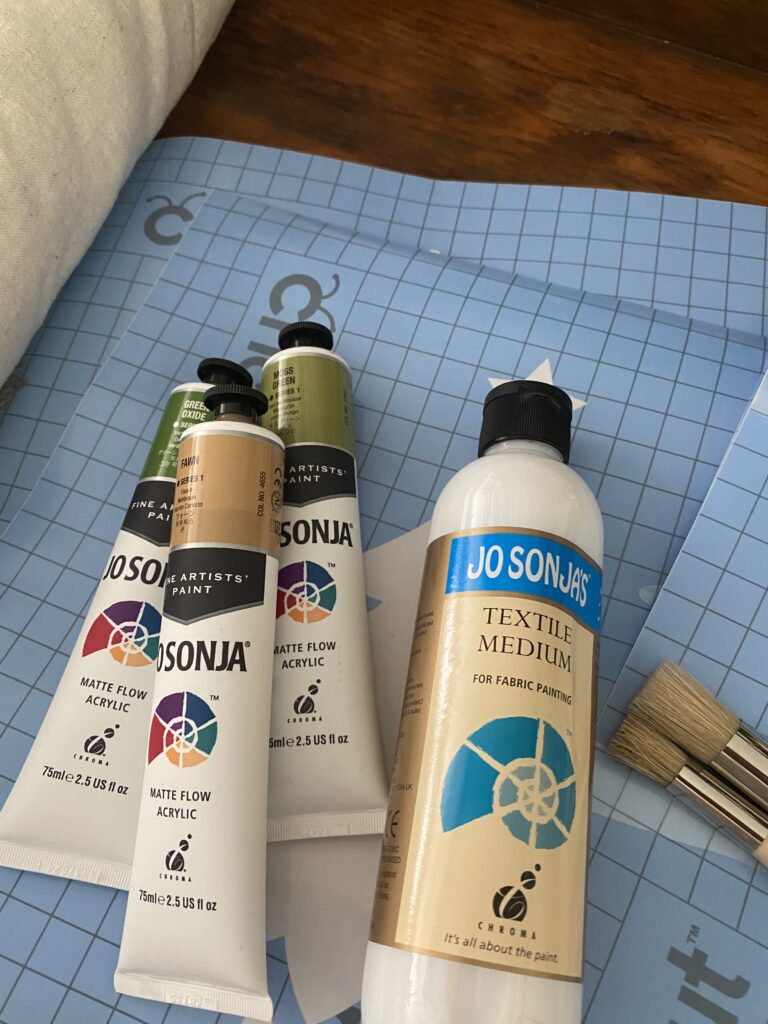
- acrylic craft paints in greens and earthy browns
- fabric medium
- stencil brush
- cloth or pressing cloth
- iron
You can easily change the colours and stencil design to suit your own Christmas decorating style.
Creating the Christmas Tree Stencils
I used my Cricut machine to cut several simple Christmas tree designs from removable stencil vinyl. However, if you don’t have a Cricut, don’t worry! You can easily use purchased Christmas stencils instead. Just look for a few simple tree designs in different shapes and sizes to achieve a similar effect. Something like this pack would be great.
I didn’t want every tree to look exactly the same, so using a variety of designs gave the finished tablecloth a more relaxed, handmade feel.
Before you start painting, lay your tablecloth out completely and decide roughly where you’d like your designs to sit. I wanted mine scattered across the fabric rather than arranged in perfectly straight rows.
Once I was happy with the placement, I positioned my stencils ready for painting. If you’re using purchased stencils, you can secure them with a little low-tack masking tape to help keep them in place.
The idea is to create something that looks charming and handmade rather than perfectly uniform. After all, that’s part of the beauty of a project like this!
Mixing Paint with Fabric Medium
Because I wanted to be able to use and wash the tablecloth rather than have it become something that could only come out for display, I mixed the acrylic paint with a fabric medium.
Fabric medium helps turn ordinary acrylic paint into a paint suitable for fabric, making it softer and more flexible once dry and helping it withstand washing.
Follow the directions on the particular fabric medium you are using for the correct ratio of paint to medium.
I chose several shades of green and brown that worked with the natural colour palette I was using for Christmas.
You could just as easily use traditional red and green, soft neutrals, golds or even blues depending on your Christmas theme.
How to Stencil the Tablecloth Without the Paint Bleeding
This is probably the most important part of the project.
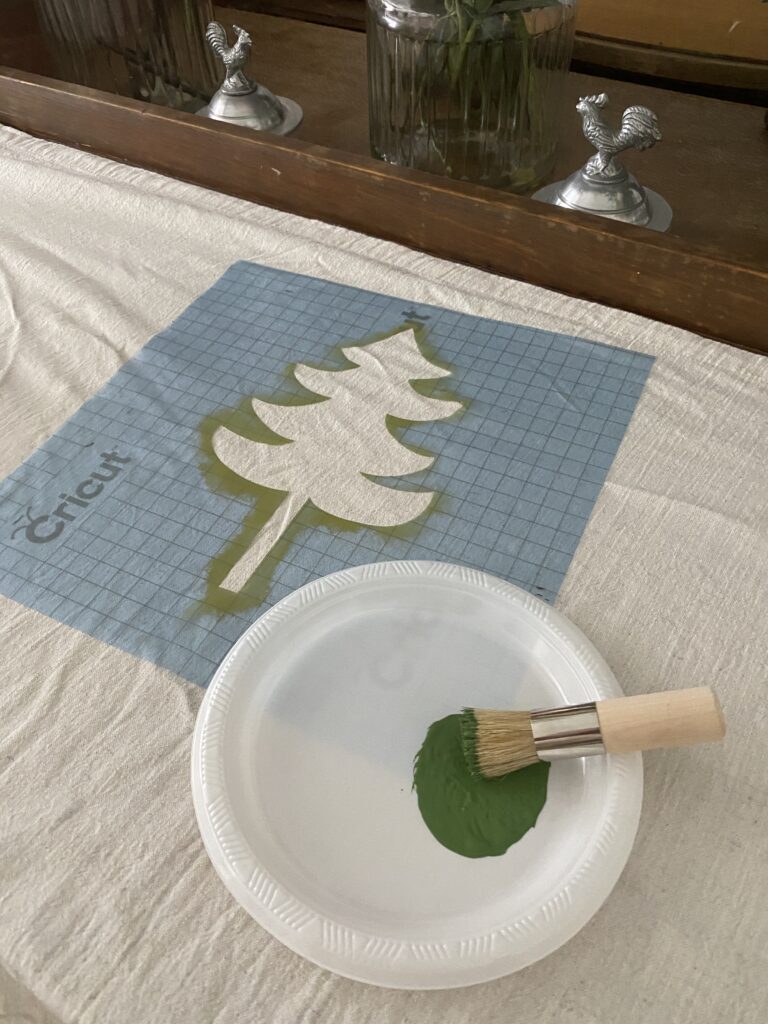
Don’t use too much paint.
After dipping my stencil brush into the paint mixture, I blotted the brush each time before applying it to the fabric.
You want the brush to be relatively dry rather than loaded with wet paint.
Using too much paint makes it much more likely to work its way underneath the stencil and cause bleeding around the edges of your design.
I gradually built up the colour instead.
It takes a little longer, but you’ll get a much cleaner result.
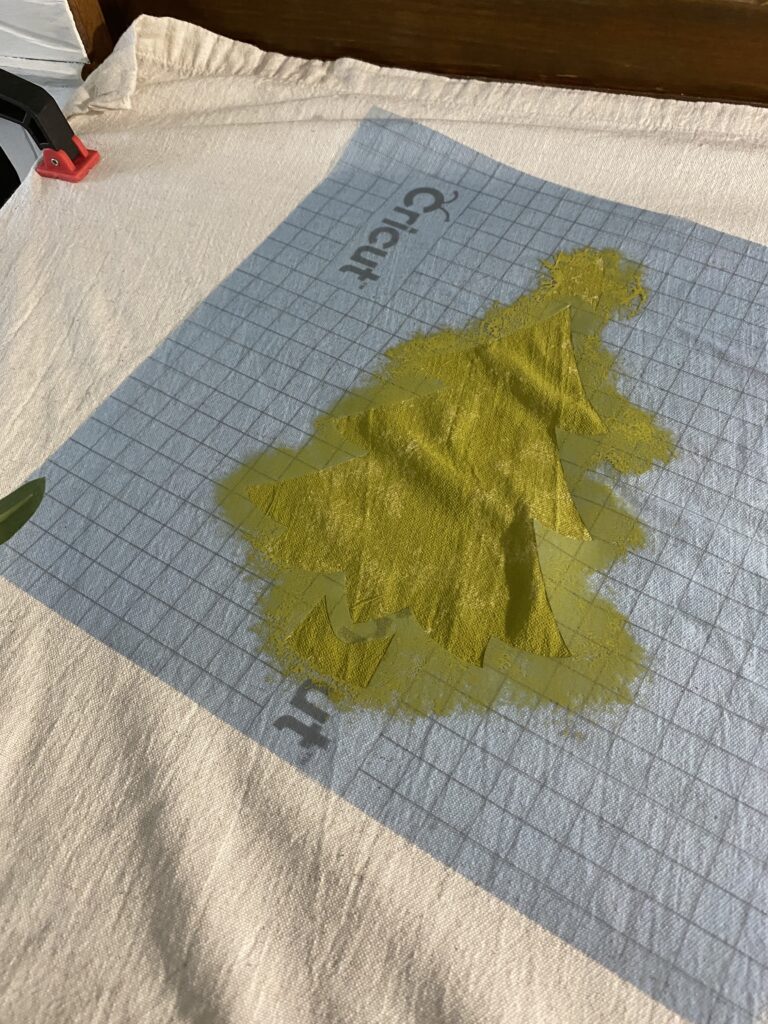
Once one tree was finished, I carefully removed the stencil and moved on to the next design.
Continue until you’re happy with the number and placement of trees across your tablecloth.
Setting the Paint
Once all of my Christmas trees were completely dry, there was one final step.
The paint needed to be heat-set.
I placed a cloth over each painted tree and ironed over it to set the paint into the fabric, following the instructions for the fabric medium I had used.
And that was it!
A very inexpensive linen-look tablecloth had become a completely unique Christmas tablecloth that worked perfectly with the rest of my tablescape.
It’s such a simple craft, but the finished result looks far more special than the amount of work involved.
And I love that I can bring it out again next Christmas.
Christmas Table Crafts #2: DIY Faux Brass Candlesticks
The second project came about because I knew exactly what I wanted for the centre of the table.
Brass candlesticks.
More specifically, I wanted a collection of brass candlesticks in different shapes and heights nestled amongst the greenery running along the centre of the table.
There was just one problem.
Finding a whole collection of beautiful brass candlesticks isn’t necessarily easy — and when you do find them, they can be expensive.
So rather than waiting until I found the perfect collection, I decided to create my own.
Start with Mismatched Candlesticks
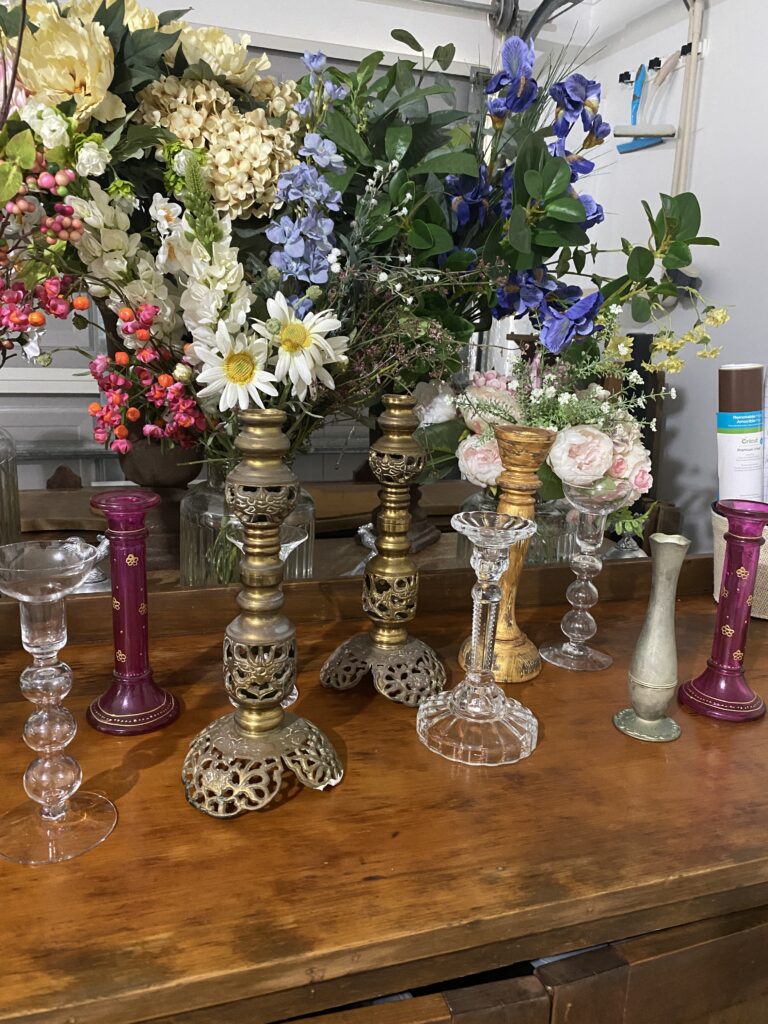
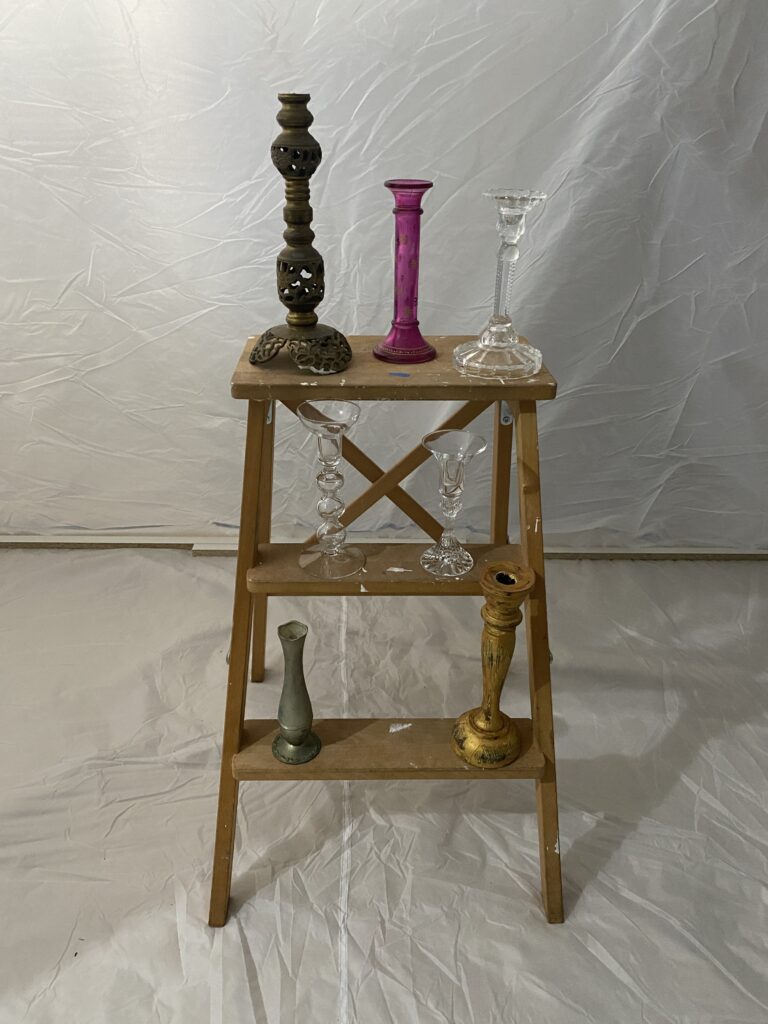
I gathered together a mottled collection of candlesticks.
And when I say mismatched, I really do mean mismatched!
They were different colours, shapes and materials, which didn’t matter at all because I was going to give them all the same finish.
In fact, having different shapes and heights was exactly what I wanted.
It meant that once they were grouped together along the table, they would look as though they’d been collected over time rather than bought as a matching set.
Thrift stores, op shops, Facebook Marketplace and inexpensive homeware stores are all great places to look for candlesticks for a project like this.
Don’t worry too much about the colour. Look at the shape instead.
Creating the Faux Brass Finish
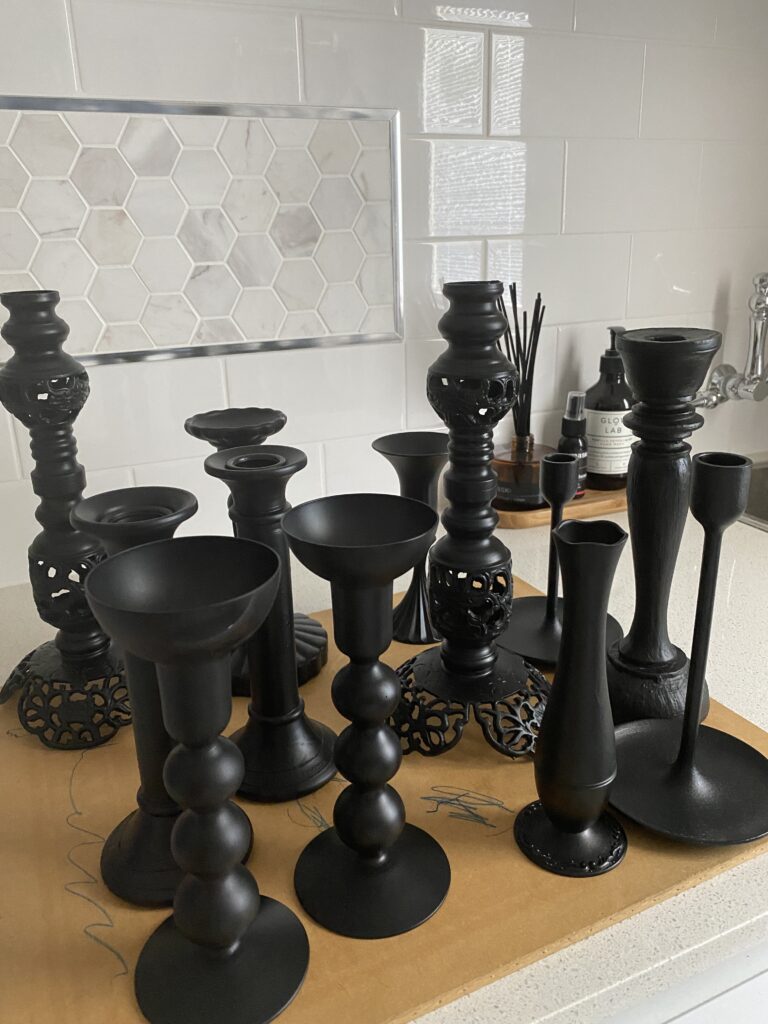
Once the candlesticks were clean and ready to paint, I spray-painted them all black.
The black gave me a consistent base across all the different materials and colours and also helped create the aged look I wanted underneath the brass finish.
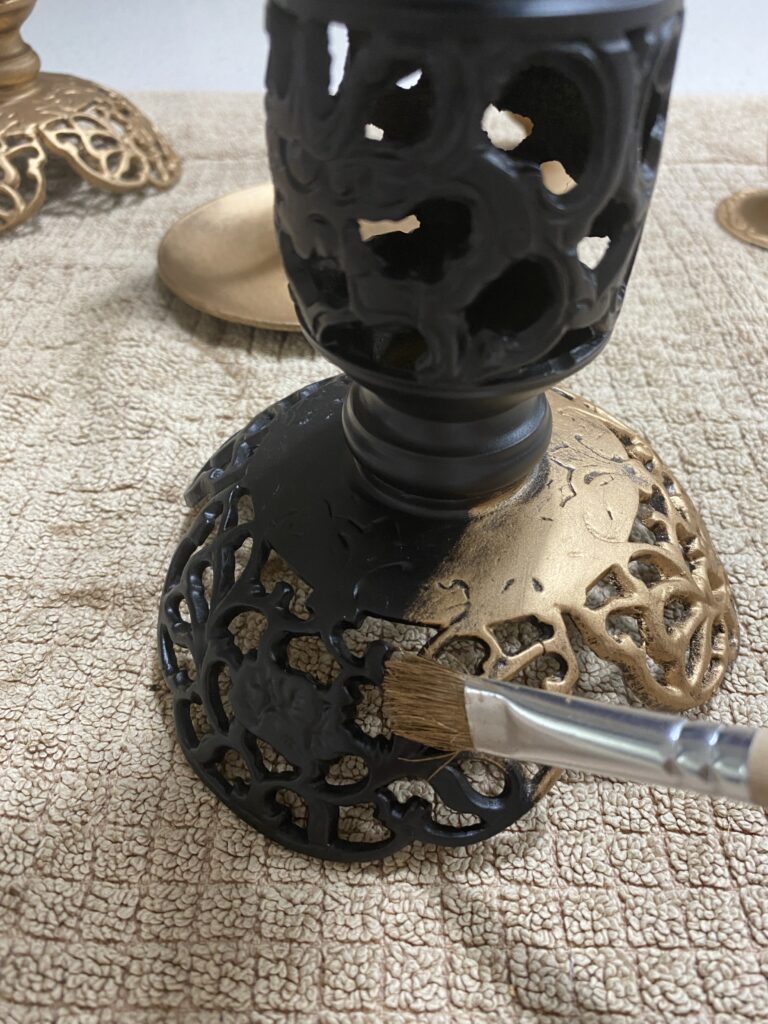
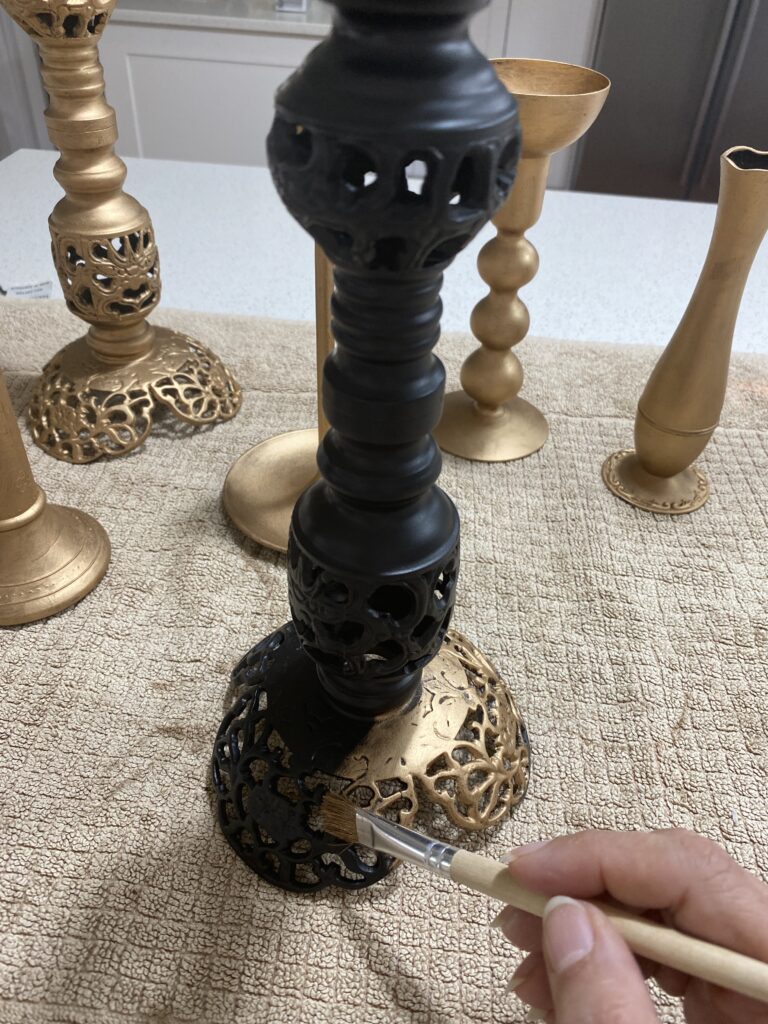
Once the spray paint had completely dried, I used Rub ‘n Buff over the black.
This was the magic step.
Rather than creating the very bright, perfect finish you might get from simply using gold spray paint, Rub ‘n Buff allowed me to build up the metallic finish while leaving some of the darker colour underneath showing through.
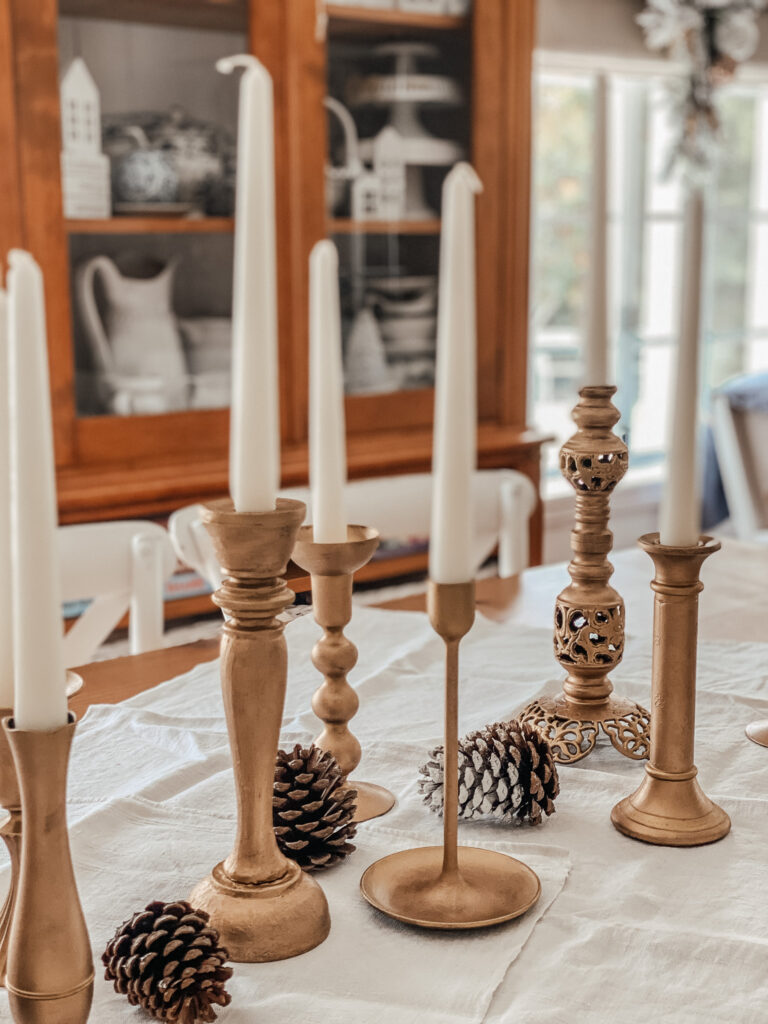
The result was a much more aged, brass-like appearance.
I didn’t try to make every candlestick absolutely identical either. Slight variations in the finish only added to that collected vintage look.
The Finished Faux Brass Candlesticks
I was absolutely thrilled with how these turned out.
Once grouped together amongst the greenery, pine cones and fairy lights on the Christmas table, you really wouldn’t know they had started life as a random collection of mismatched candlesticks.
I used taper candles in ivory and forest green, which tied them into the rest of the table beautifully.
They gave me exactly the warm vintage brass look I had imagined — without having to hunt down or pay for a large collection of genuine brass candlesticks.
And the best part is that they’re not limited to Christmas.
I’ll be able to use them for dinner parties, celebrations and other tablescapes throughout the year.
Beautiful Christmas Decorating Doesn’t Have to Be Expensive
These two Christmas Table Crafts projects are a good reminder of why I enjoy adding DIY elements to our celebrations.
Neither project was difficult.
Neither required particularly advanced crafting skills.
And neither cost a fortune.
But together they helped give my Christmas table a look that felt personal and completely suited to our home.
The stencilled tablecloth brought in the natural colours and subtle Christmas pattern I wanted, while the faux brass candlesticks added warmth, height and a little vintage character to the centre of the table.
Sometimes creating the look you want isn’t about finding the perfect thing in a shop.
It’s about looking at something simple — or even something mismatched and forgotten — and thinking, I could make that work.
And those often end up being some of my favourite pieces.
If you’re looking for another Christmas craft my mini soy candles are a great gift idea.
Happy crafting — and happy Christmas hosting!