Dining Room Makeover Ideas on a Budget
Giving your dining room a fresh new look doesn’t have to involve a full renovation or a huge budget. Sometimes a few thoughtful DIY projects and furniture updates can completely transform a space and make it feel warm, welcoming and full of character again.
Our dining room has featured in so many family dinners, celebrations and tablescapes over the years, but recently I realised I was starting to feel uninspired by the space. I still loved the room itself and all the memories attached to it — I just wanted to refresh it a little and give it some extra personality.
The goal for this dining room makeover was to work with what we already had as much as possible while adding texture, warmth and a more timeless feel.
Easy Dining Room Makeover Ideas
There were several simple updates we planned to make in the space:
- Add a VJ board feature wall
- Paint the glass display cabinet navy
- Update the dining table with paint and sanding
- Refresh the vintage lattice-front cabinet
- Style the room using decor we already owned
By focusing on smaller DIY changes rather than replacing everything, we were able to completely transform the room without spending a fortune.
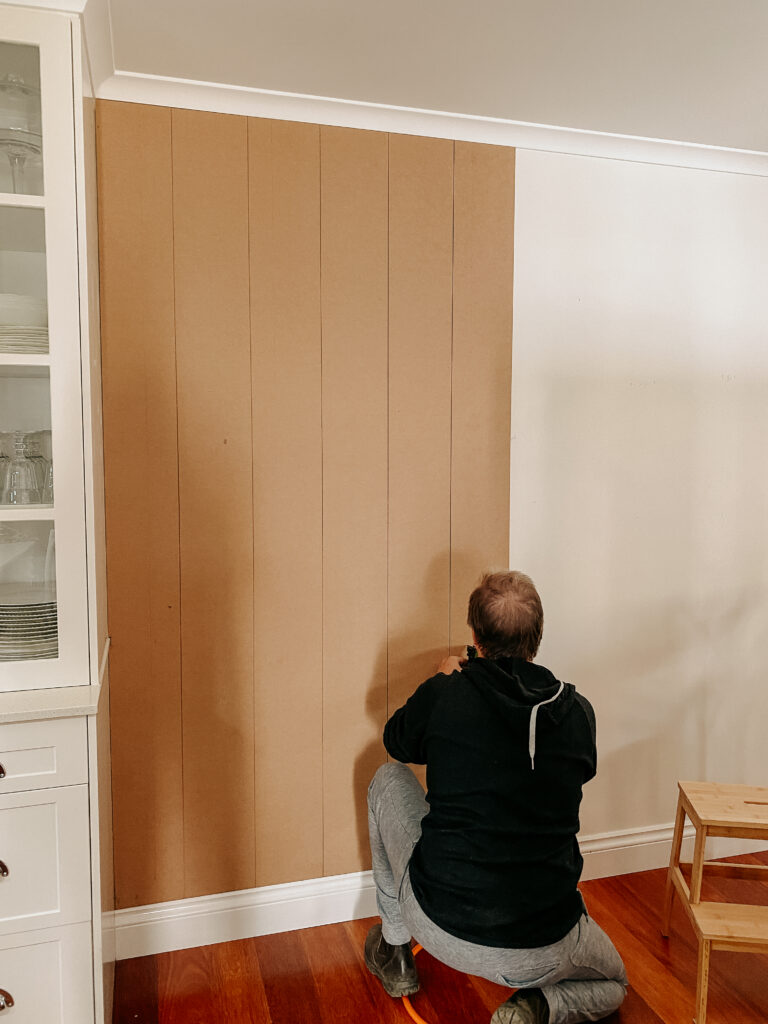
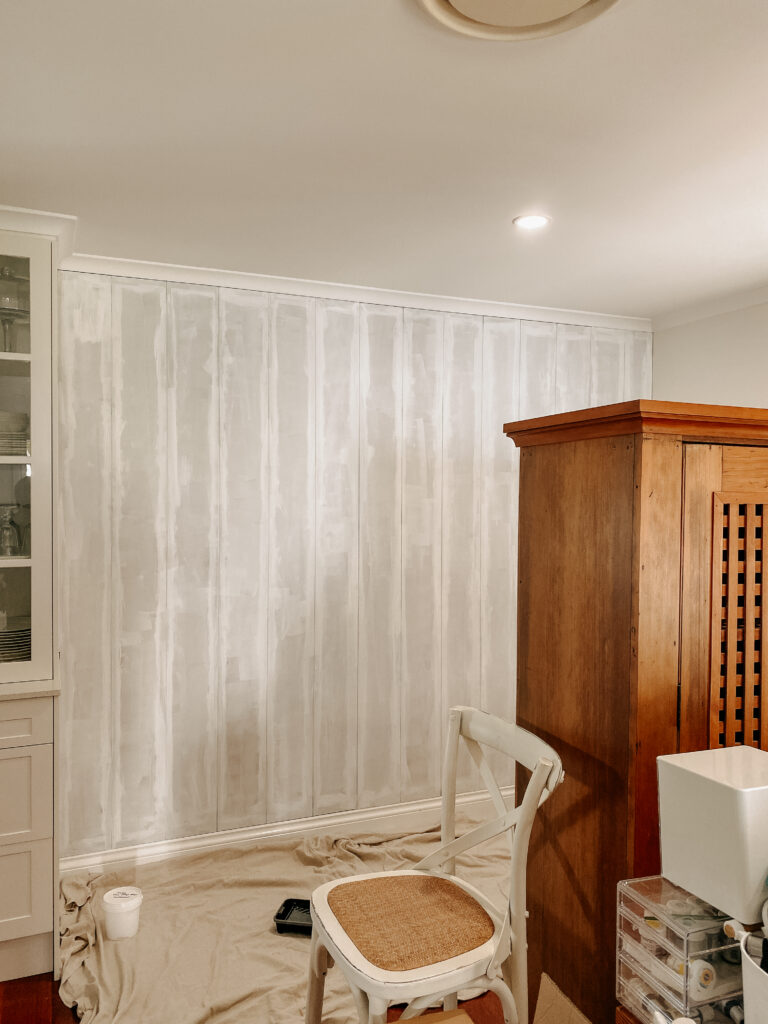
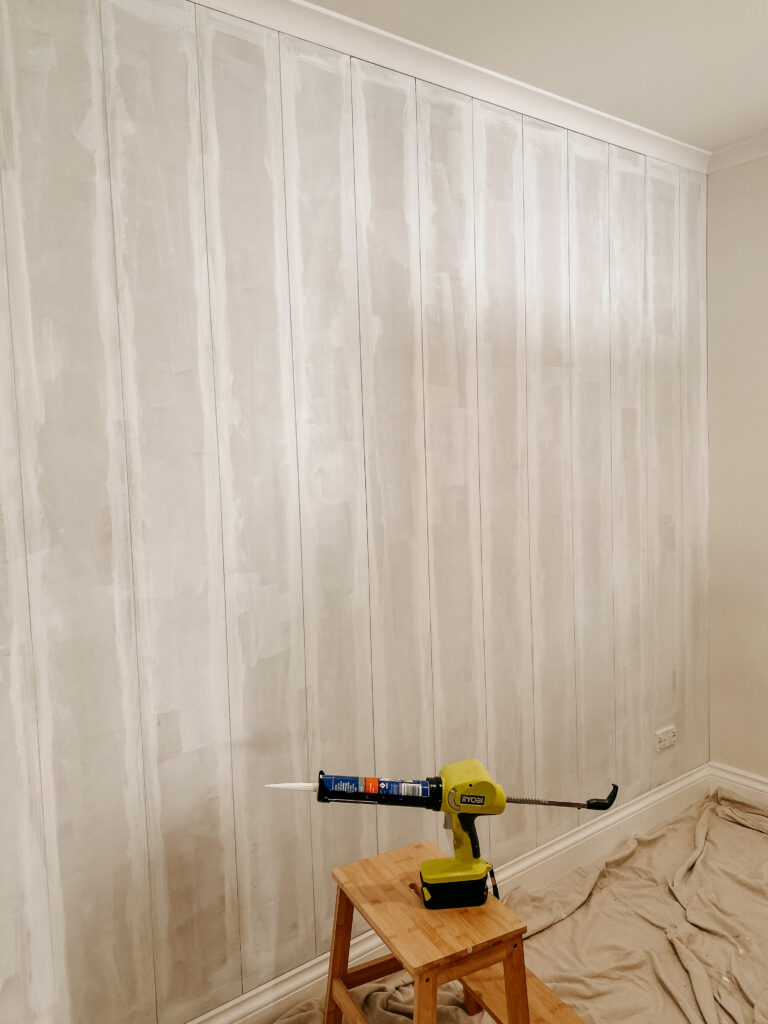
Adding a VJ Board Feature Wall
One of the biggest changes in the dining room makeover was adding a vertical shiplap-style feature wall behind the cabinets.
Wall panelling is one of my favourite ways to instantly add character to a room. In this case, the vertical lines also helped create the illusion of height, making the room feel larger and more open.
Because timber prices had become quite expensive, Tony decided to make the shiplap himself just like he had done for our living room cabinets and office wall.
This helped keep the renovation budget-friendly while still creating a custom look.
We already had a similar shiplap detail in our window seat area, so using the same width helped keep the design cohesive throughout the home.
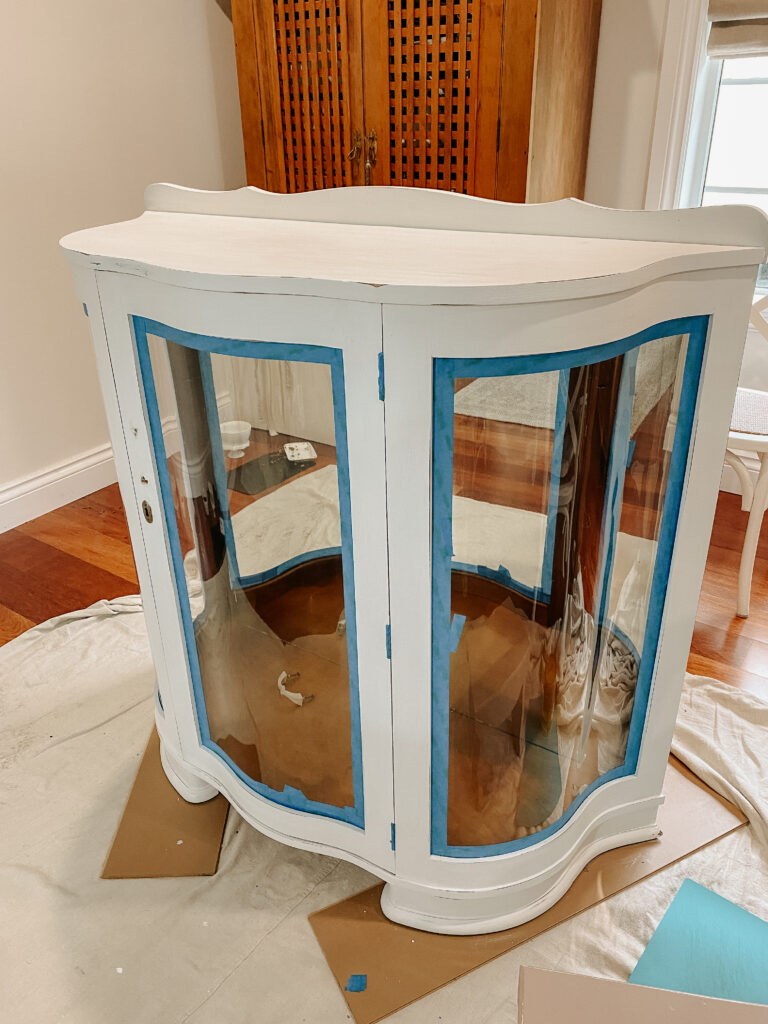
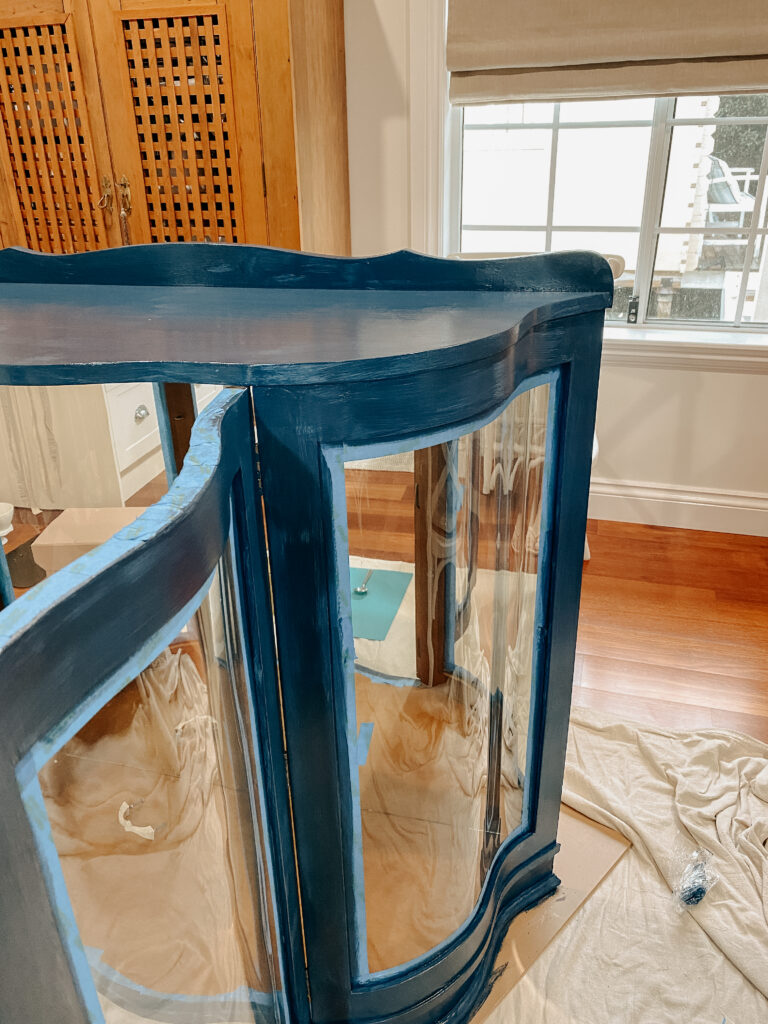
Painting the Glass Display Cabinet
The first furniture project in the room was repainting our large glass cabinet.
Before starting, I removed all my crystal vases, teacups and entertaining pieces from inside. There were definitely more than I realised, although I do genuinely use them regularly for tablescapes and entertaining.
Choosing the right navy paint colour took longer than expected because I wanted something deep and moody rather than bright or overly blue.
We eventually chose Haymes Paint in the colour Copen Blue, which turned out beautifully.
After cleaning the cabinet thoroughly, I:
- Lightly sanded the surface
- Applied four coats of paint
- Allowed plenty of drying time between coats
When transitioning furniture from a lighter colour to a darker shade, it’s definitely worth expecting a few extra coats for even coverage.
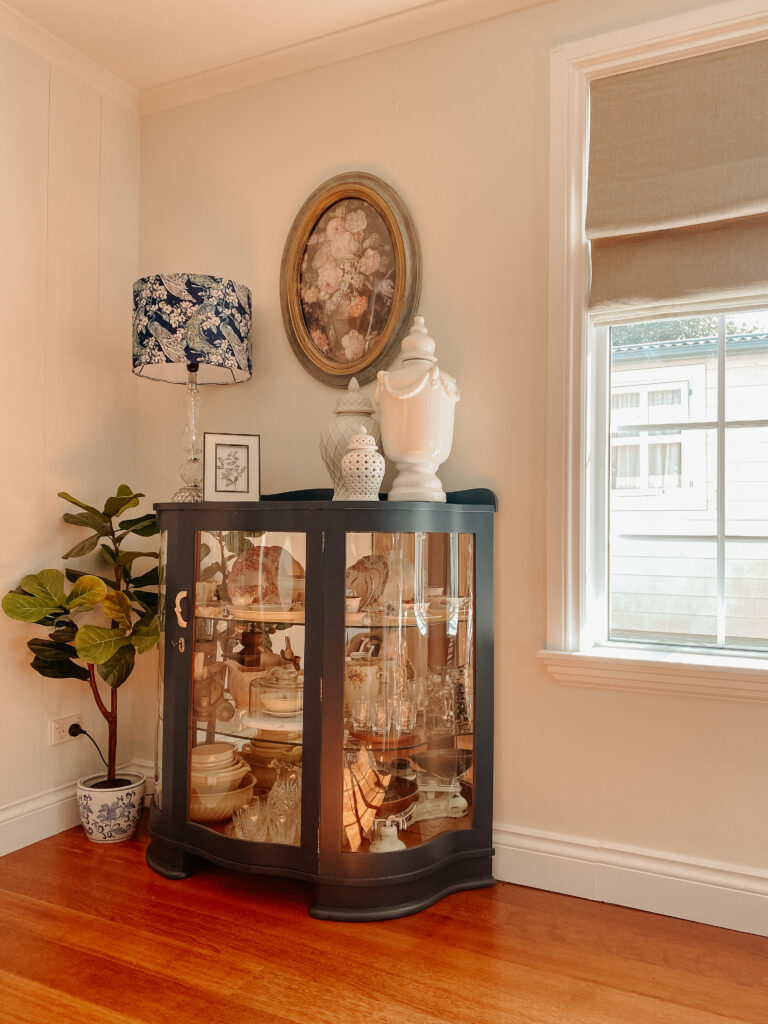
The darker cabinet instantly grounded the room and made the styling pieces inside stand out far more beautifully.
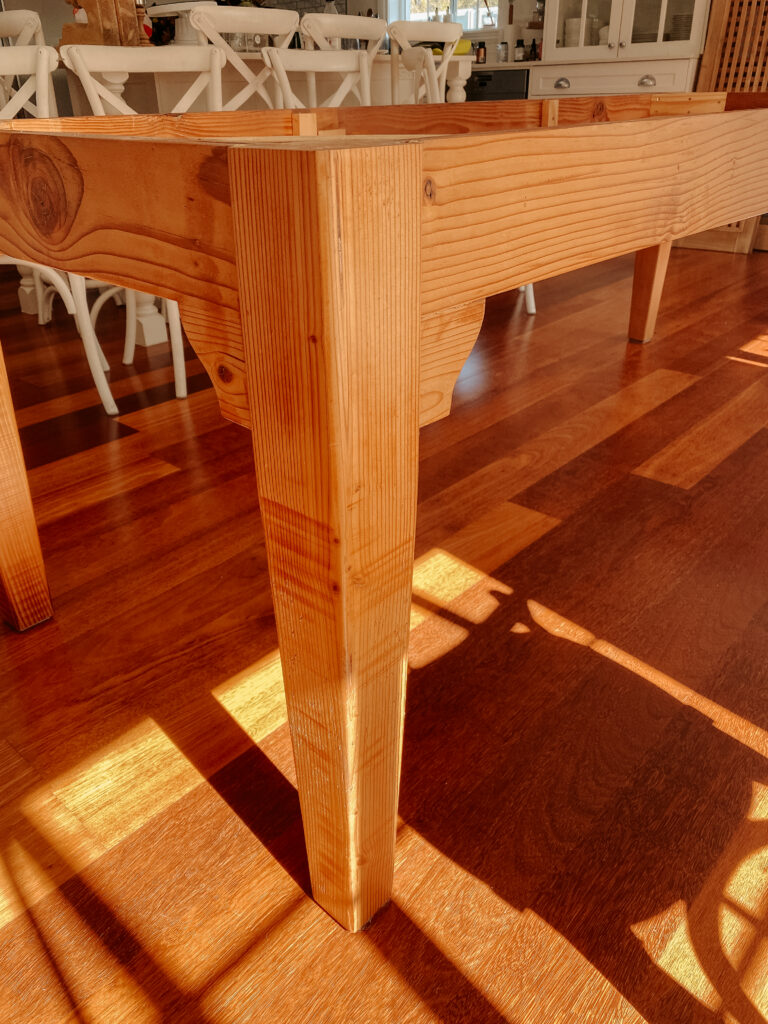
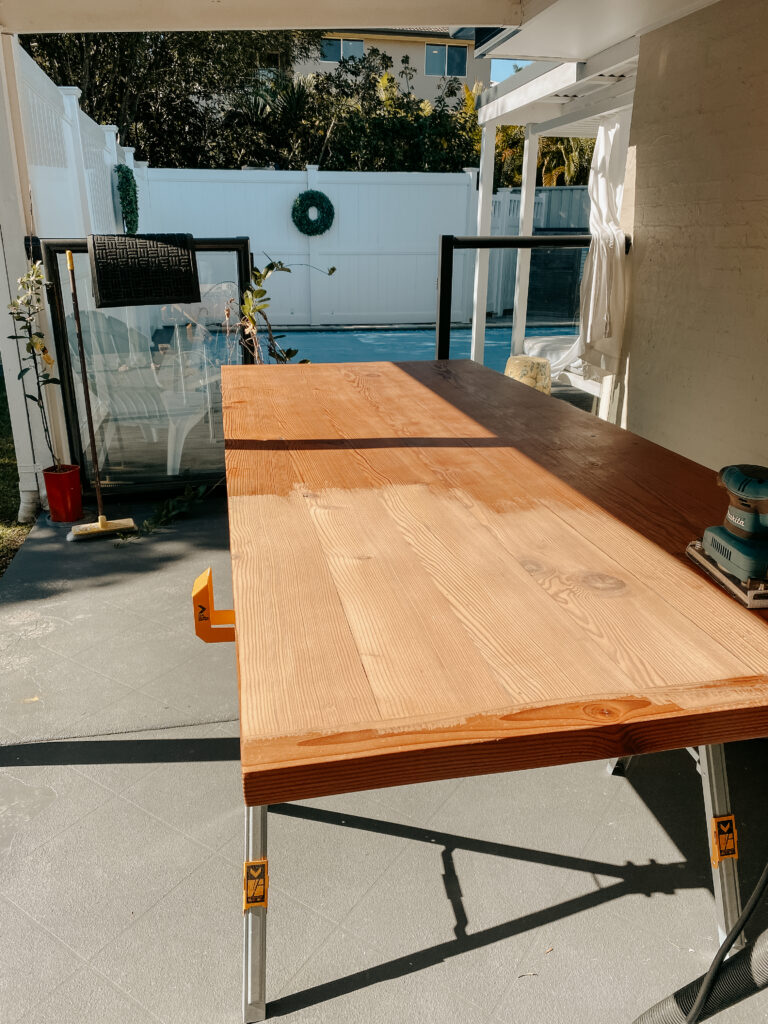

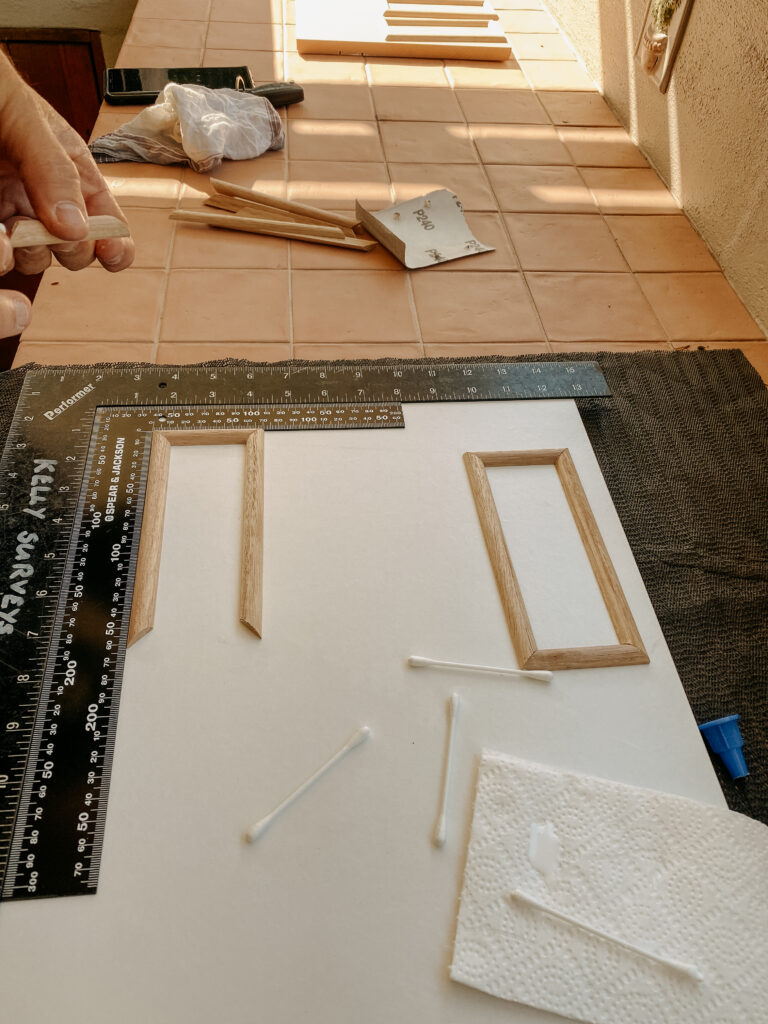
Updating the Dining Table
Our dining table holds so many memories of family dinners, celebrations and entertaining, so we really wanted to keep it rather than replace it.
Tony originally built the table himself, and while it no longer completely suited our style, we knew a few simple updates could completely change the look.
To refresh the table we:
- Painted the legs and apron white
- Sanded back the timber top
- Added trim detailing to the legs for extra character
We used Jolie Paint in Pure White for the painted sections.
These simple changes helped the table feel lighter, softer and much more in keeping with the relaxed vintage style we love throughout our home.
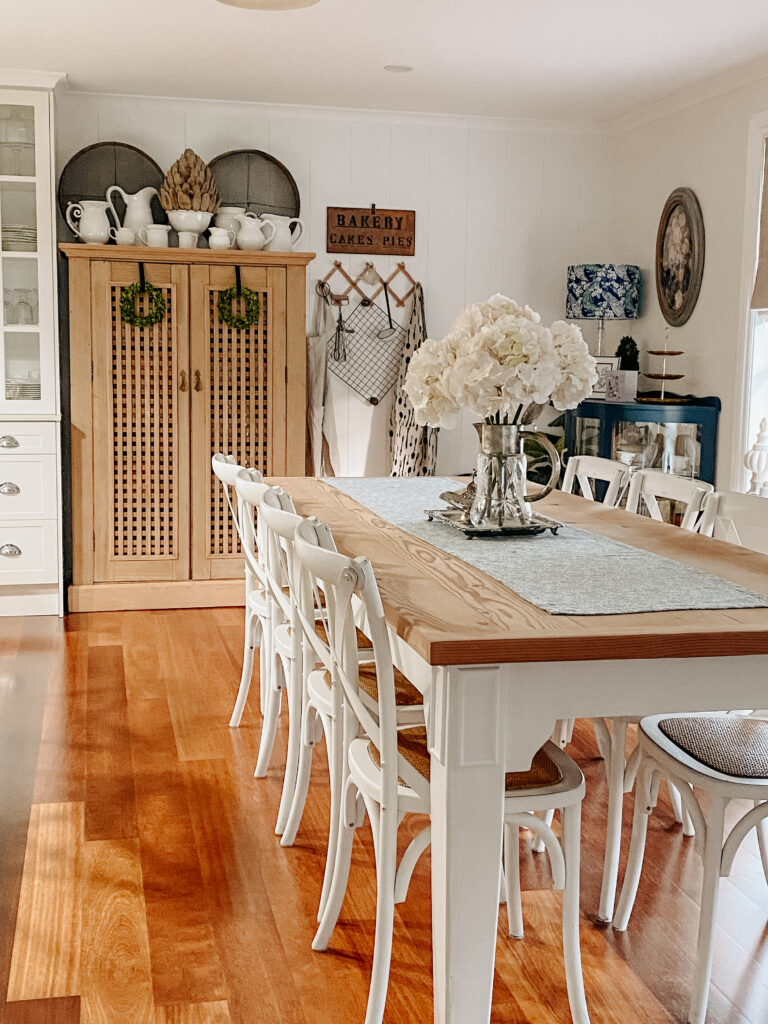
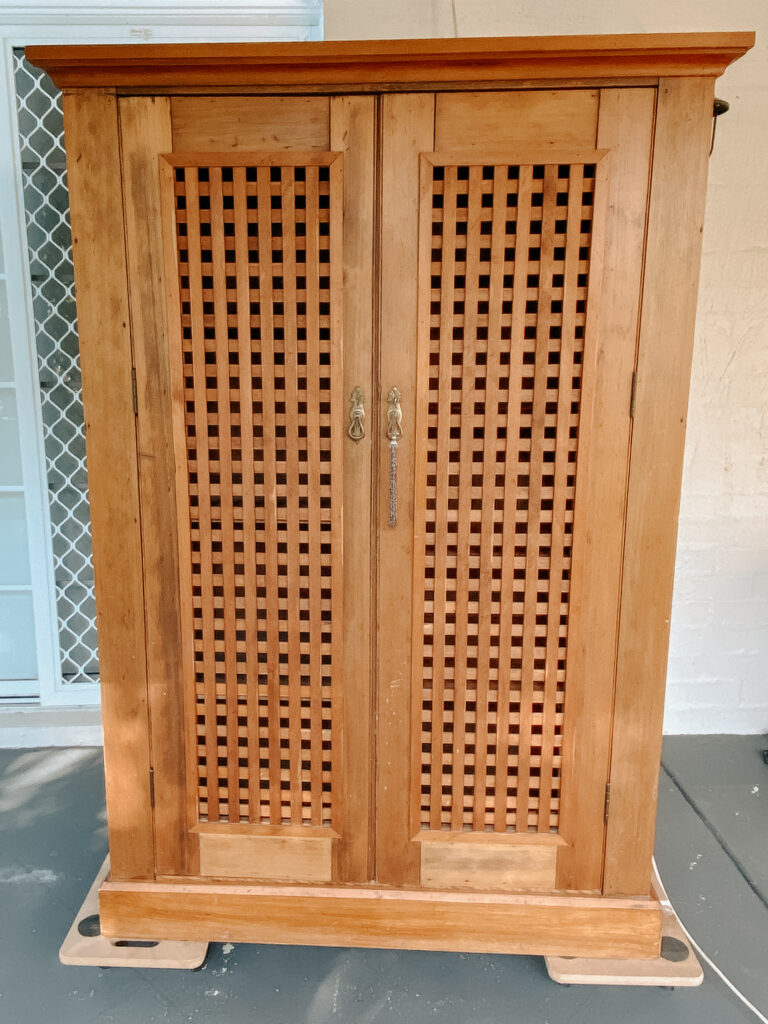
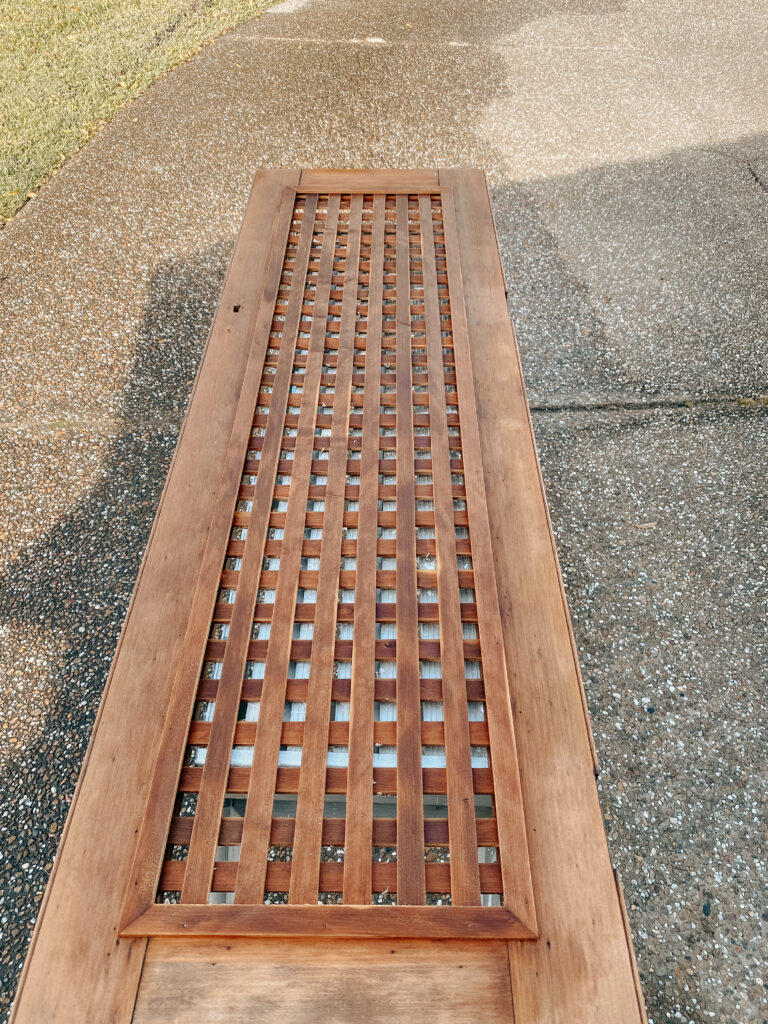
Giving the Vintage Lattice Cabinet a Makeover
We’ve owned our vintage lattice-front cabinet for many years and I’ve always loved the shape and detail of it, but it definitely needed a little refresh.
Initially I started sanding the cabinet by hand, but quickly realised the lattice sections would be far too difficult to fully strip that way.
Instead, I carefully tried the oven cleaner stripping method.
I’ll admit I was nervous because I hadn’t had great success with it previously, but thankfully it worked really well on this piece.
The timber initially became slightly fuzzy after the process, but once fully dried it settled beautifully and was ready for refinishing.

Shopping Our Home Instead of Buying More
One of my favourite parts of this dining room makeover was styling the room almost entirely with decor we already owned.
At the time, Tony had tested positive for Covid, so we were home in quarantine and unable to shop anyway. In a strange way, it ended up being the perfect opportunity to “shop our home” and rethink how we used existing pieces.
Repurposing older decor items felt:
- More creative
- More personal
- More sustainable
- Far less wasteful
And honestly, I think the room feels far more authentic because of it.
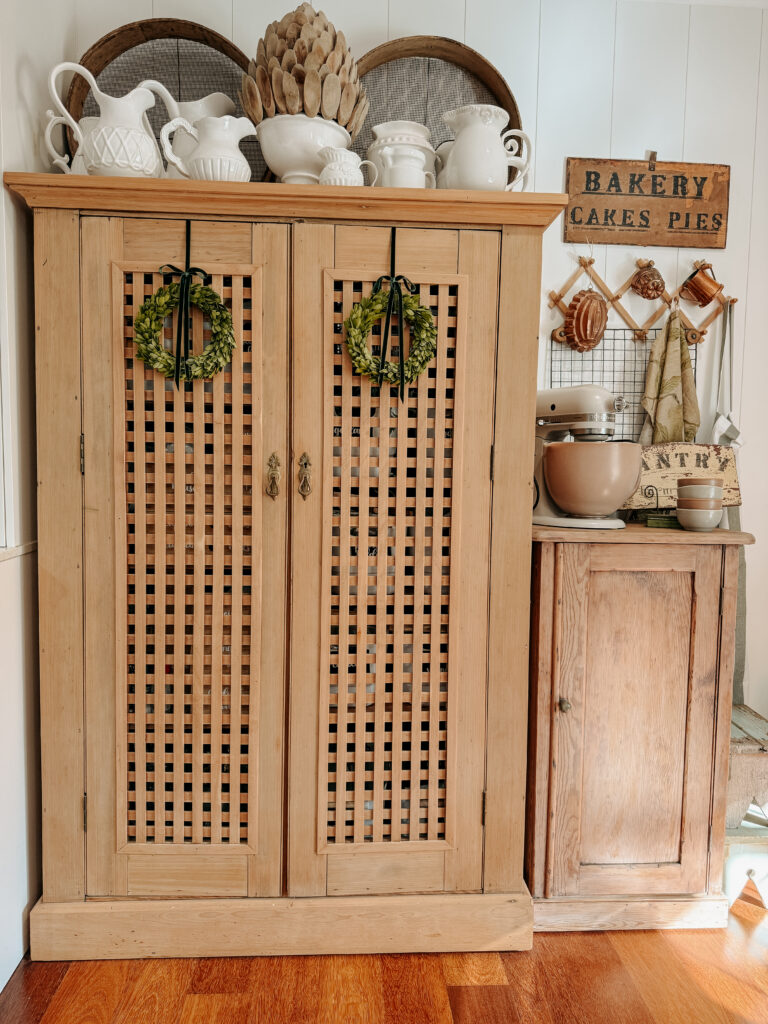

The Finished Dining Room Makeover
Tony and I were both so happy with how the room came together.
The best part is that the makeover was achieved with very little spending:
- We already owned most of the furniture
- We reused existing decor
- Tony made the wall panelling himself
- The only major purchases were paint and timber
This makeover reminded me that creating a beautiful home doesn’t always require buying everything new. Sometimes small DIY projects and thoughtful updates are enough to completely refresh a space.
Final Thoughts on Updating a Dining Room on a Budget
If your dining room feels a little tired or outdated, don’t underestimate the impact of:
- Paint
- Wall panelling
- Furniture makeovers
- Styling with pieces you already own
Small changes really can completely transform a room while still keeping it functional, welcoming and personal.
And for a home centred around gathering, entertaining and family dinners, I think creating a dining space you truly love is always worth the effort.