How to Add Colonial Bars to Windows
The front windows of our home have always had colonial bars—but the back of the house didn’t.
And for years, it’s something I wanted to change especially in our kitchen and family area.
After nearly 22 years, those windows were starting to look tired and a little plain. So we finally decided to do something about it—and I’m so glad we did.
This simple, affordable DIY has completely transformed the space.
If you’ve ever wondered how to add colonial bars to windows without spending a fortune, here’s exactly how we did it.
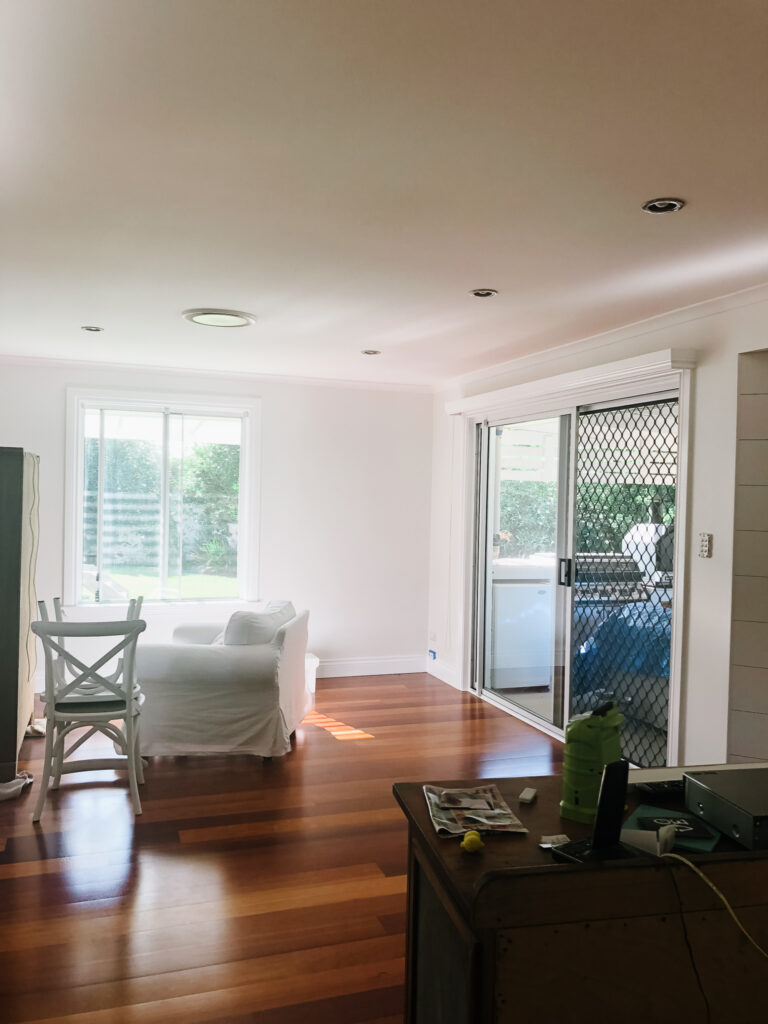
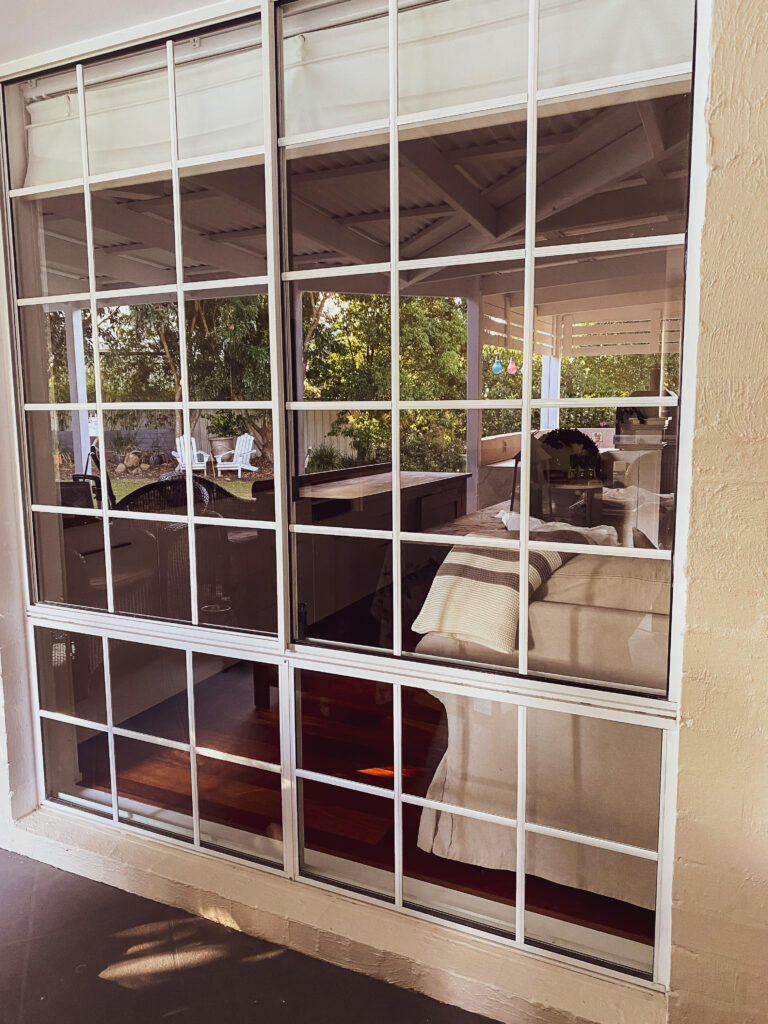
The Before
Our windows were very basic—functional, but lacking character.
Over time, they had also started to show their age, which made the whole space feel a little flat.
Adding colonial bars was always part of the vision, we just needed the right time (and a little motivation!) to make it happen.
What We Used for This DIY Window Upgrade
We wanted to match the existing bars at the front of the house, so we sourced the same product.
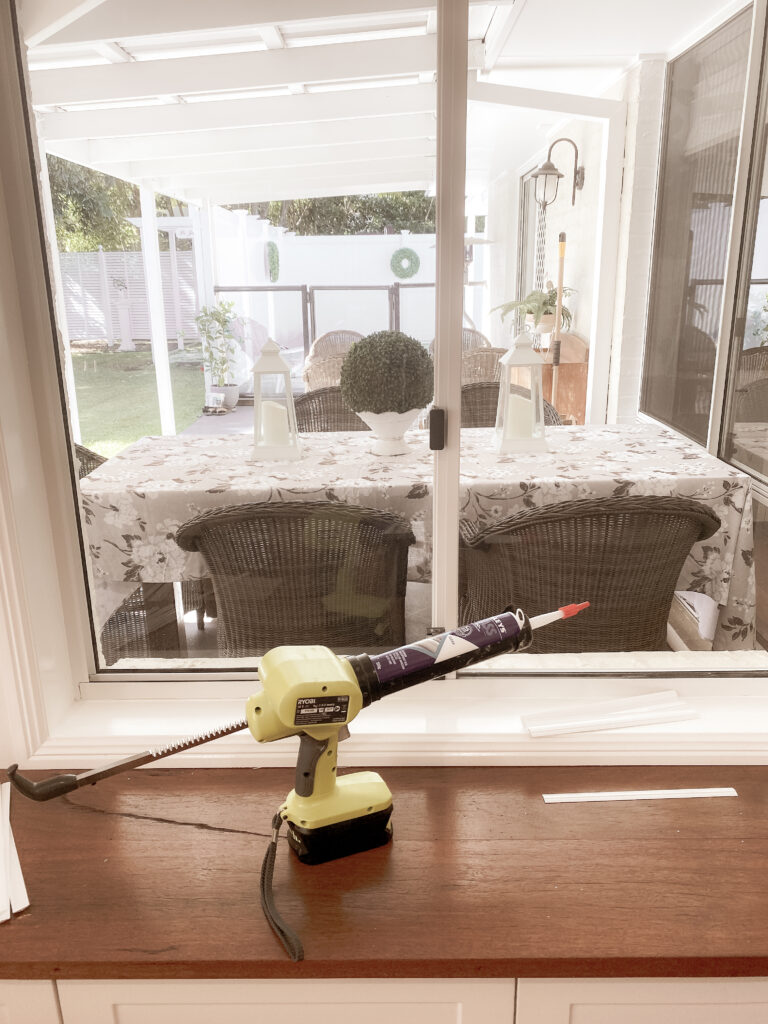
Aluminium colonial bars (special order from Stegbar – not listed online)
Clear glass silicone sealant (for securing the bars)
Folding scraper (for removing excess silicone)
Mineral turpentine (for cleaning)
Masking tape (to hold pieces in place during installation)
Tungsten carbide 60-tooth mitre saw blade (for precise cuts)
There are other options available—such as flat PVC bars—but we chose aluminium to match the existing style of our home.
How We Installed the Colonial Window Bars
1. Measure Carefully (This Matters Most)
Before cutting anything, we measured each section precisely.
Taking your time here is essential—accurate measurements make all the difference to the final result.
2. Cut Your Pieces Efficiently
We used a mitre saw with a tungsten carbide blade for clean, accurate cuts.
Tony set up a guide on the saw so that all the horizontal pieces (which were the same size across three windows) could be cut quickly and consistently.
Such a simple step—but a huge time saver.
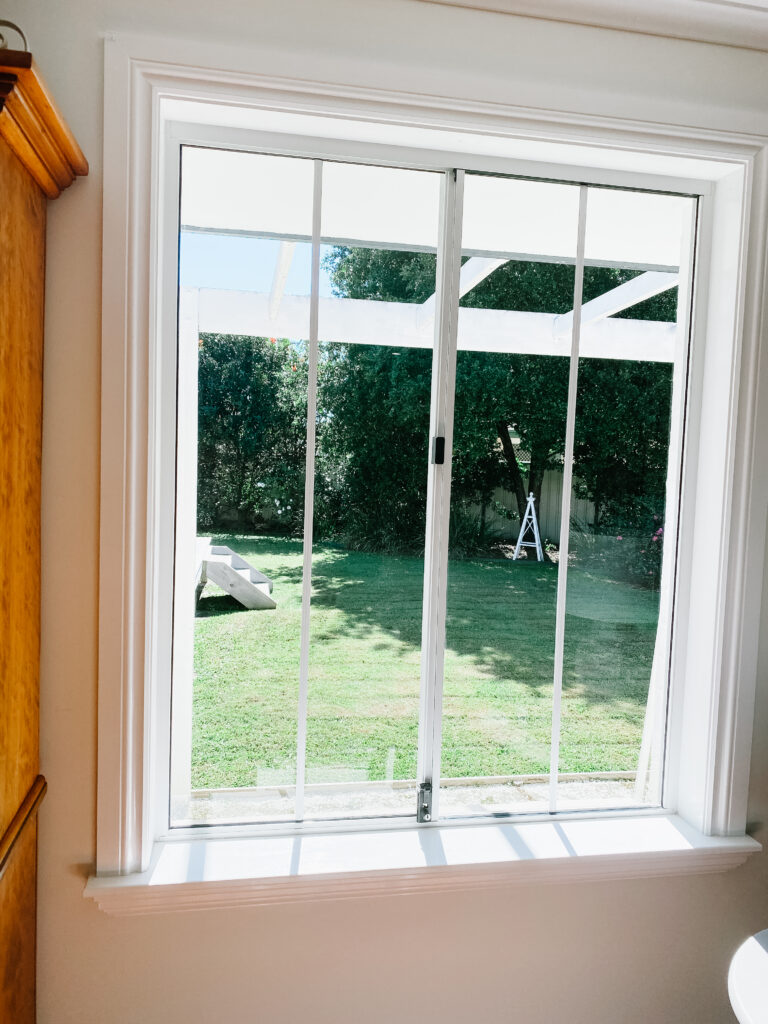

3. Install the Vertical Bars First
We started with the vertical pieces, securing them in place with silicone.
4. Add the Horizontal Pieces
Next came the horizontal bars.
Some pieces may slip slightly while the silicone sets, so we used tape to hold everything in place until secure.
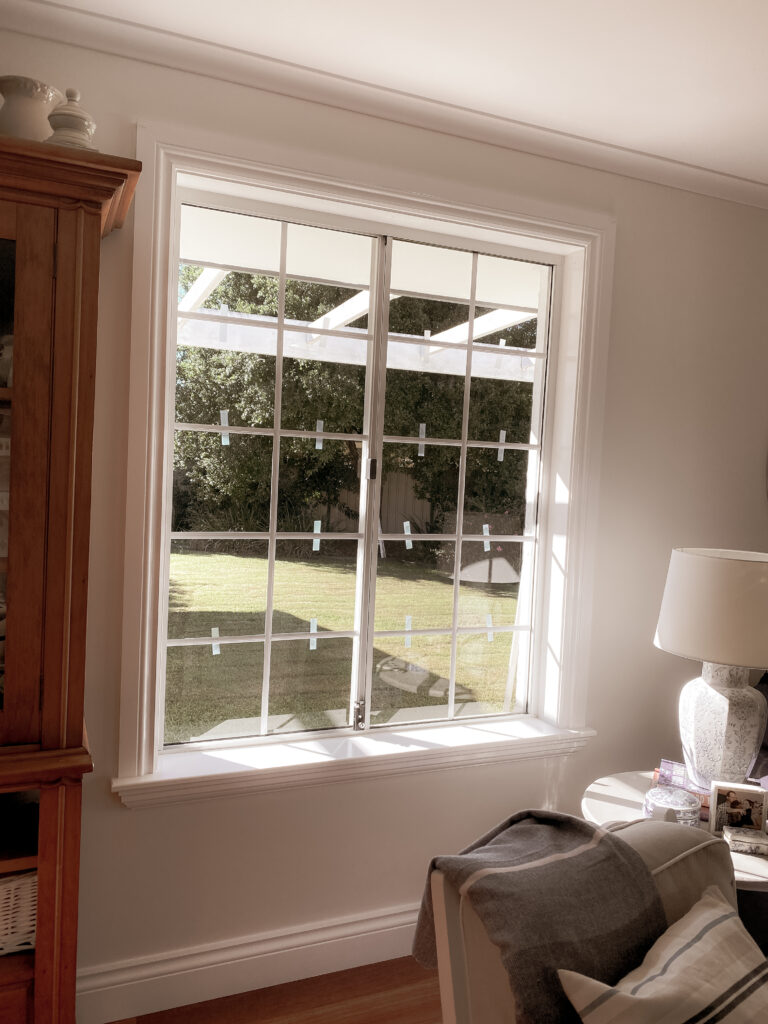
5. Check Everything with a Level
This step is non-negotiable.
The last thing you want is slightly crooked bars… because once they’re on, they’re on for good.
6. Clean As You Go
If silicone seeps out from underneath, remove it straight away using a scraper and mineral turpentine for a clean finish.
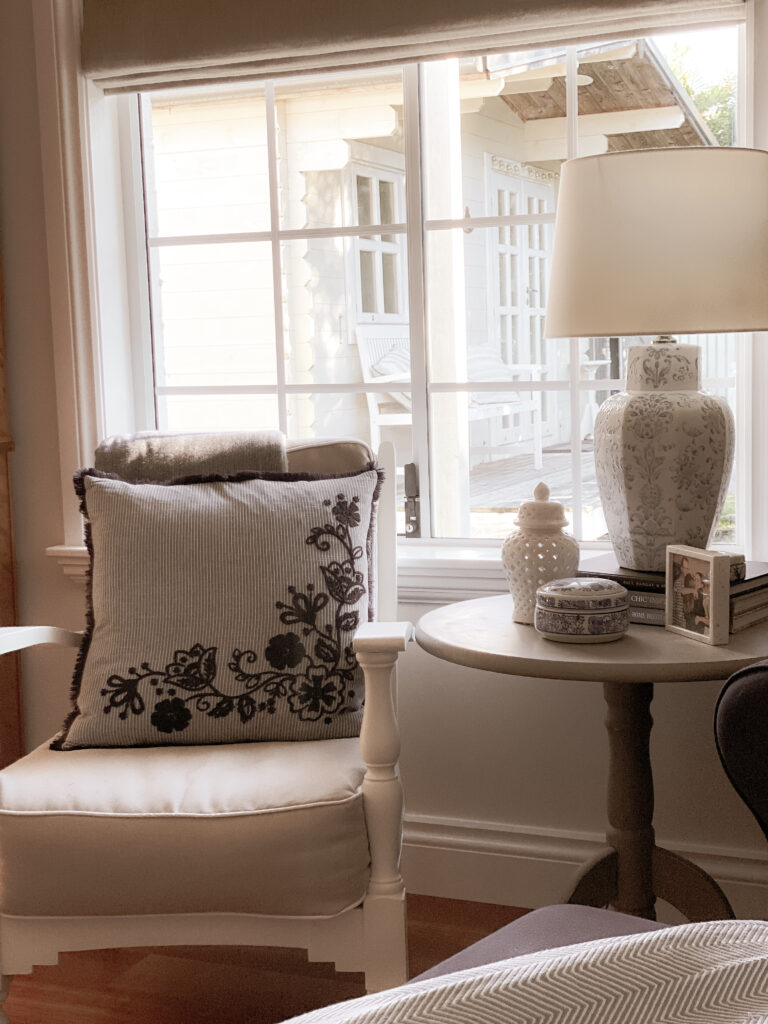
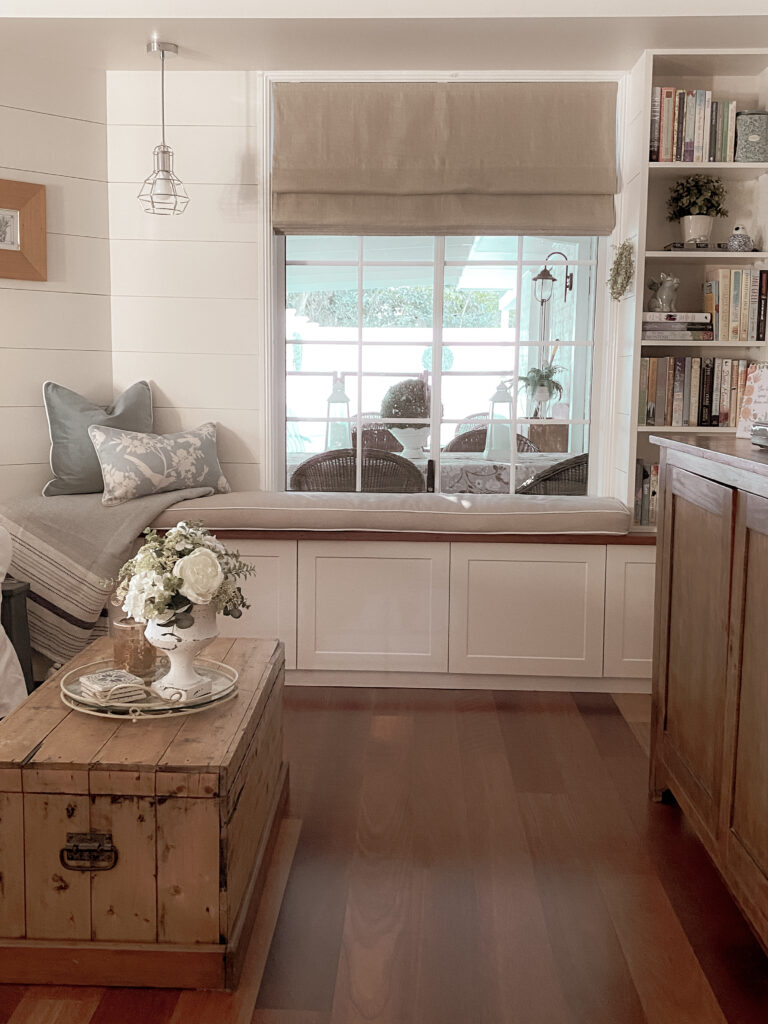
Finishing the Space: Blinds, Curtains & Soft Layers
Once the bars were installed, it was time to complete the look.
We ordered new blinds and curtains to complement the windows, and it made such a difference to the overall feel of the room.
We chose:
Linen-look blockout blinds in a soft neutral (“Hopsack”)
Sheer curtains in “Tahiti Sheer Snow”
The space doesn’t receive direct sunlight thanks to the pergola, so the sheer curtains were perfect for keeping things light and airy.
We also opted for automatic blinds with a remote, which adds a lovely layer of everyday ease.
✨ I’ve added the blinds, curtains, and other similar options to my Shop My Favourite Things if you’d like to explore them.
The Final Touch
To soften the space, I added a few new cushions—simple, neutral, and easy to change with the seasons.
I always prefer to keep the larger elements of a room neutral and bring in colour through softer pieces like cushions and throws. It allows you to refresh a space without starting over.
Was It Worth It?
Absolutely.
For a relatively simple and affordable DIY project, the transformation has been incredible.
The windows now feel like they truly belong to the home—and the entire space feels more finished, more considered, and much more inviting.
It’s a reminder that sometimes, the smallest changes make the biggest difference.
✨ If you’d like to see how more of this space came together, you can also read the first part of our kitchen renovation.
Hi where I can get the colonial bars.
I found the ones we used at a window supply place, they are aluminium.
Please send me the link
Thanks
Absolutely beautiful transformation! Well done. Can I also please have the link for the aluminium window supply place? Thanks, Kim
Hi Kim,
The Stegbar website does not have the product for me to link to. This is what we asked for when we called them “18 Raw Mat Generic Aluminium Extrusions”. If you give them a call hopefully they can help you. If not here is a link to another similar product https://oknalux.com.au/products/windows/colonial-bars/
Regards
Anita
Hi, I just read your article on “How to Add Colonial Bars” and was wondering if you installed bars on both the interior and exterior of the glass or just on the exterior.
Hi Grahame,
Yes we did install on both sides of the glass.