Small Family Bathroom Remodel Ideas for a More Functional Space
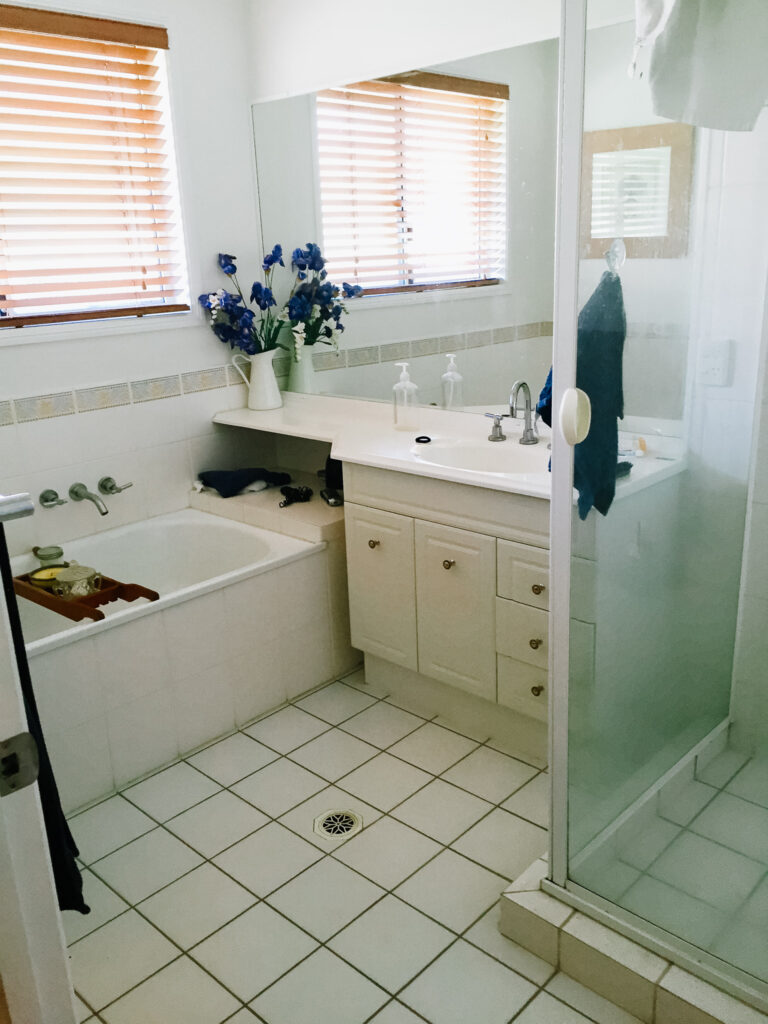
Designing a small family bathroom remodel can be challenging, especially in older builder-grade homes where layouts often feel cramped and impractical. Our bathroom was a very typical 1990s Australian design, and while the room itself wasn’t tiny, the layout made it feel much smaller and less functional than it could have been.
This renovation was the final major interior renovation project in our home, and it took months of planning to get the layout right. We wanted the bathroom to feel brighter, more spacious and much more practical for family life while still keeping a timeless and elegant feel.
The transformation completely changed how the space functions and honestly feels like an entirely different bathroom.

Planning the Small Family Bathroom Remodel
One of the biggest decisions we had to make during the planning stage was whether or not to include a bath.
Initially, I wanted to remove the bath completely because none of us really used it. However, because this house works beautifully as a family home, we ultimately decided keeping a bath was important for resale value.
Even though it would have been cheaper and easier to leave the plumbing where it originally was, the existing layout simply didn’t work for the design we envisioned.
The new layout included:
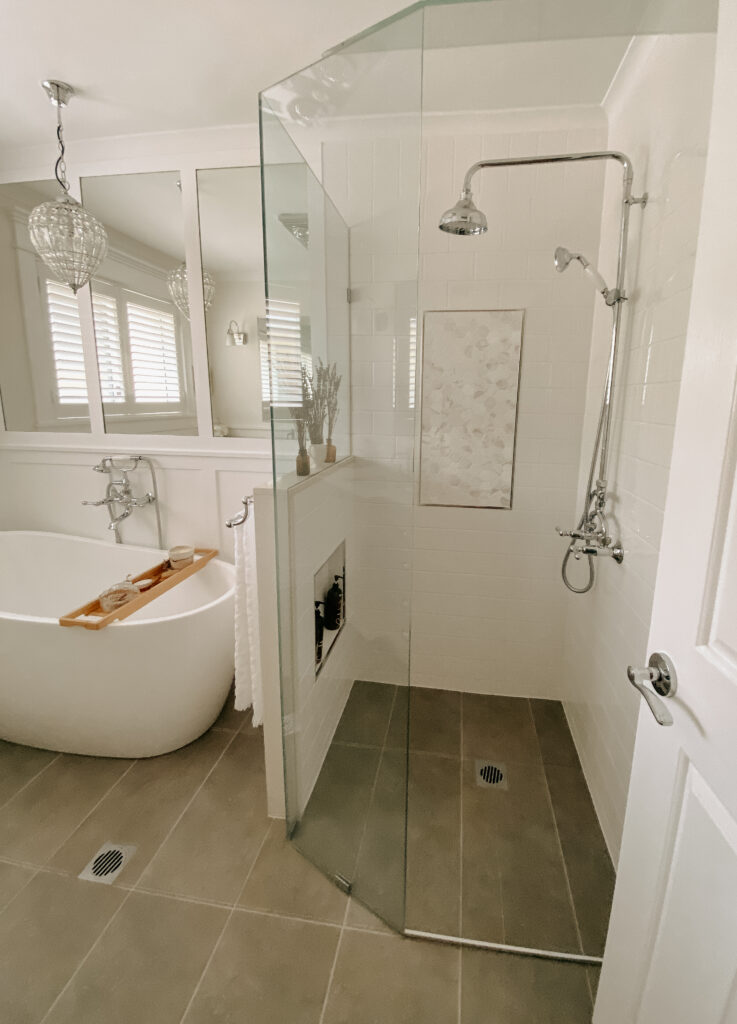
- Keeping the shower in the same location
- Moving the bath to the back wall beside the shower
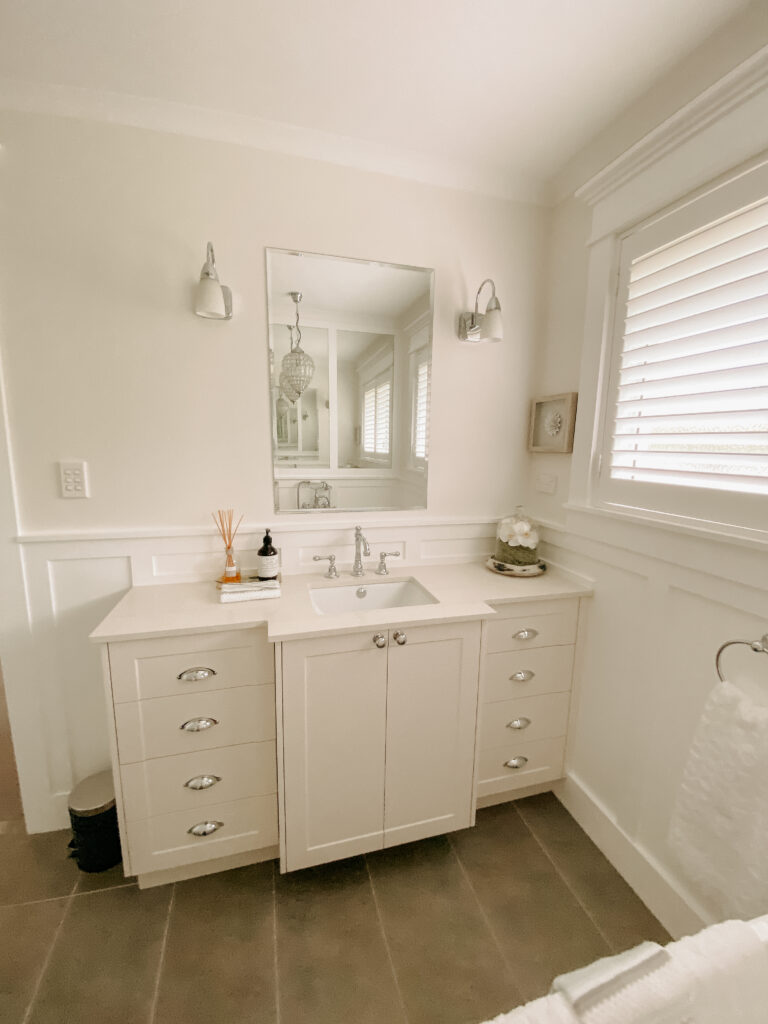
- Installing a custom vanity opposite the bath
- Increasing overall storage
- Creating a more open and functional floorplan
Careful planning made such a difference in this renovation, especially in a smaller bathroom where every centimetre matters.
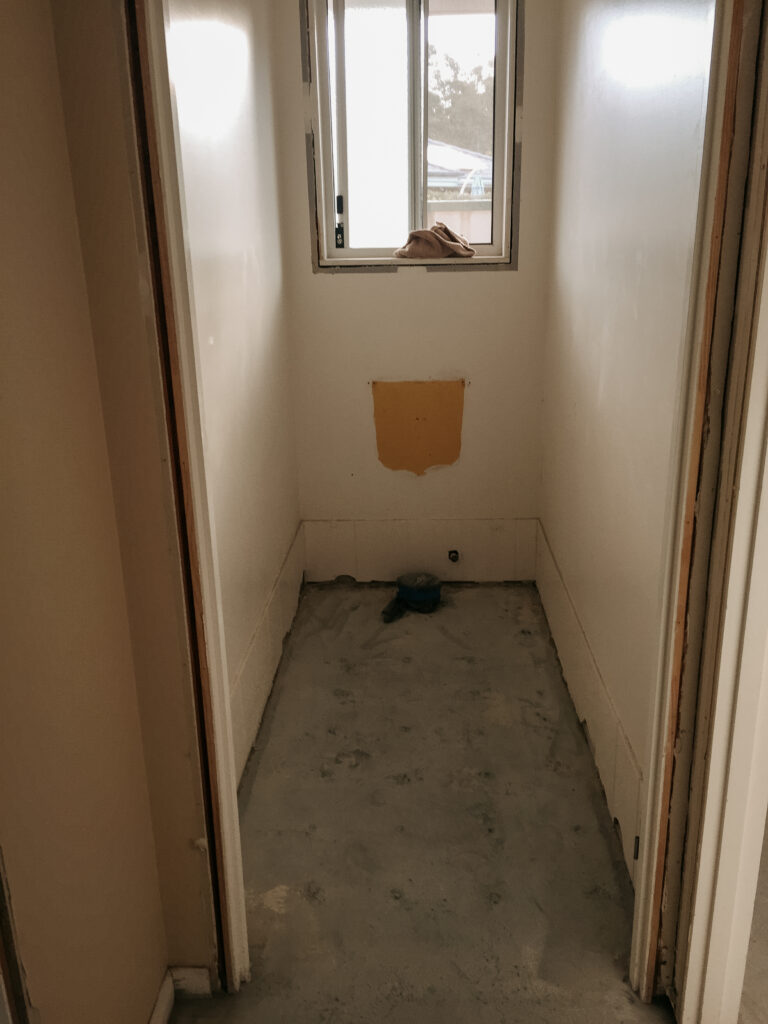
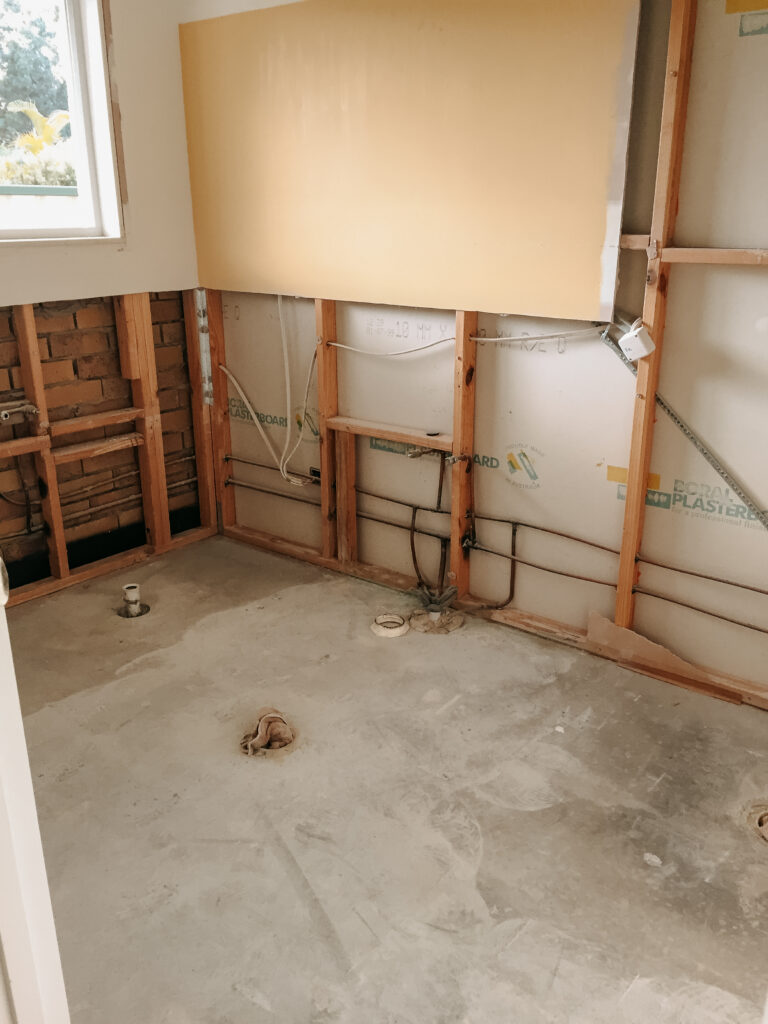
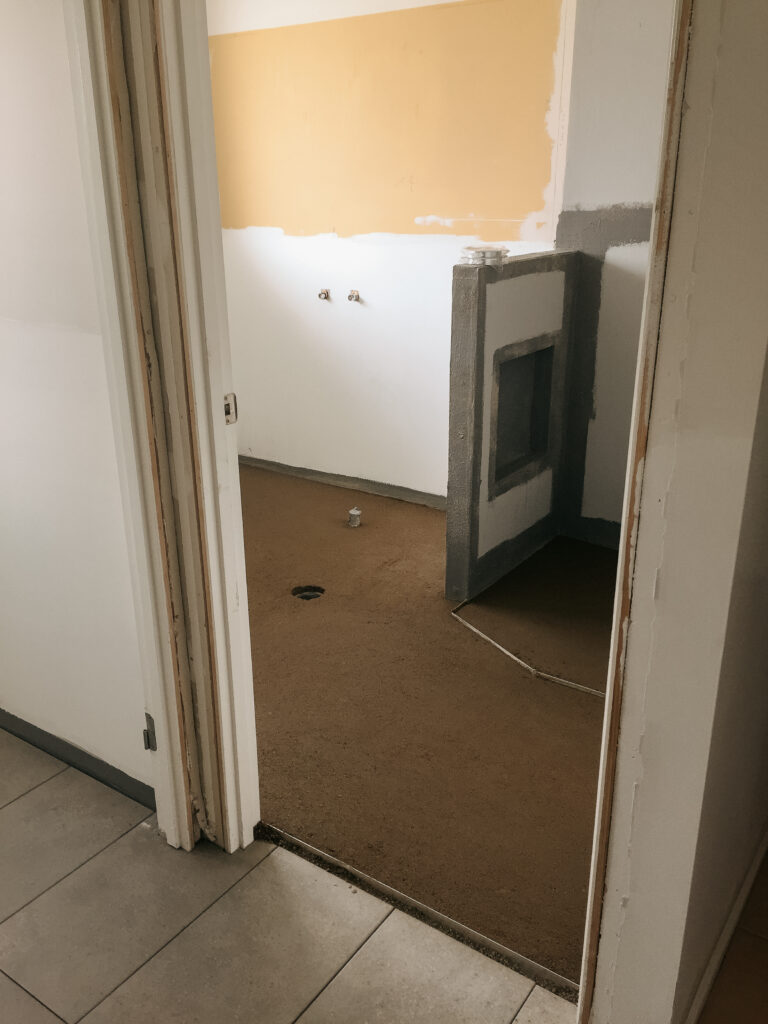
Demolition of the Old Bathroom
Before demolition started, we had both a plumber and electrician disconnect the water and power to make everything safe.
After renovating our master bathroom previously, we had learned several lessons that helped make this renovation much faster.
One major thing we did differently was removing the plasterboard immediately rather than trying to remove the old wall tiles individually. It saved an enormous amount of time and effort.
We also removed:
- Window trims
- Door surrounds
- Existing fittings and fixtures
because we already knew we wanted to replace everything to match the nearby laundry renovation.
Rebuilding the Bathroom Layout
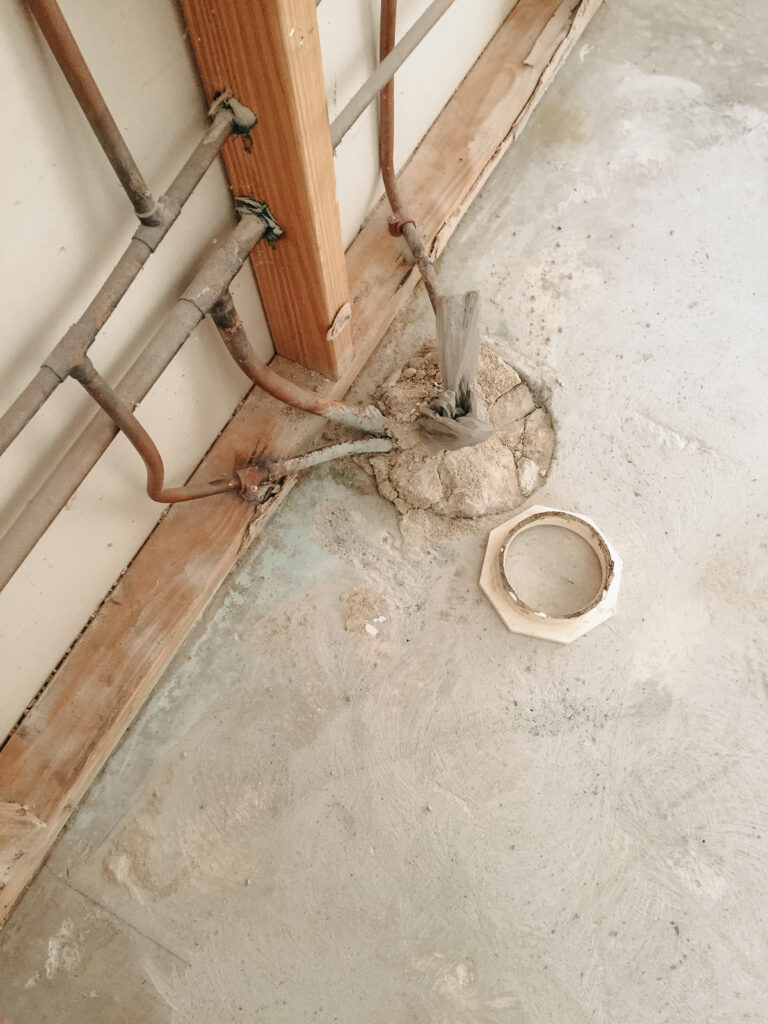
Once demolition was complete, the plumber returned to install the new pipework for the custom vanity and reposition plumbing for the new bath layout.
Tony also cut channels into the concrete slab to allow for the new vanity drainage.
Before rebuilding began, we had our shower screen installer inspect the space so any required framing or structural changes could be completed early.
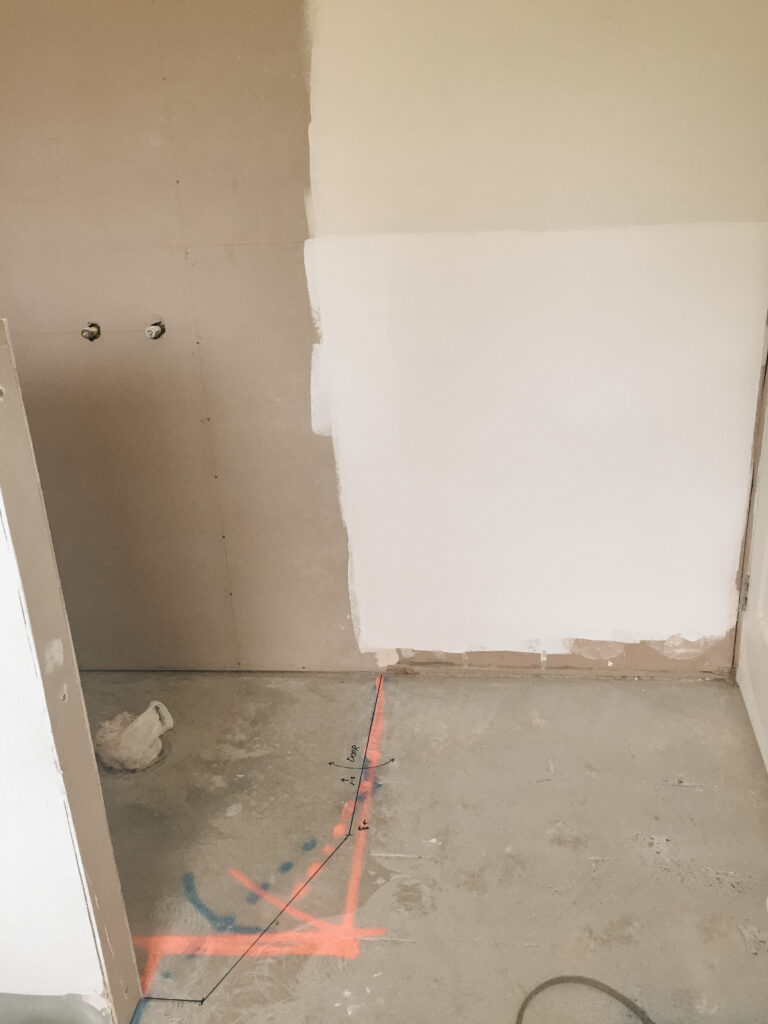
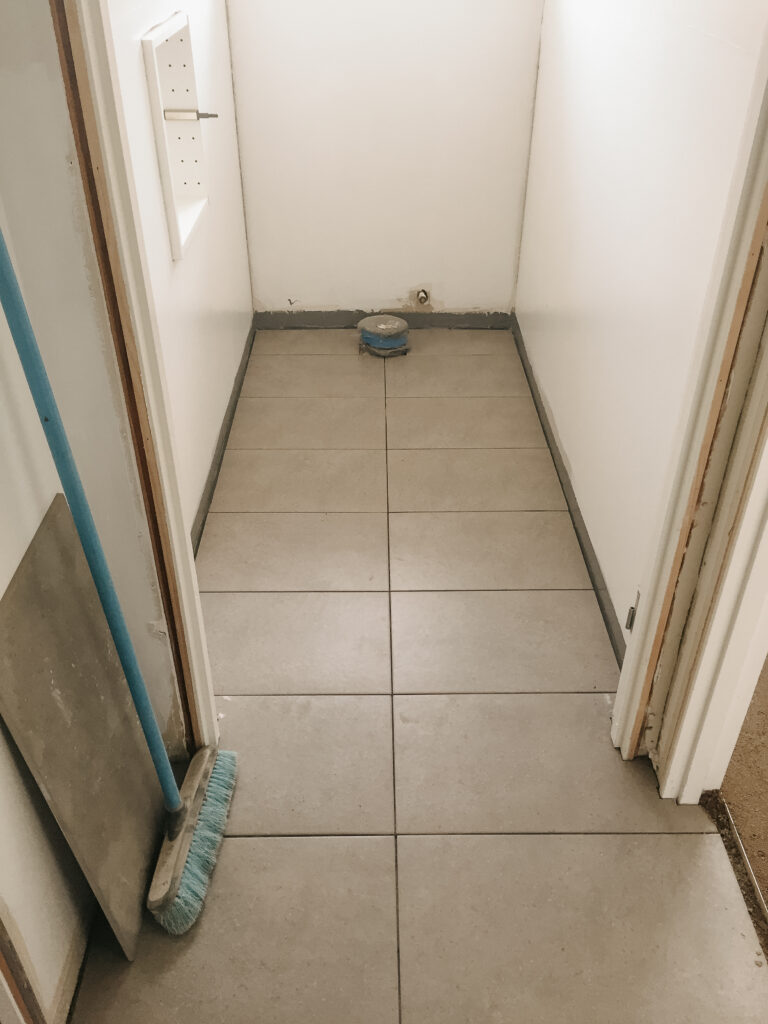
Fixing the Bathroom Floor Levels
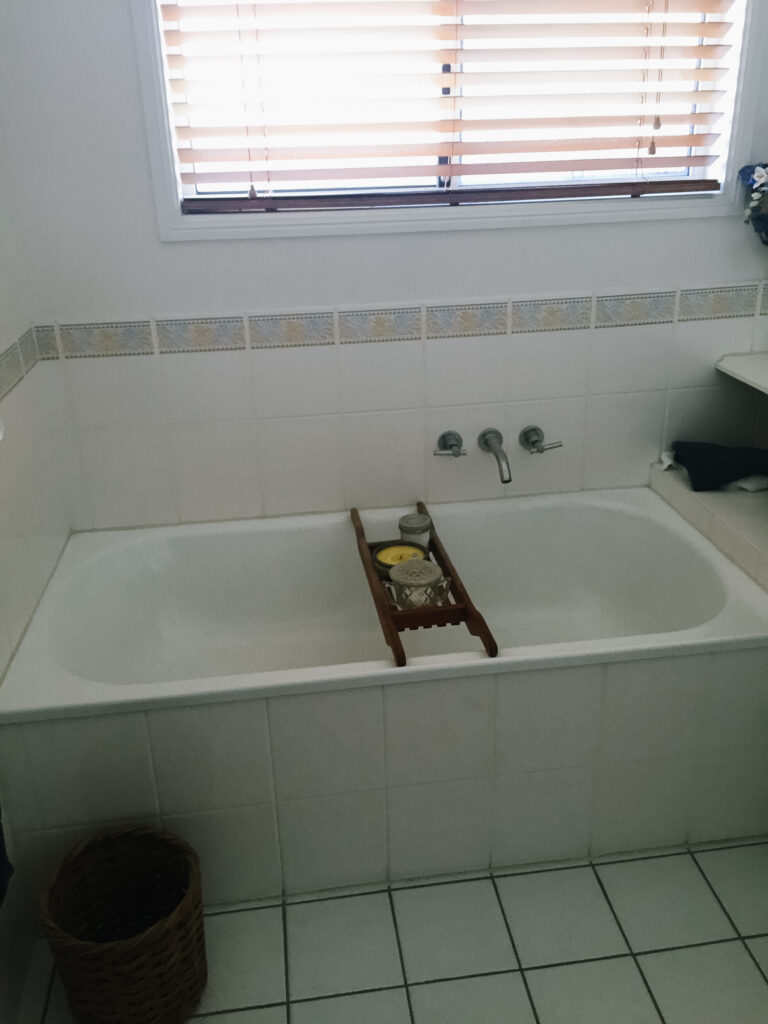
One thing we really disliked in the original home was the raised step into the bathroom, toilet and laundry.
During the renovation we removed the step-up into the laundry and toilet entirely. For the bathroom, however, regulations required the floor to slope correctly toward the drains.
To achieve this:
- The tiler installed an entirely new sand bed
- The bathroom floor was slightly ramped at the entry
- Proper drainage falls were created throughout the wet areas
This solution felt far more seamless and modern compared to the old raised step.

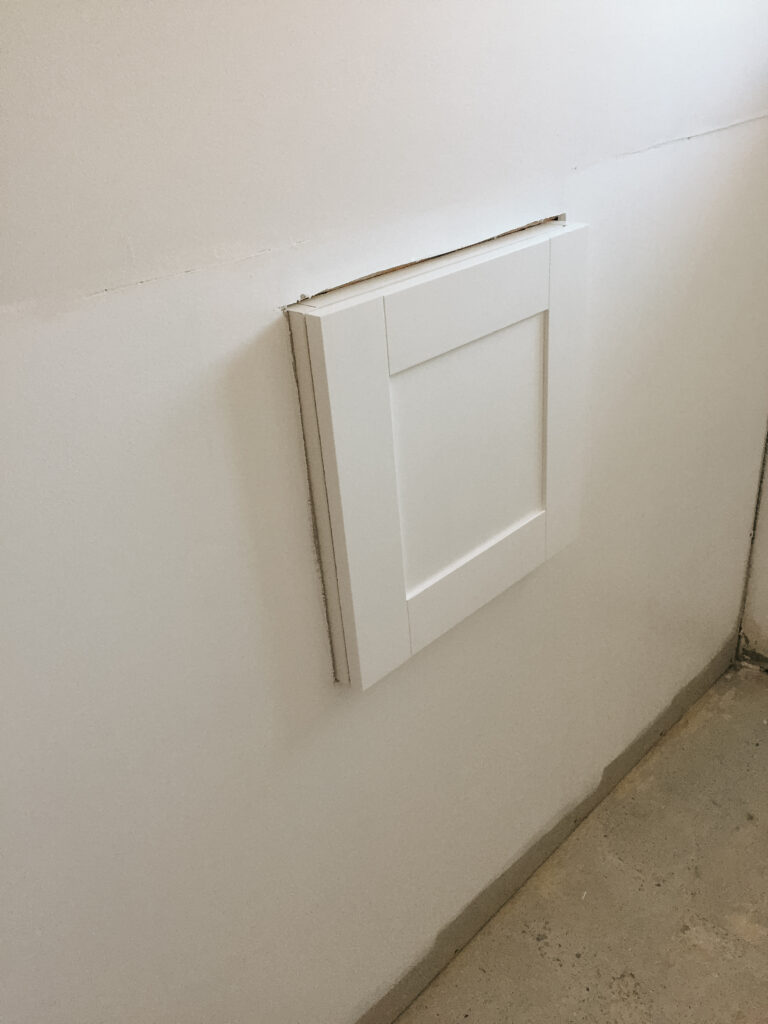
Adding More Bathroom Storage
Storage was one of the biggest priorities in this bathroom remodel.
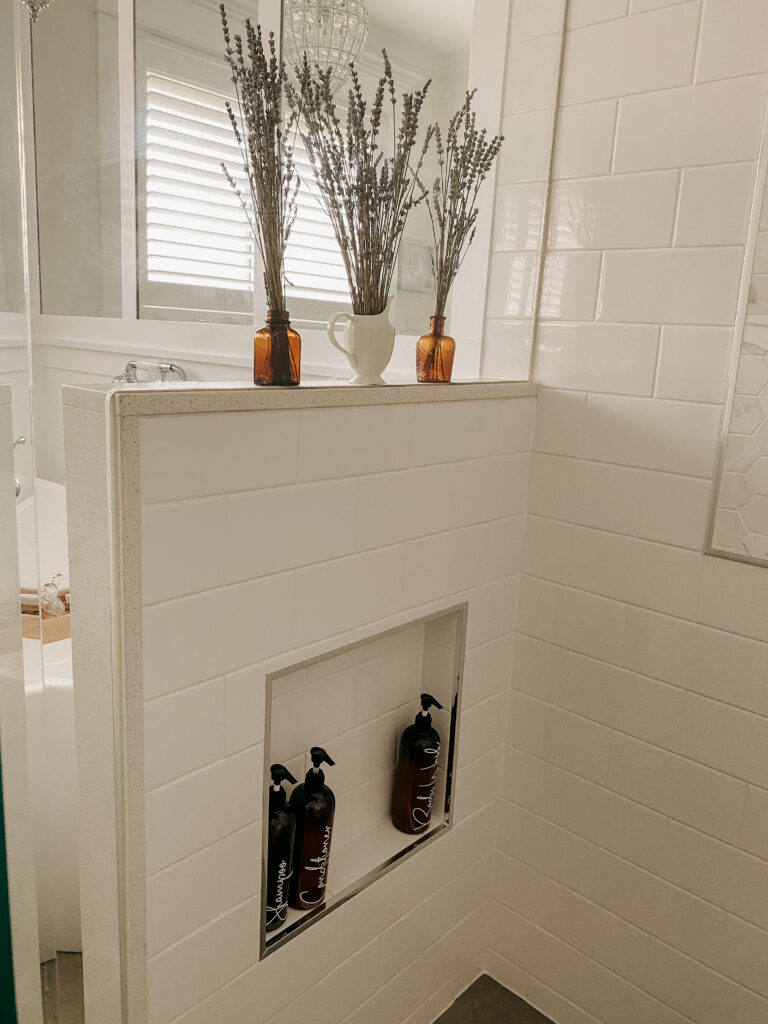
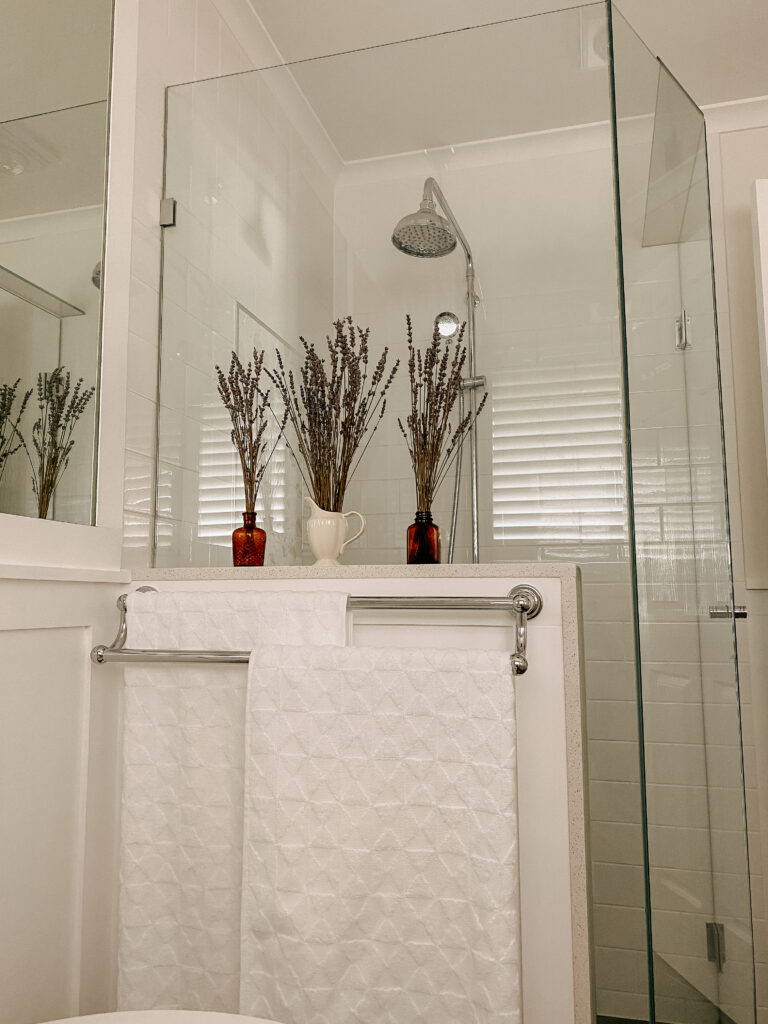
Tony built a nib wall that included a recessed shower niche for toiletries, helping keep the shower floor clutter-free and much easier to clean.
I also came up with an idea for hidden toilet roll storage because I really dislike excess items sitting on the floor in bathrooms if they can be avoided.
To solve this, we:
- Installed a small IKEA cupboard recessed into the wall cavity
- Reduced the cabinet depth to fit properly
- Added a push-to-open mechanism instead of handles
It ended up being one of the most practical storage additions in the entire renovation.
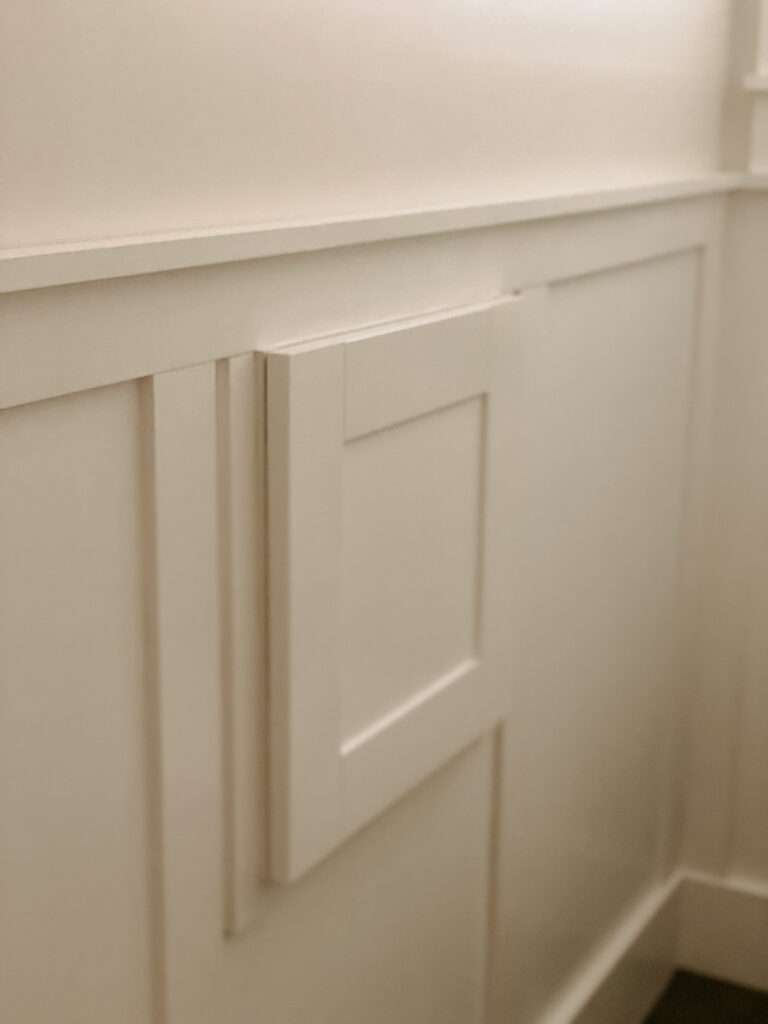

Finishing Touches for the Bathroom Remodel
Once tiling was completed, Tony and I installed:
- Board and batten wall detailing
- Fresh paint
- New window trims and door surrounds
to tie the bathroom and toilet in with the nearby laundry renovation.
The custom vanity and sink were then installed by the cabinet maker, followed by all the final styling and finishing touches.
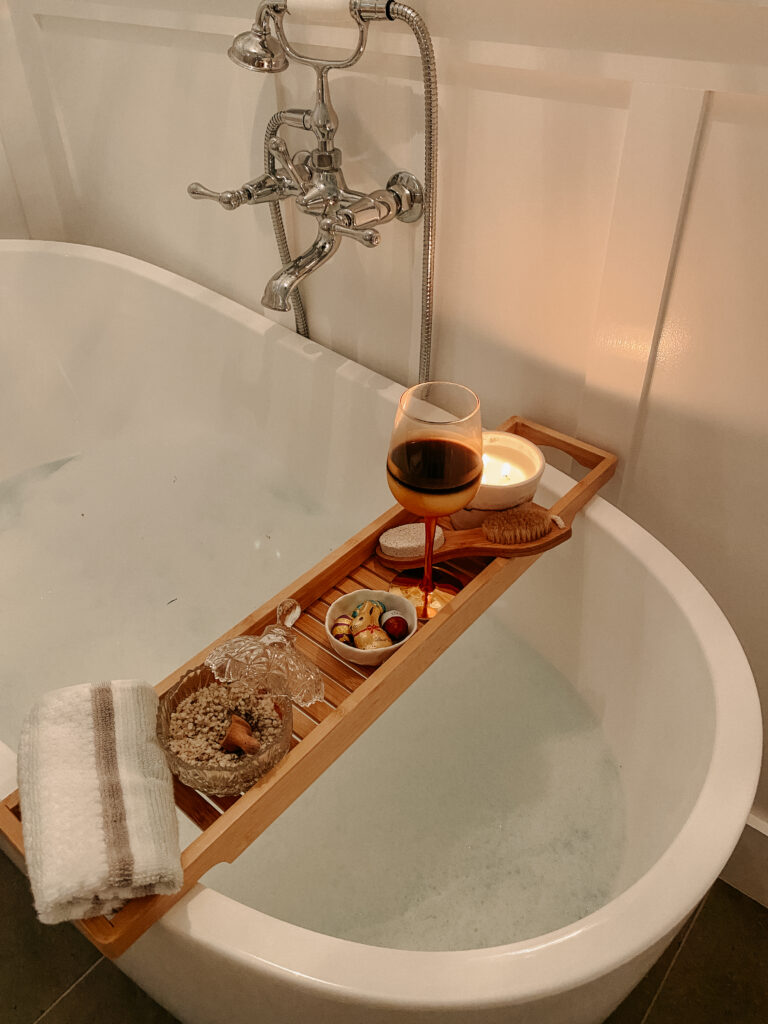
Choosing a Small Freestanding Bath
Finding the right bath for a smaller bathroom was surprisingly difficult.
I specifically needed:
- A compact freestanding bath
- Something elegant but practical
- A bath comfortable enough for actual daily use
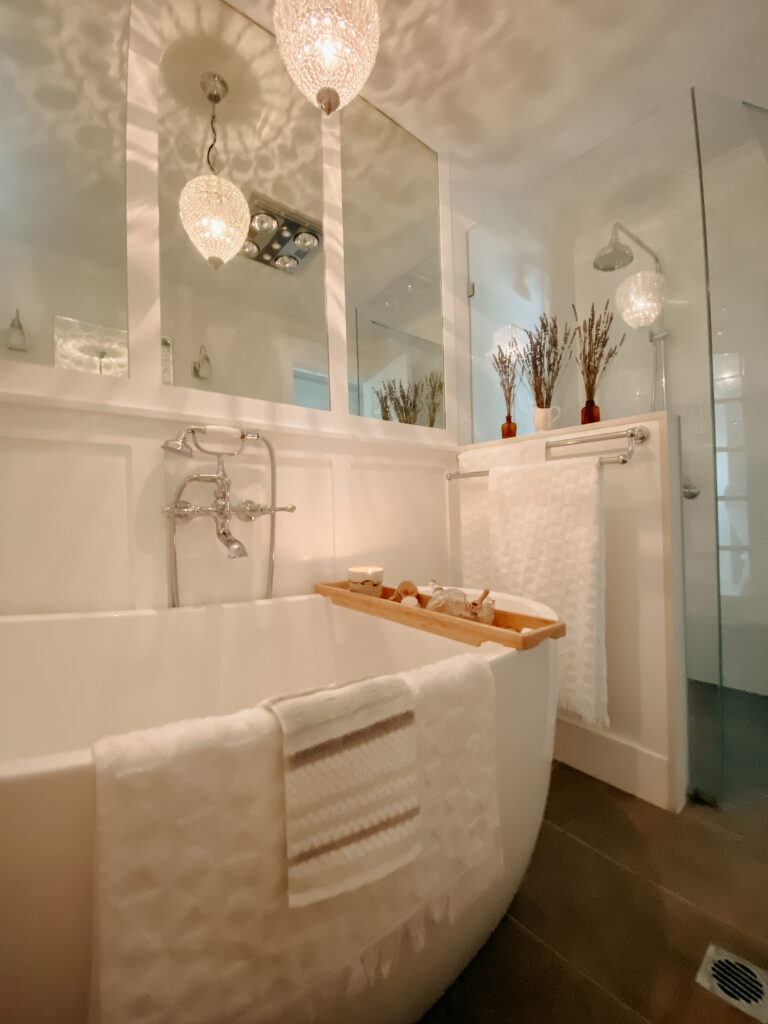
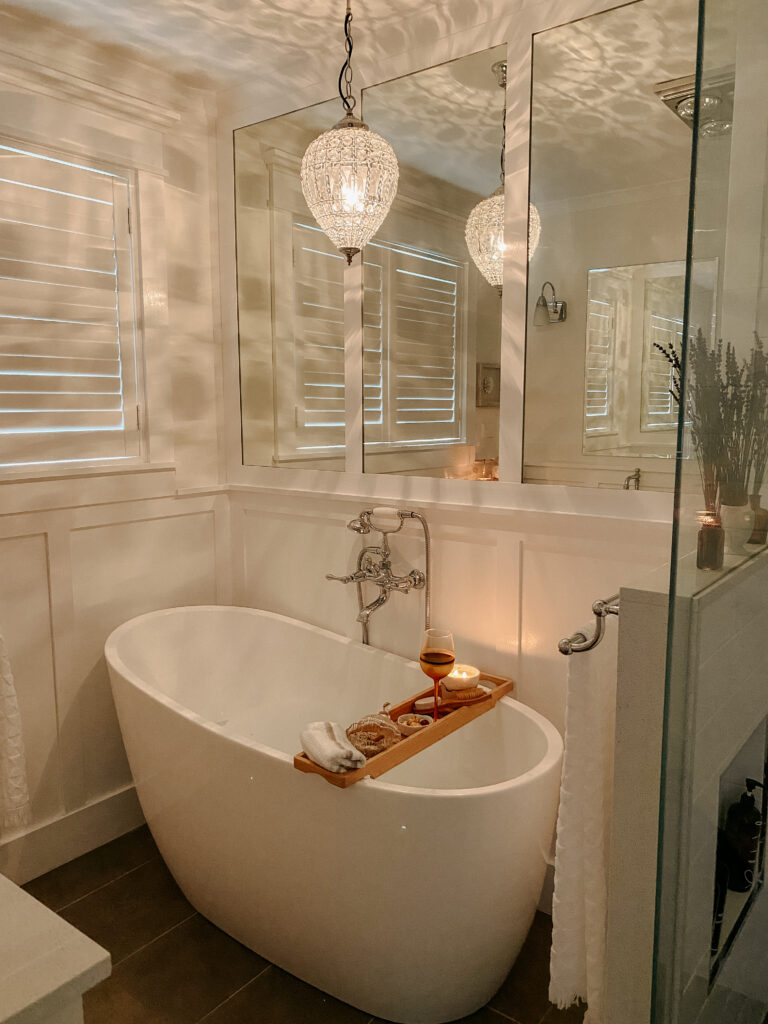
Eventually I found a 1400mm x 700mm freestanding bath that fit perfectly within the space.
Despite its smaller footprint, it’s incredibly comfortable because the bath depth allows you to recline fully submerged rather than stretched out flat.
Honestly, I use this bath far more than the original larger one because it’s so much more comfortable.
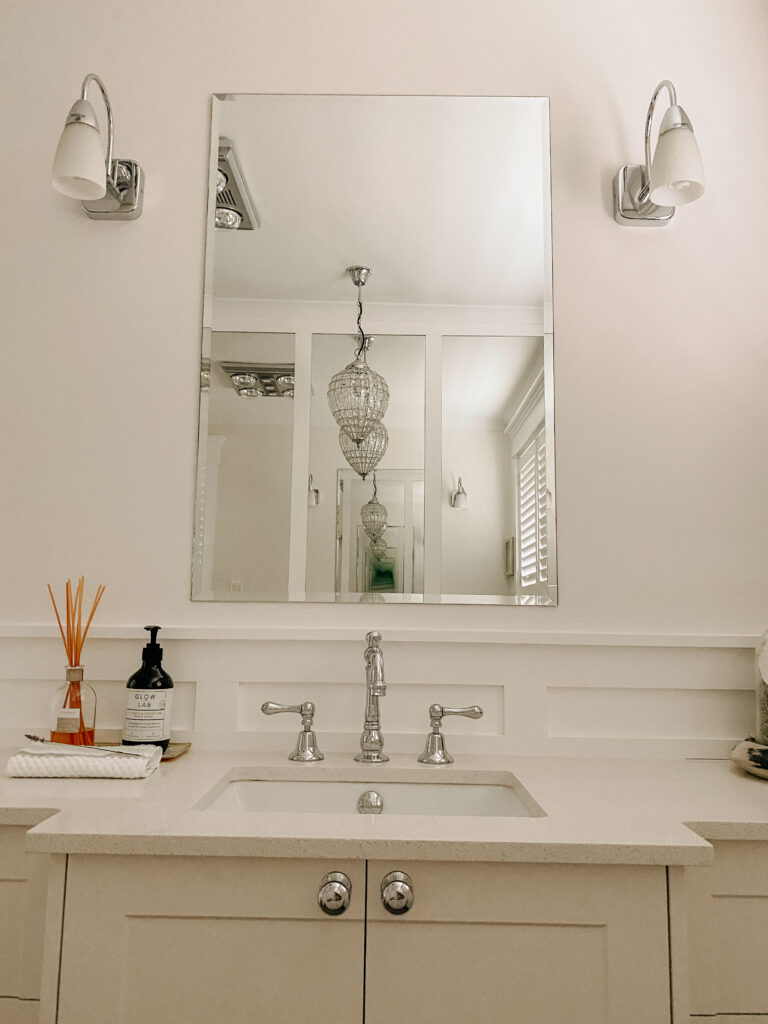
Bathroom Lighting Ideas
Lighting can completely change the atmosphere of a bathroom, especially in smaller spaces.
I really wanted to include a chandelier above the bath to add softness and elegance, but many options felt too large and overpowering for the scale of the room.
Eventually I found a smaller chandelier that added:
- Sparkle
- Softness
- A more luxurious feel
without visually overwhelming the space.
Because the light sat above the bath, the electrician rewired it to operate safely on 12 volts instead of 240 volts.
Using Mirrors to Make a Small Bathroom Feel Larger
One of my favourite design decisions in this bathroom remodel was installing three large framed mirrors above the bath.
The mirrors helped:
- Reflect light throughout the room
- Make the bathroom feel larger
- Add architectural detail
- Tie in beautifully with the board and batten detailing
Tony routed grooves into the timber trim to create custom mirror framing, which helped the mirrors feel fully integrated into the design.
Final Bathroom Styling and Fixtures
The final stage was all about the details that made the bathroom feel complete.
The plumber returned to install:
- The freestanding bath
- Tapware
- Final plumbing fixtures
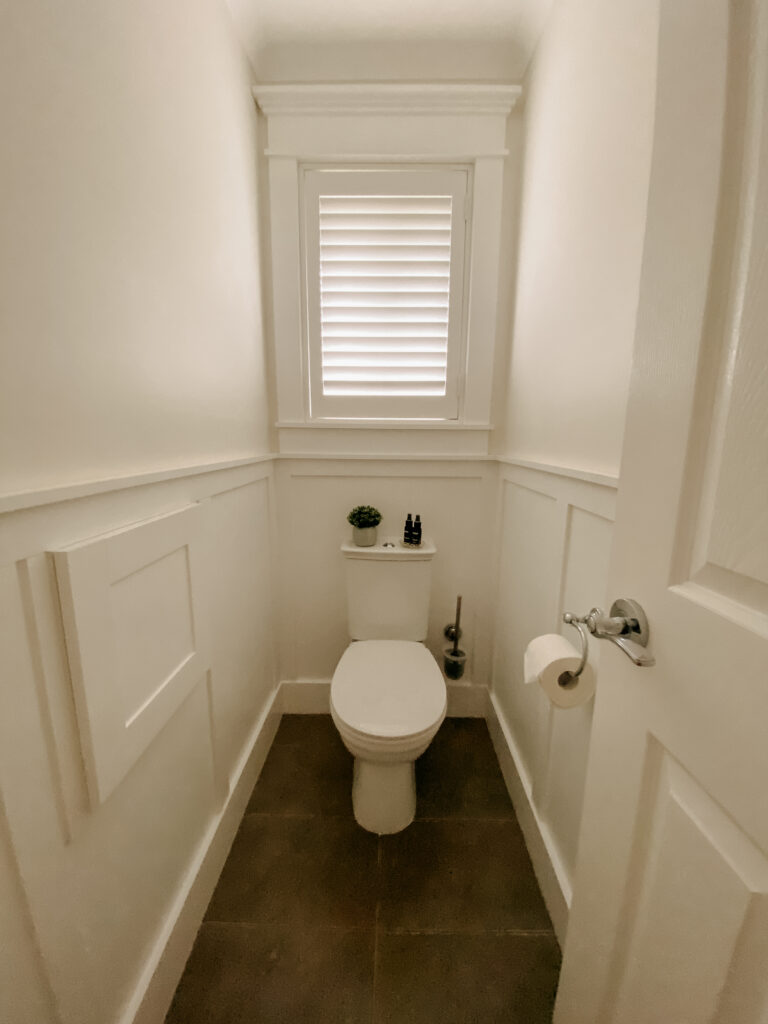
We also installed plantation shutters purchased in kit form, which were surprisingly easy to fit ourselves.
Even though this bathroom is still relatively small, it now feels calm, elegant and incredibly functional — completely different from the outdated bathroom we started with.
Bathroom Remodel Product Details
Vanity
Custom design by Prestige Cabinets
Tapware and Towel Rails
Astra Walker Olde English Collection
Floor Tiles
Promenade Greige from National Tiles
Marble Mosaic Tiles
National Tiles
Benchtop
Caesarstone Ice Snow
Bath Tray
IKEA
Towels
Pillow Talk
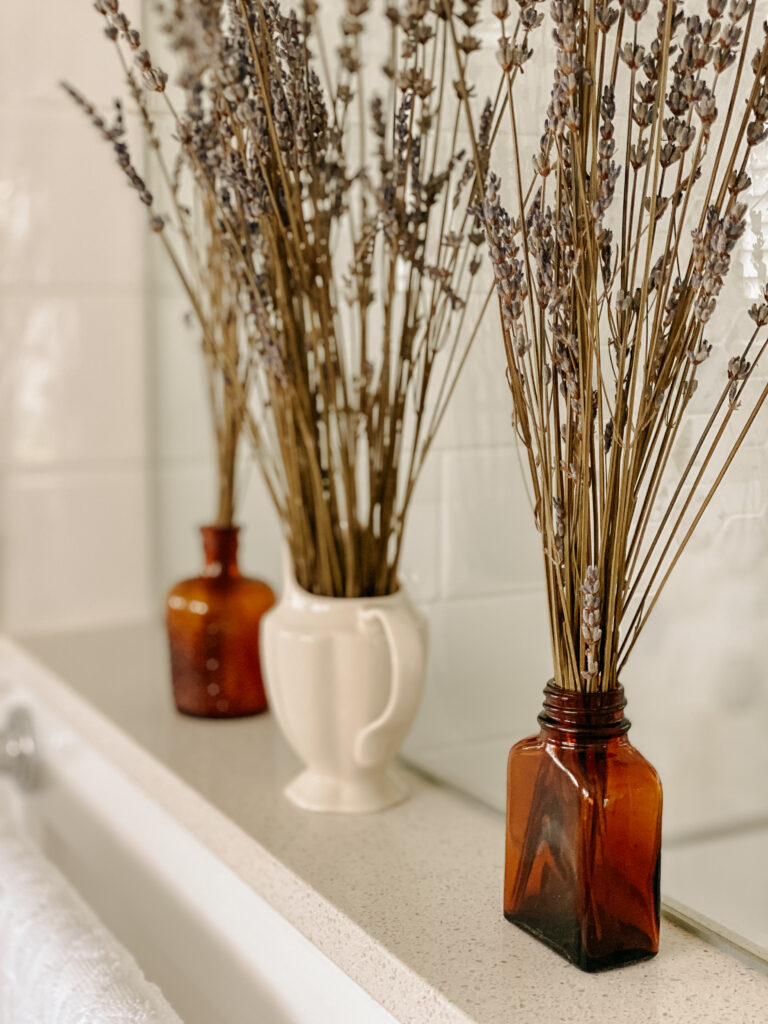
Amber Bottles and Labels
Orchid Cloche
Jash Living
Plantation Shutters
Final Thoughts on Our Small Family Bathroom Remodel
This renovation proved that even a small family bathroom can become beautiful, functional and timeless with careful planning and thoughtful design choices.
By:
- Improving the layout
- Adding better storage
- Using mirrors strategically
- Choosing lighter finishes
- Incorporating custom details
we created a bathroom that feels far larger and more luxurious than its original footprint.
It may still be a compact space, but it’s now one of my favourite rooms in the house. If you enjoyed this one have a look at our three part kitchen makeover.