How to Create a Dessert Board
There’s something so special about gathering around a beautifully styled dessert board filled with sweet treats, fresh fruit, and indulgent little desserts.
If you’ve been asked to bring dessert to a gathering or simply want a show-stopping centrepiece for entertaining at home, a dessert board is one of the easiest and most impressive options you can create.
Not only are dessert boards visually stunning, but they’re also interactive, practical, and easy to customise for any occasion.
This version combines tropical fruit, pavlova, creamy toppings, and an indulgent chocolate dessert board section filled with everyone’s favourite sweet treats.
Choosing the Perfect Dessert Board Base
The first step in creating a beautiful dessert board is selecting the right serving board or platter.
Large wooden boards create a warm rustic feel, while marble boards instantly add elegance.
If you’re transporting your board, a sturdy tray with raised edges is ideal for keeping everything secure.
You can also browse my Shop My Favourites collection for some of my favourite entertaining boards and serving pieces.
What to Include on Your Dessert Board
The key to a stunning dessert board is variety.
Combining different colours, textures, flavours, and heights helps create a board that feels abundant and inviting.
For this dessert board, I combined fresh tropical flavours with rich chocolate treats for the perfect balance.
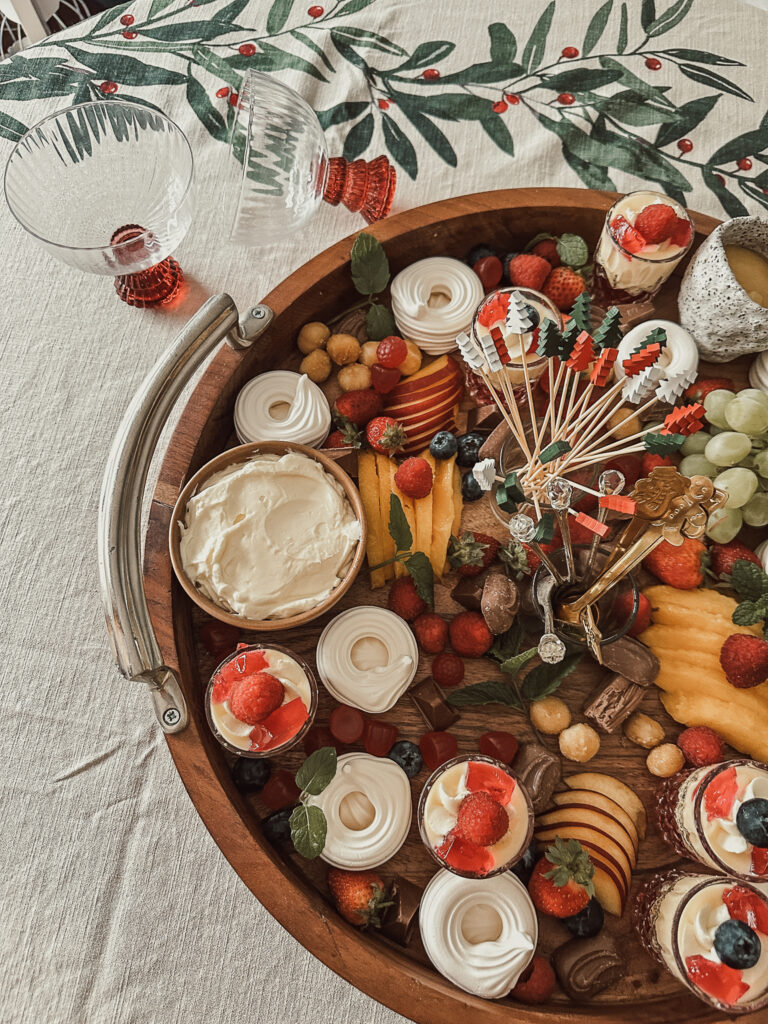
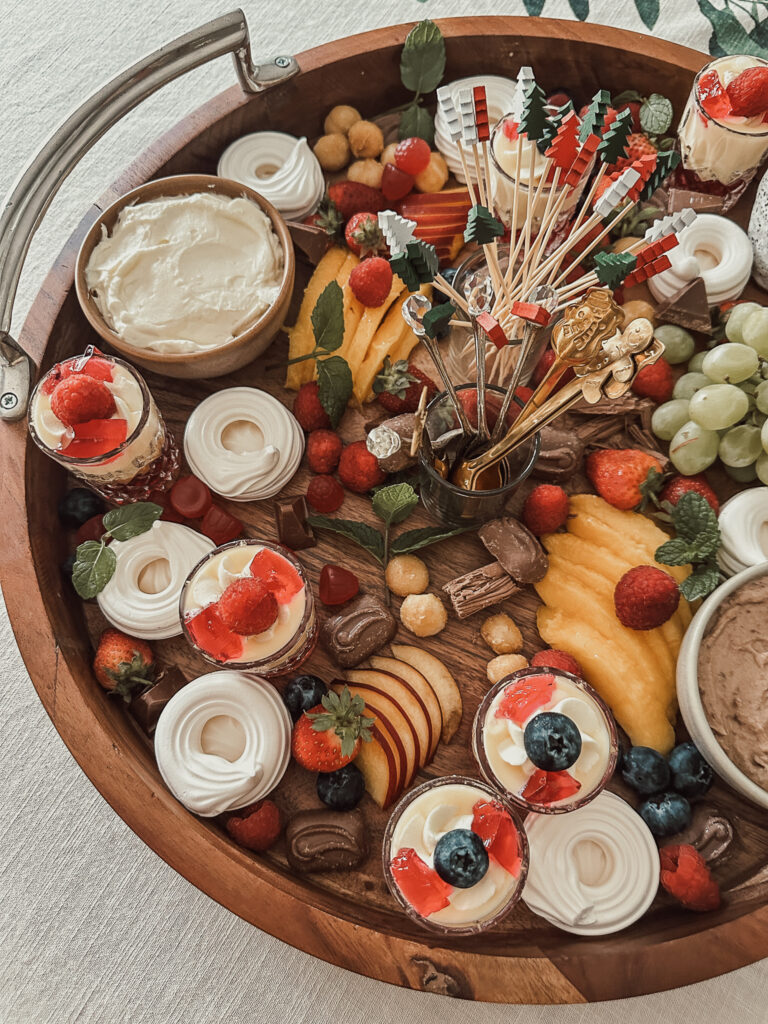
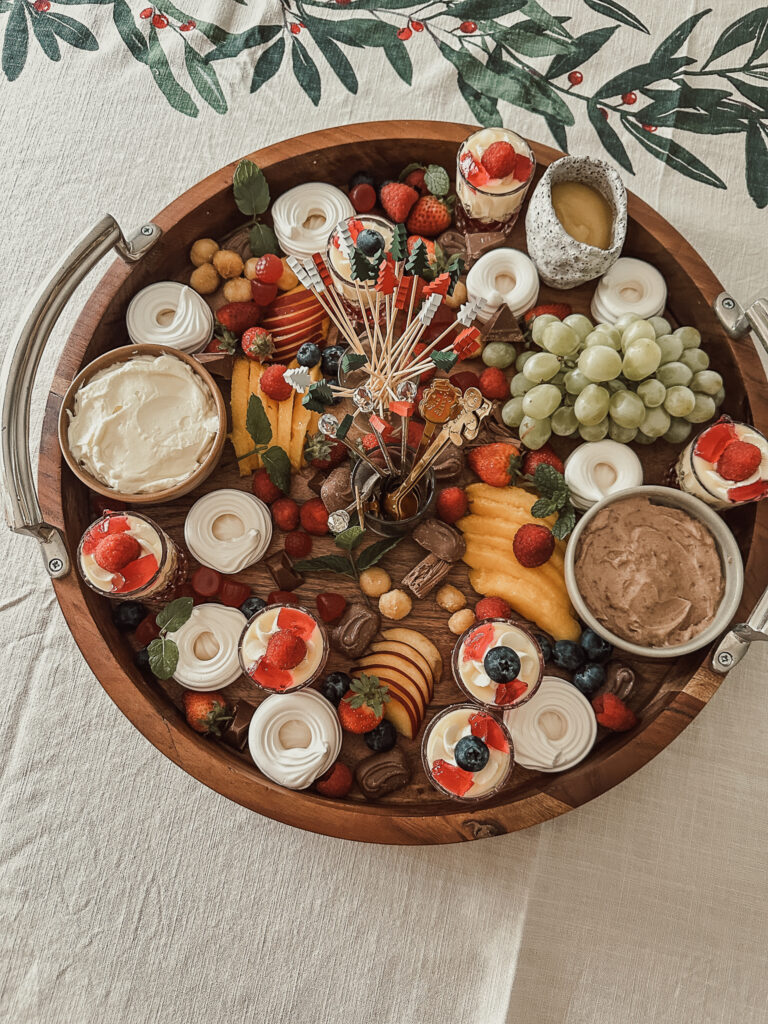
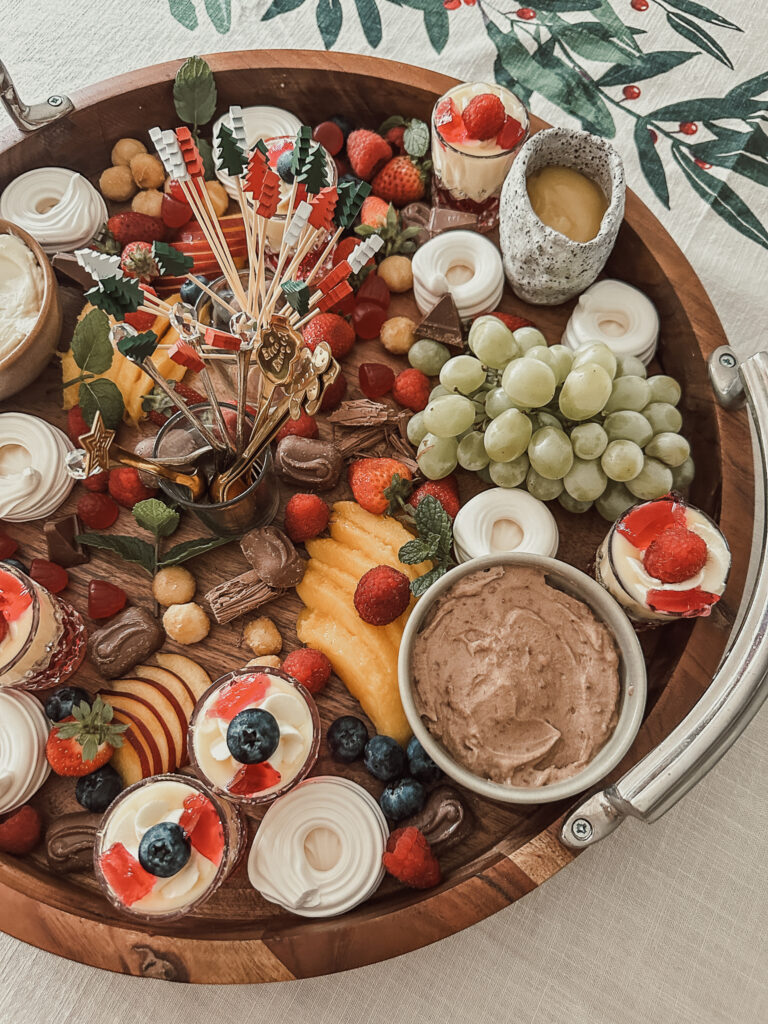
Mini Pavlova Bases
Mini pavlovas make the perfect centrepiece for a dessert board.
Arrange them around the board so guests can customise their own desserts with toppings and sauces.
Whipped Cream
A generous bowl of softly whipped cream is essential.
Serve it in a pretty bowl with a spoon so guests can easily help themselves.
Tropical Fruit Board
Fresh fruit adds colour and freshness while balancing richer desserts.
Some of my favourite fruits for dessert boards include:
- Mango
- Kiwi fruit
- Pineapple
- Strawberries
- Blueberries
- Raspberries
Tuck the fruit throughout the board to create a lush and colourful display.
Toblerone Chocolate Cream
For a more indulgent option, include a bowl of chocolate cream made by folding melted chocolate through whipped cream.
It creates a rich mousse-like topping that pairs beautifully with fruit and pavlova.
Lemon or Passionfruit Curd
A small bowl of lemon or passionfruit curd adds brightness and a tangy contrast to sweeter desserts.
It’s especially delicious drizzled over pavlova and cream.
Mini Trifles
Mini trifles served in small glasses help create height and visual interest on the board.
Layers of sponge cake, jelly, custard, and cream always feel nostalgic and crowd-pleasing.
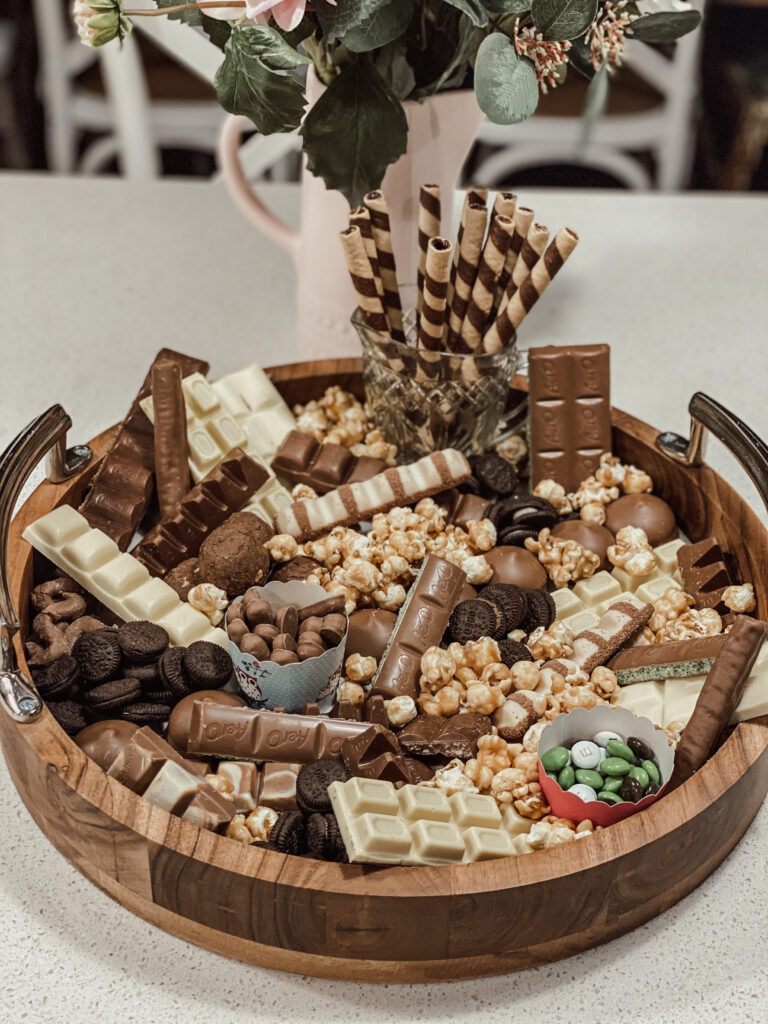
Chocolate Dessert Board Additions
Alongside the tropical fruit section, I also love including a dedicated chocolate dessert board section filled with bite-sized treats.
For the chocolate section, include:
- Mini Oreos
- Chocolate straw wafers
- Milk chocolate blocks broken into strips
- White chocolate blocks broken into strips
- Caramel popcorn
- Chocolate coated marshmallows
- Chocolate and macadamia nut cookies
Layering these treats throughout the board instantly creates texture and makes the entire display feel abundant and indulgent.
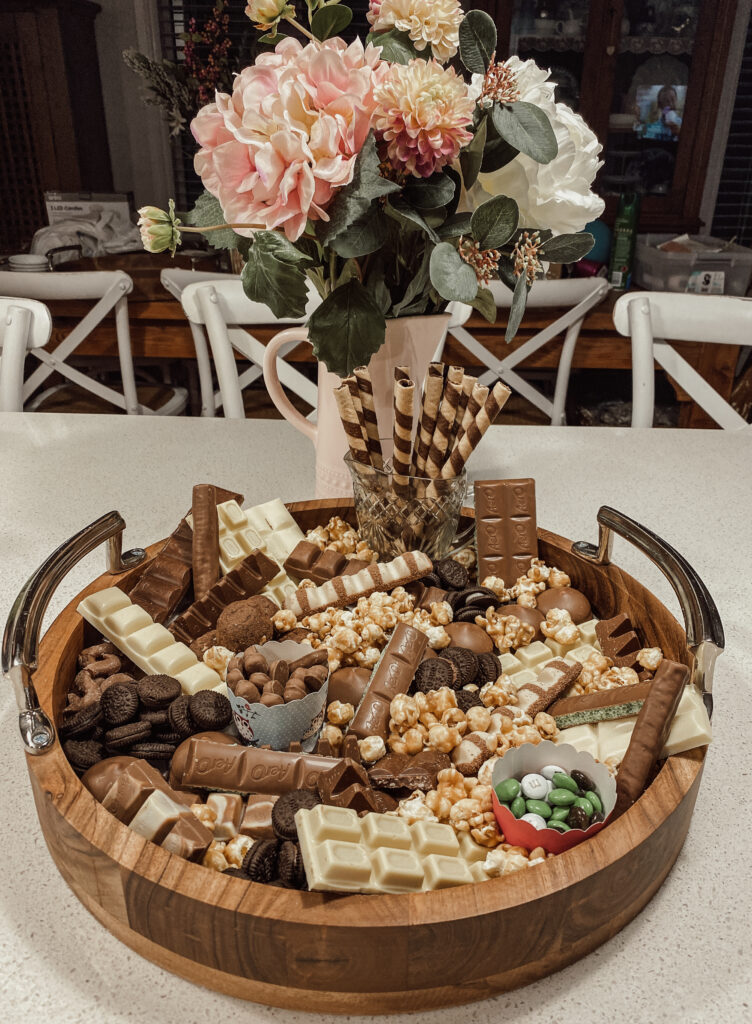
Homemade Treats and Sweet Extras
I also love adding homemade treats from my A Joyful Gift cookbook.
Some beautiful additions include:
- Rocky road
- Chocolate balls
- Small slices cut into bite-sized pieces
- Homemade cookies
These little additions help personalise the board and make it feel extra special.
How to Arrange Your Dessert Board
One of my favourite ways to style a dessert board is in a loose wreath shape because it creates flow and makes the board feel full and balanced.
Start with the Bowls
Place bowls of cream, chocolate cream, and curd evenly around the board first.
Add Height
Position mini trifles and taller desserts around the board to create dimension.
Layer the Fruit
Tuck fruit around the pavlovas and desserts to create a soft overflowing effect.
Scatter Chocolate and Treats
Fill gaps with chocolates, cookies, popcorn, marshmallows, and sweet treats to create texture and visual interest.
Finish with Decorative Touches
Fresh mint, flowers, ribbons, or small decorative details help finish the board beautifully without requiring much effort.
Tips for Transporting a Dessert Board
If you’re travelling with your dessert board, preparation is key.
Prep Ahead
Slice fruit and prepare toppings in advance.
Assemble On Site
If travelling a long distance, transport everything separately and assemble the board once you arrive.
Use Secure Containers
Wrap bowls carefully and store ingredients in airtight containers to prevent spills.
Choose a Sturdy Board
Boards with raised edges are much easier to transport safely.
Why Dessert Boards Are Perfect for Entertaining
Dessert boards work beautifully for entertaining because they combine practicality with visual impact.
They encourage guests to interact, customise their desserts, and casually graze throughout the event.
Best of all, they can easily be adapted to suit different tastes, themes, and occasions.
Whether you focus on tropical fruit, rich chocolate desserts, pavlova, or homemade treats, learning how to create a dessert board is one of the easiest ways to elevate your entertaining at home.
If you’re after something a little more comforting try my sticky date pudding.