How to Create a Wallpaper Feature Wall in Your Bedroom
Adding a wallpaper feature wall is one of the easiest ways to completely transform a room and add warmth, texture and personality to your home. Whether you love soft neutrals, vintage florals or bold modern prints, wallpaper can instantly create a cozy and layered look without needing to renovate an entire space.
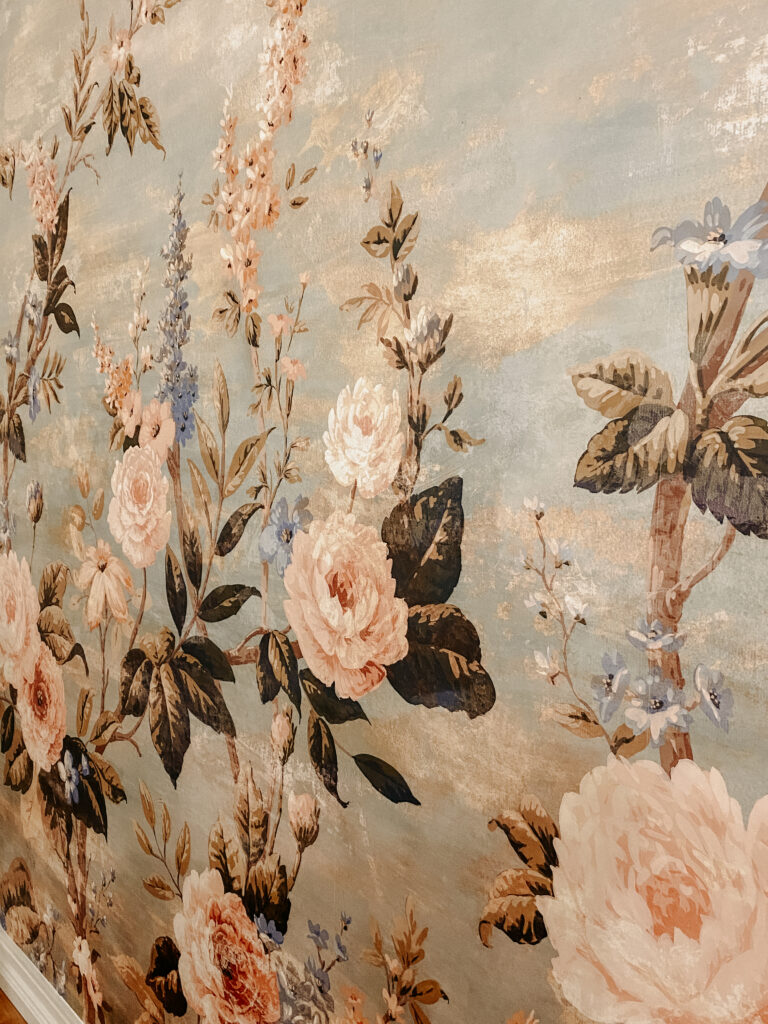
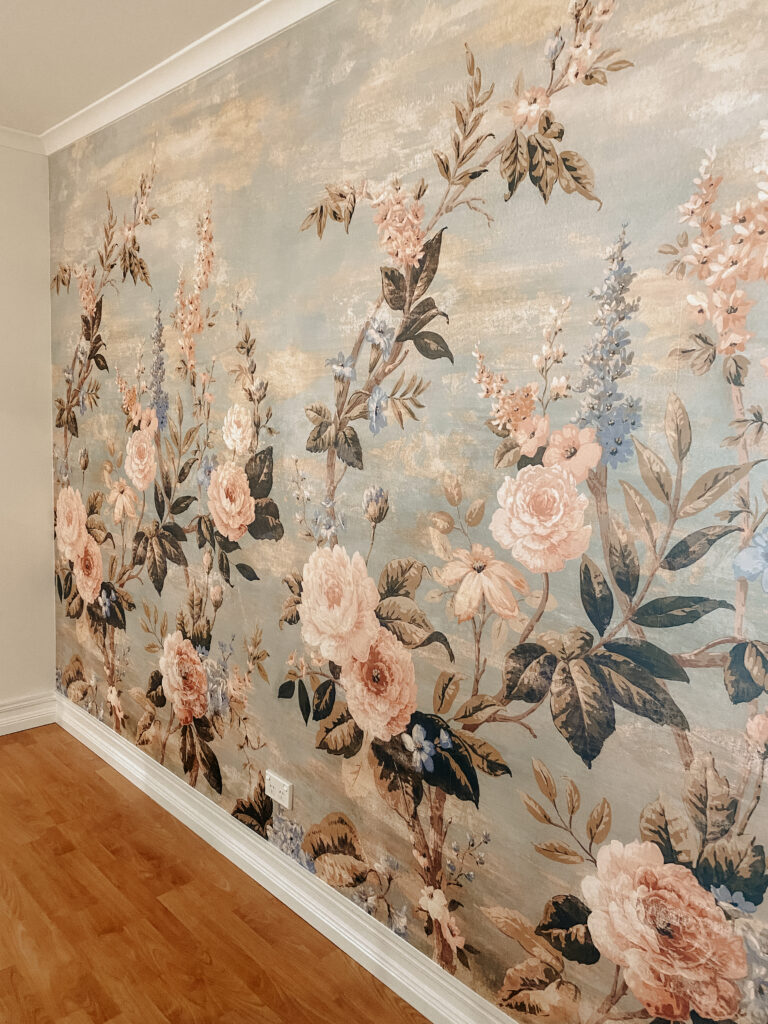
For our master bedroom makeover, I wanted to create a soft vintage-inspired feel that worked beautifully with our French bed and antique furniture pieces. Wallpaper ended up becoming the focal point of the entire room and completely changed the atmosphere of the space.
If you’ve been considering wallpaper but feel nervous about installing it yourself, this step-by-step guide will show you exactly how we created our DIY wallpaper feature wall.

Choosing Wallpaper for a Feature Wall
I’m normally very drawn to neutral interiors, but once we found our beautiful vintage French bed for the master bedroom makeover, I knew I wanted to add a little more softness and interest to the space.
We previously used peel-and-stick wallpaper in our office makeover, which looked beautiful but was definitely more difficult to install. This time we decided to use paste-the-wall wallpaper, which was much easier to work with.
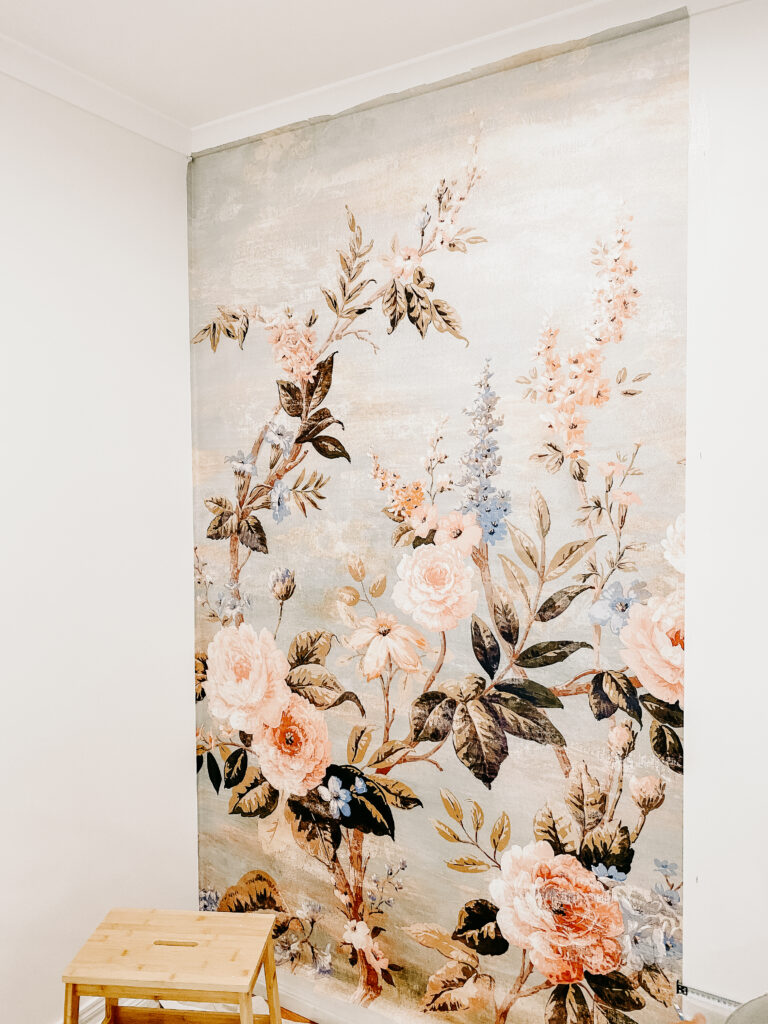
The wallpaper we chose was the Fairy Tale Botanic design from Photowall Sweden and it suited the room perfectly with its romantic floral pattern and vintage-inspired feel.
I wanted something that felt:
- Soft and romantic
- Floral without being overpowering
- Slightly vintage in style
- Muted and washed out rather than bright and bold
Even though I love neutral interiors, I knew adding subtle pink and blue tones would help create warmth and depth in the room.
One of my biggest recommendations when choosing wallpaper is to narrow down your search using a few clear parameters before you start browsing. Wallpaper companies often have hundreds of designs, so filtering by colour palette, style and mood makes the process far less overwhelming.
I also highly recommend ordering samples before committing to a design. Colours can appear very different online compared to real life, and the wallpaper we chose actually had much deeper tones in person.
If you’d like to see the wallpaper and decor details we used throughout this room, you can find everything linked on my Shop My Favourites page.
Why We Chose Paste-the-Wall Wallpaper
For this project, paste-the-wall wallpaper was definitely the right choice.
Not only was it easier to install than peel-and-stick wallpaper, but it also allowed more flexibility when positioning the panels and smoothing out joins.
Another thing I loved about the wallpaper from Photowall was that:
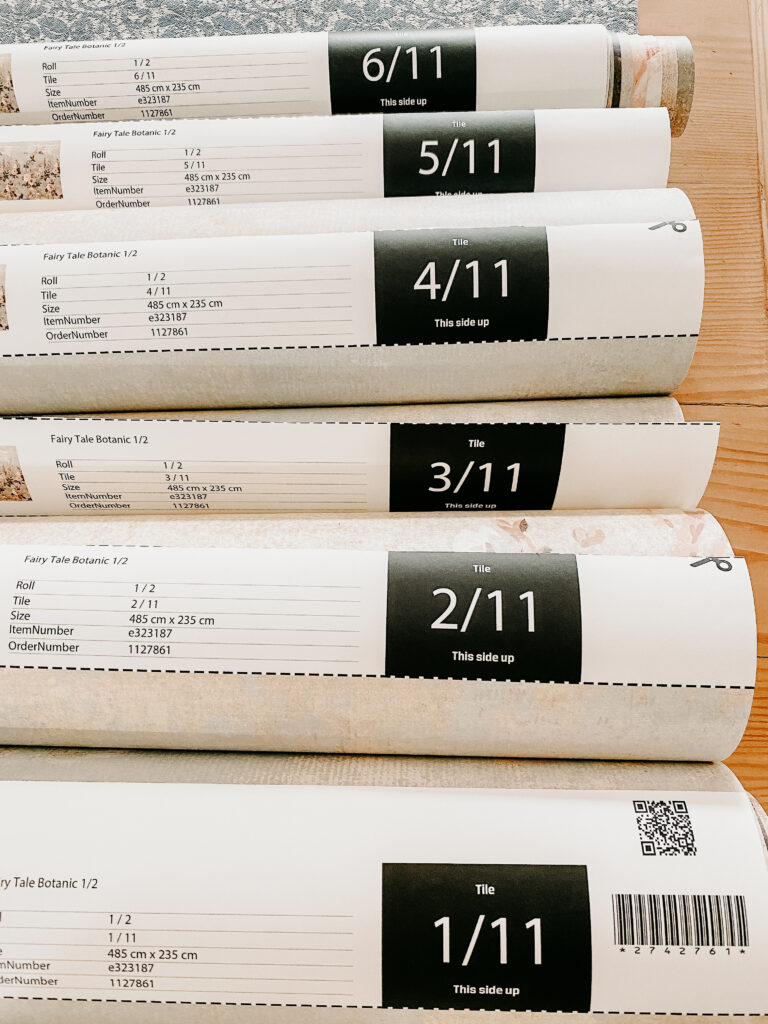
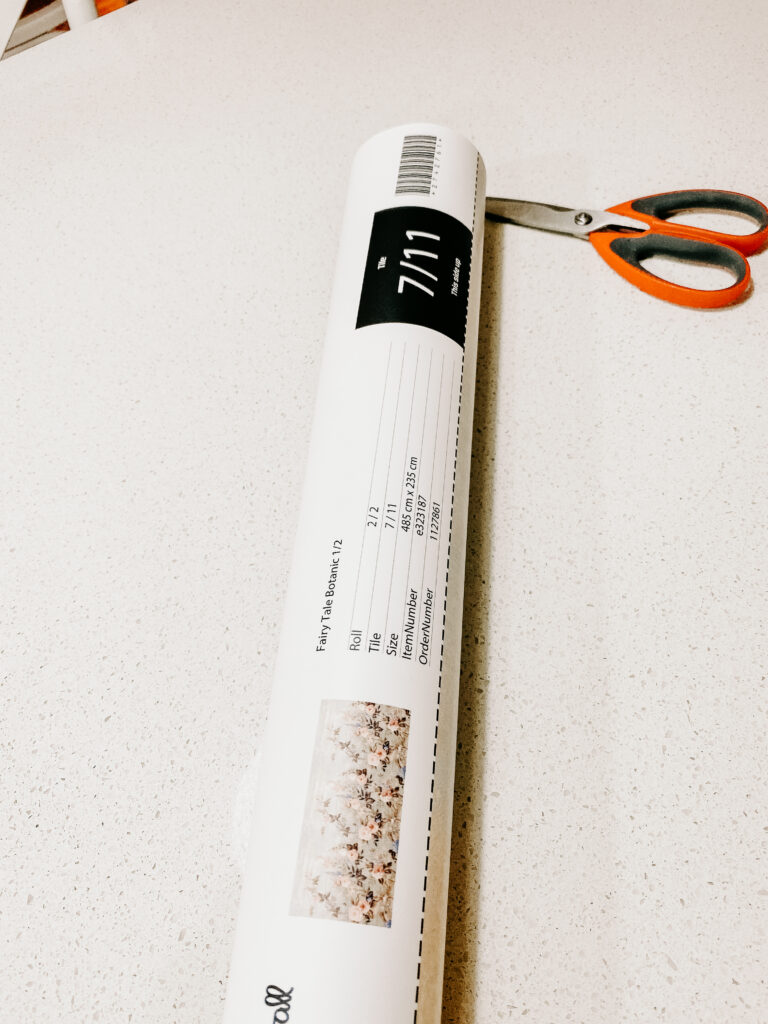
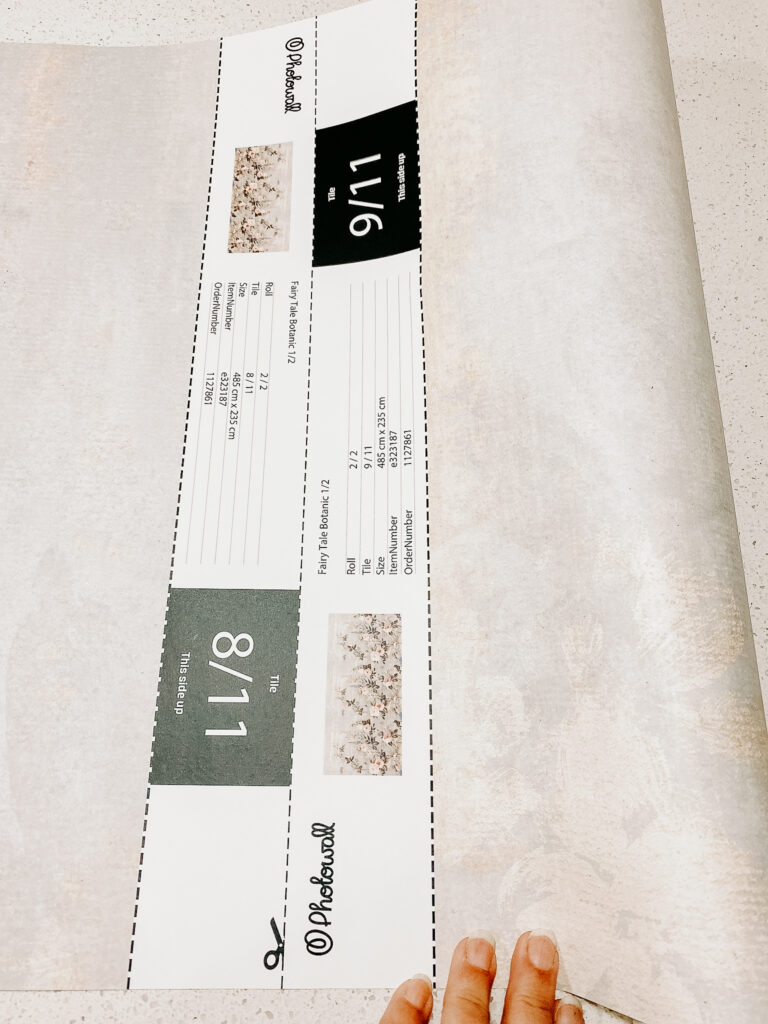
- Each panel was clearly labelled
- Wallpaper paste was included
- The toolkit included everything needed for installation
Having everything supplied made the process far less intimidating for a DIY project.
Preparing the Wall
Good preparation makes a huge difference when hanging wallpaper.
Before we started, we:
- Filled any holes or imperfections
- Sanded the wall smooth
- Cleaned the wall thoroughly using sugar soap wipes
Taking the time to properly prepare the surface helped ensure the wallpaper adhered beautifully and gave a much smoother finish.
How to Hang Wallpaper
The first thing we did was organise all the wallpaper panels in order before beginning installation. Since each section was clearly numbered, this step was very straightforward and saved a lot of confusion later.
Step 1: Create a Straight Starting Line
One of the most important things when hanging wallpaper is making sure your first panel is perfectly straight.
Because our home is older, the corner of the wall wasn’t level. If we had started directly from the corner, the wallpaper would slowly become crooked across the wall.
To avoid this, we:
- Measured 400mm from the corner
- Used a plumb bob and long level
- Drew a vertical pencil line as our guide
The wallpaper panels were 450mm wide, which gave us enough room to deal with the uneven corner without affecting the overall alignment.
This step made all the difference and is especially important in older homes.
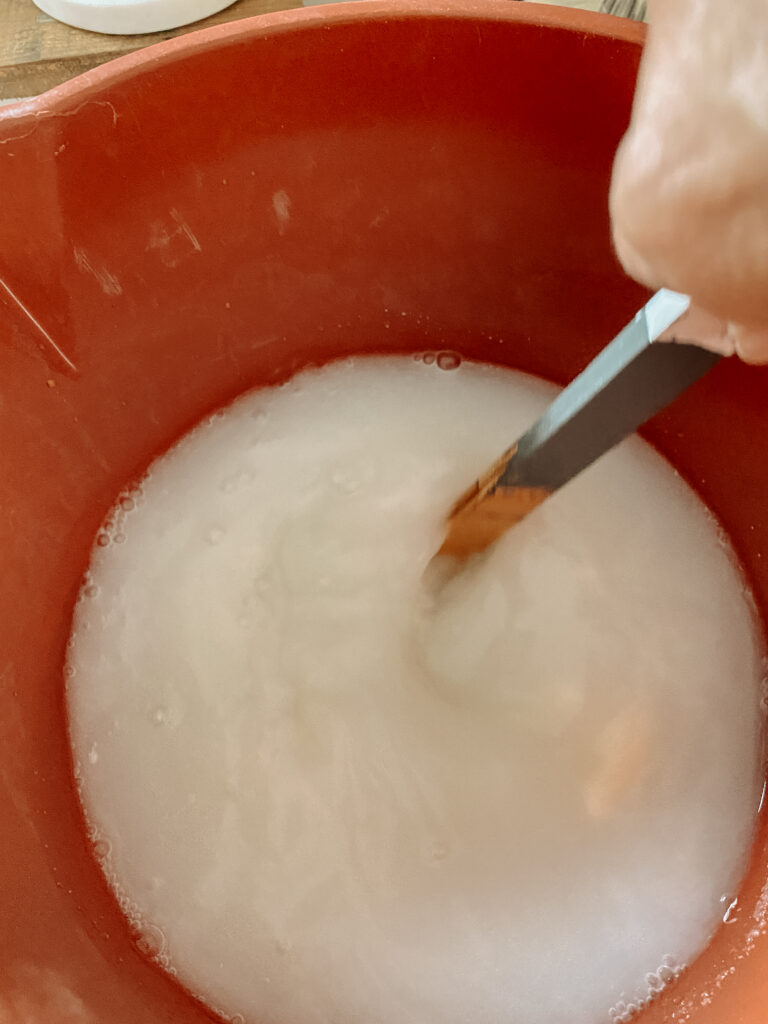
Step 2: Mix the Wallpaper Paste
The instructions recommended mixing the full packet of paste into 4 litres of water, but we actually found smaller batches worked much better.
Instead, we mixed:
- 1 litre of water
- 65 grams of paste
Doing this prevented lumps and created a smoother consistency.
Step 3: Apply the Wallpaper
Using the supplied glue brush, we applied paste directly onto the wall slightly wider than the wallpaper panel itself to ensure the joins adhered properly.
We then:
- Positioned the wallpaper against the level line
- Allowed extra paper at the top and bottom for trimming
- Smoothed the wallpaper using the supplied smoothing brush
- Rolled the joins carefully with the seam roller
The seam roller gave the joins an incredibly professional finish and made the seams almost invisible.
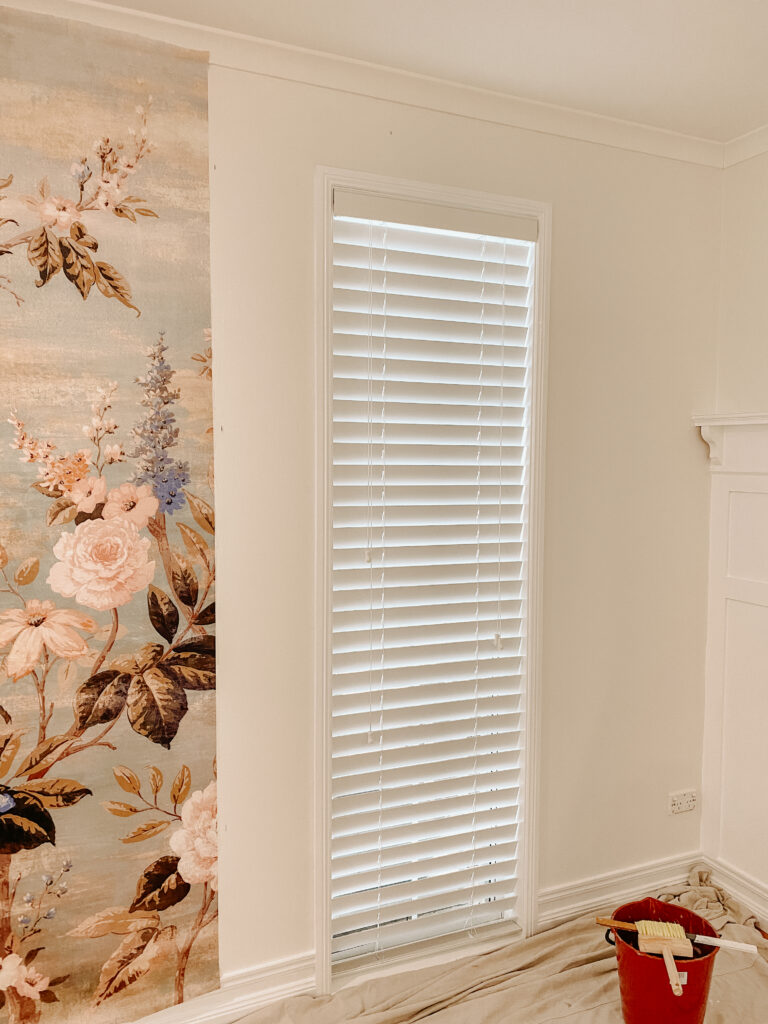
Dealing with Obstacles
Our feature wall included several tricky areas:
- Two power outlets
- One window
- Decorative timber moulding
The key to dealing with obstacles is simply taking your time.
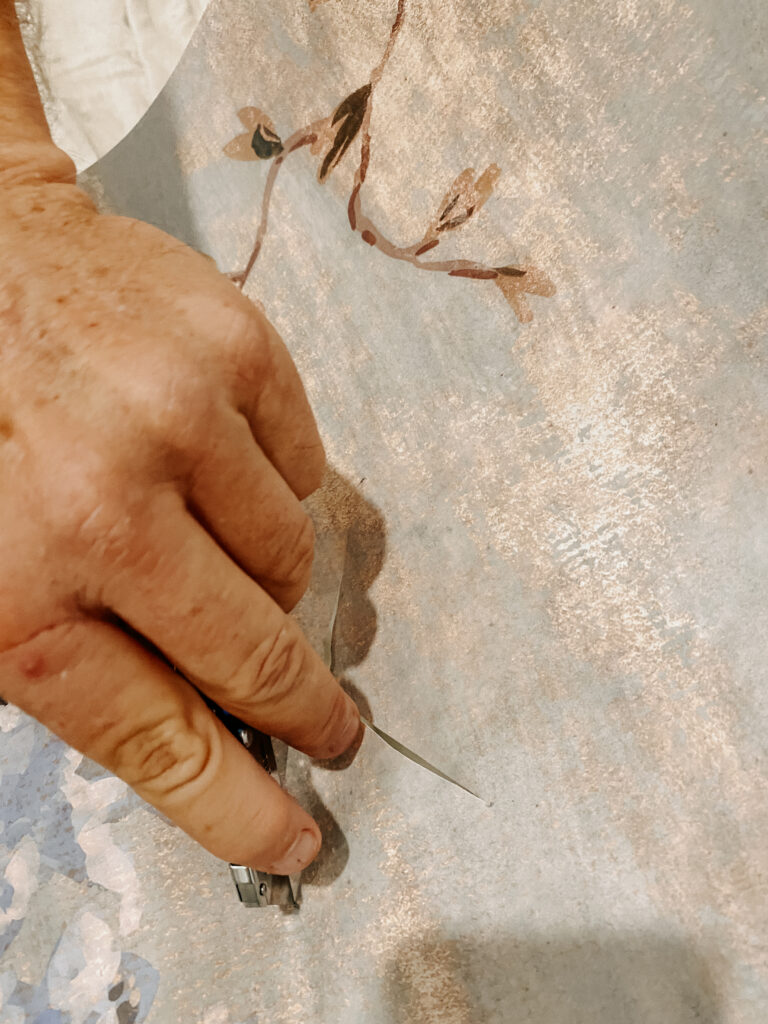
For power points, we carefully made diagonal cuts from the centre of the outlet outward and slowly trimmed the wallpaper back. It’s always better to trim gradually rather than cutting too much at once.
Once all the panels were installed, we trimmed away the excess wallpaper around the edges for a clean finish.
Final Thoughts on Our Wallpaper Feature Wall
This wallpaper feature wall was definitely outside my comfort zone, but it ended up becoming one of my favourite parts of our master bedroom makeover.
Wallpaper has such an incredible ability to add warmth, texture and personality to a room, and the finished space feels soft, layered and cozy while still fitting with the vintage style we love throughout our home.
If you’ve been thinking about trying wallpaper yourself, don’t be afraid to give it a go. With a little patience and preparation, it’s absolutely a DIY project you can tackle yourself.
If you’d like more inspiration for our master bedroom makeover, you can also read about the custom handbag storage solution we created using a refurbished vintage cupboard.
Anita, this wall is so gorgeous and makes such an impact in your beautiful bedroom. I would love to try this if I can find the perfect one for my dining room.
Thanks Wendy, I really do love it. You should have a look at Photowall because they literally have over 6000 designs!!!!