Easy DIY Handbag Storage Ideas Using a Vintage Cupboard
If you love handbags but struggle to keep them organised, creating a DIY handbag storage solution can completely transform both your space and your daily routine. For years, my handbags were stacked in piles throughout the house, making them difficult to access and not particularly well protected either.
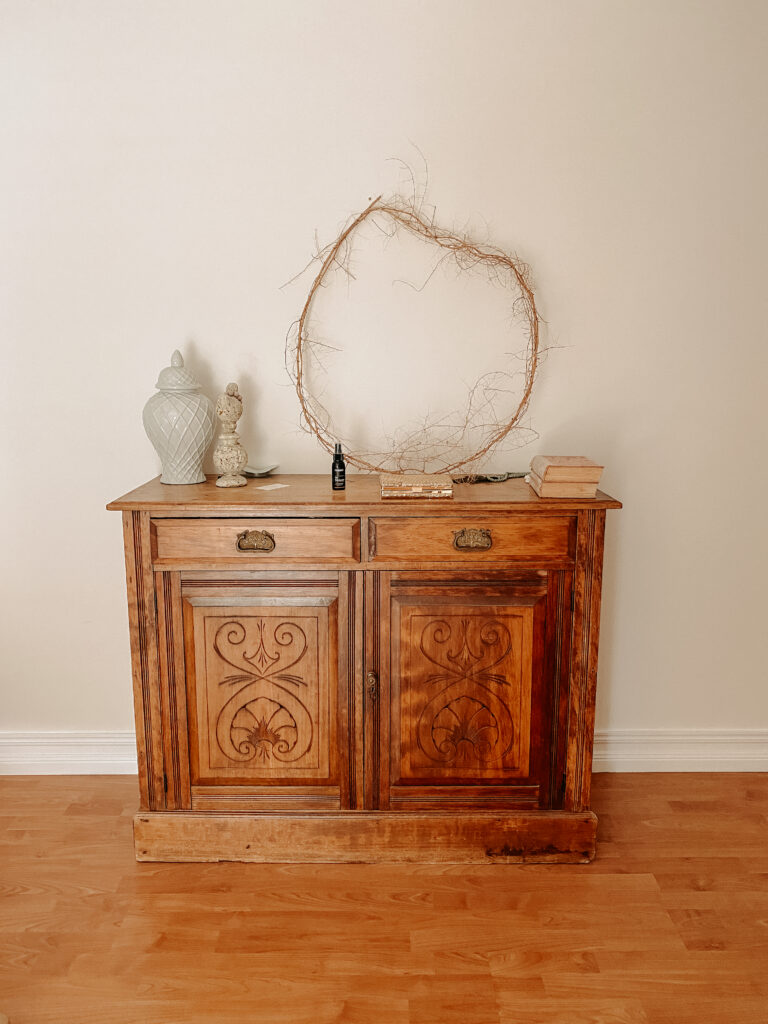
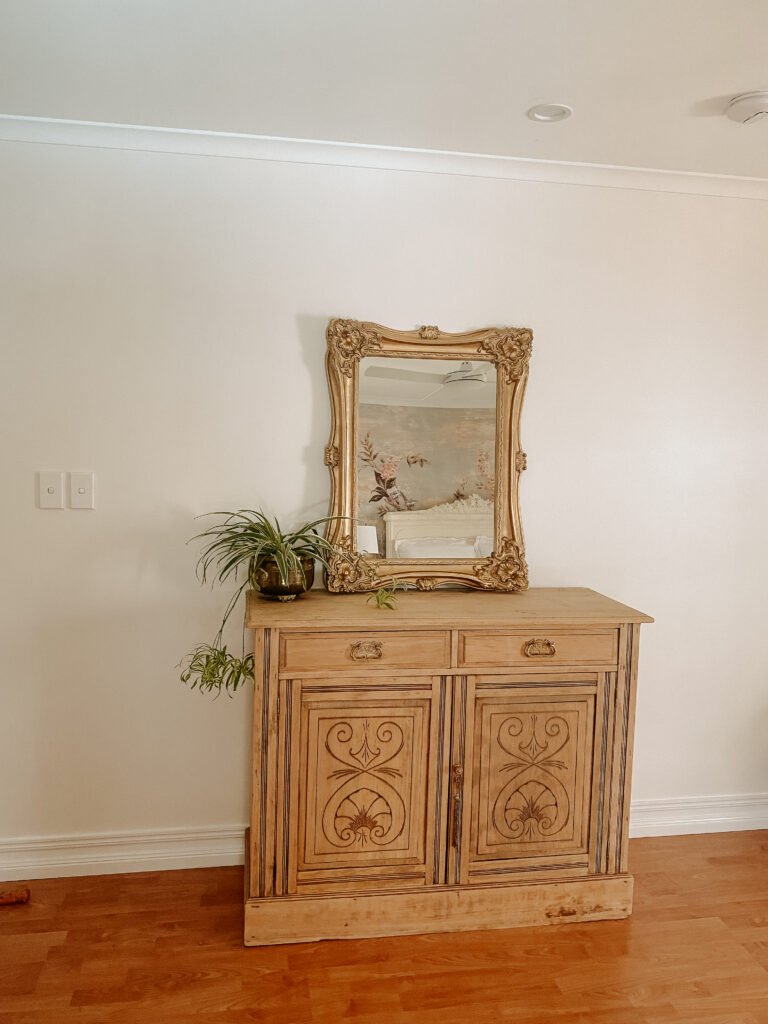
As part of our Master Bedroom Makeover, we decided to turn a beautiful vintage cupboard into custom handbag storage — and it ended up being one of my favourite projects in the room.
Not only does this DIY storage solution keep everything neat and organised, but it also gave new life to an old piece of furniture we already owned. I love projects that combine practicality with character, especially when they help create a calmer and more functional home.
Choosing a Vintage Cupboard for Handbag Storage
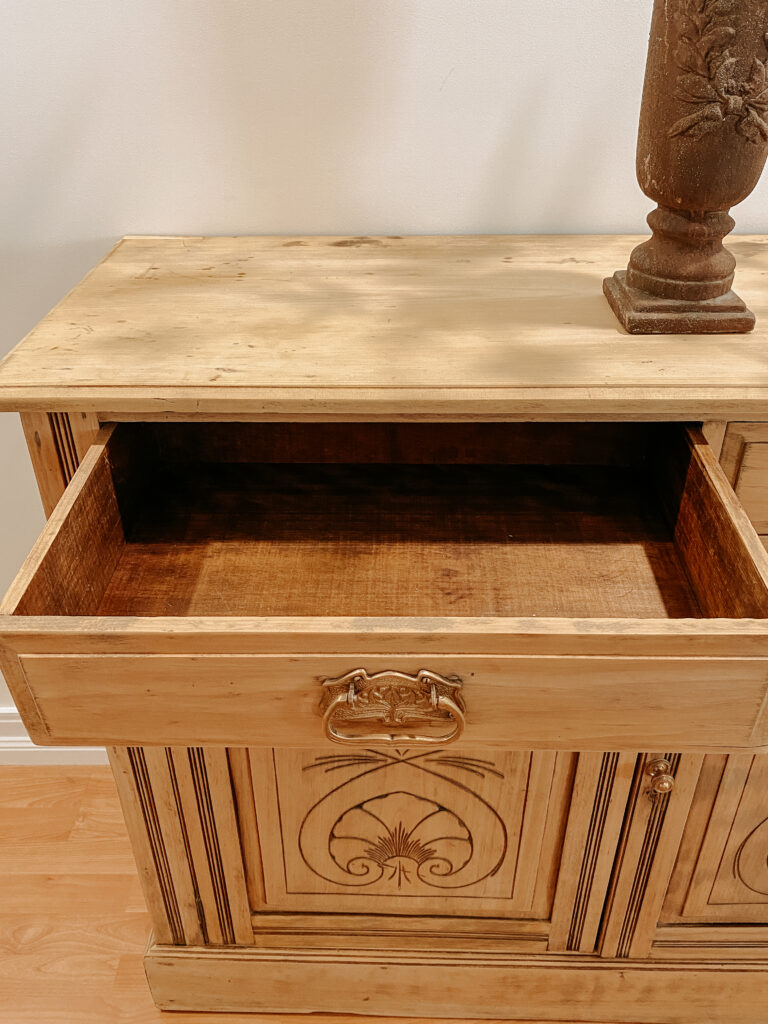
The base for this handbag storage project was a vintage timber cupboard I’ve owned for many years. Rather than buying new storage furniture, we decided to repurpose something we already had and customise it to suit exactly what I needed.
Vintage furniture pieces are often beautifully made and have so much more character than newer storage options. With a little sanding and some internal organisation, this cupboard was completely transformed.
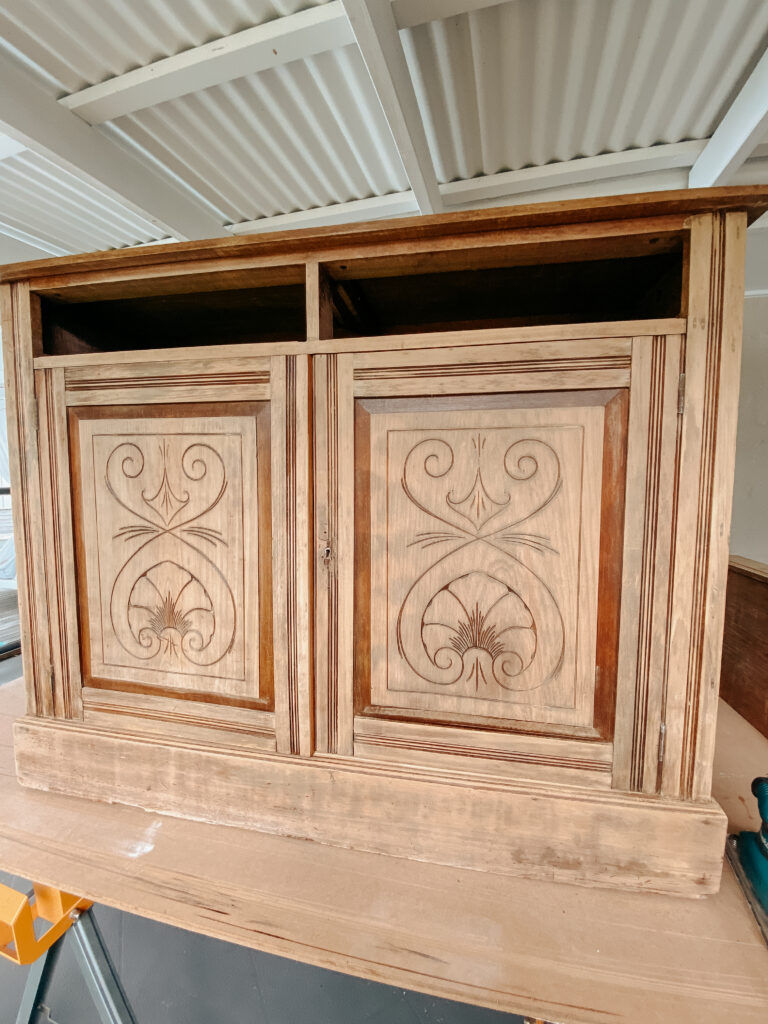
Step One: Sanding and Preparing the Cupboard
The first step was removing all the hardware before sanding back the timber.
The cupboard originally had a very orange-toned finish, so the goal was to bring it back to a more natural timber colour that better suited the softer vintage style of our bedroom makeover.
I absolutely love sanding old furniture because the transformation can be dramatic with surprisingly little cost involved.
To remove the old finish, I used:
- 80 grit sandpaper for stripping back the coating
- A Makita 1/3 Sheet Sander
- 240 grit sandpaper for smoothing the timber
- A sanding pad for detailed areas around the doors
Once sanded back to raw timber, the cupboard immediately felt lighter, fresher and far more in keeping with the rest of the room.
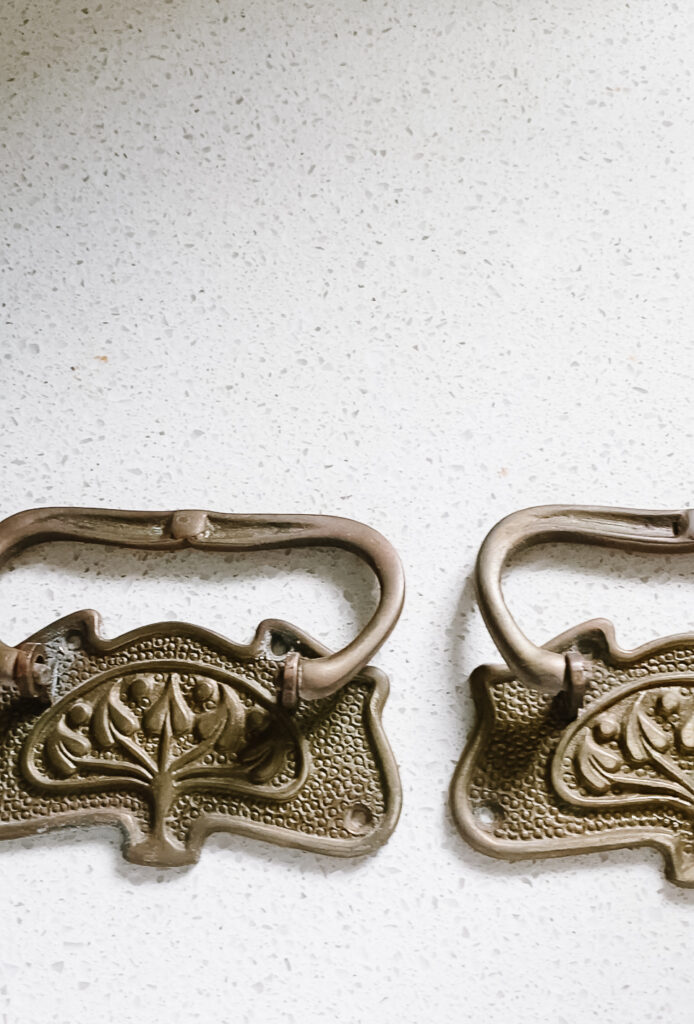
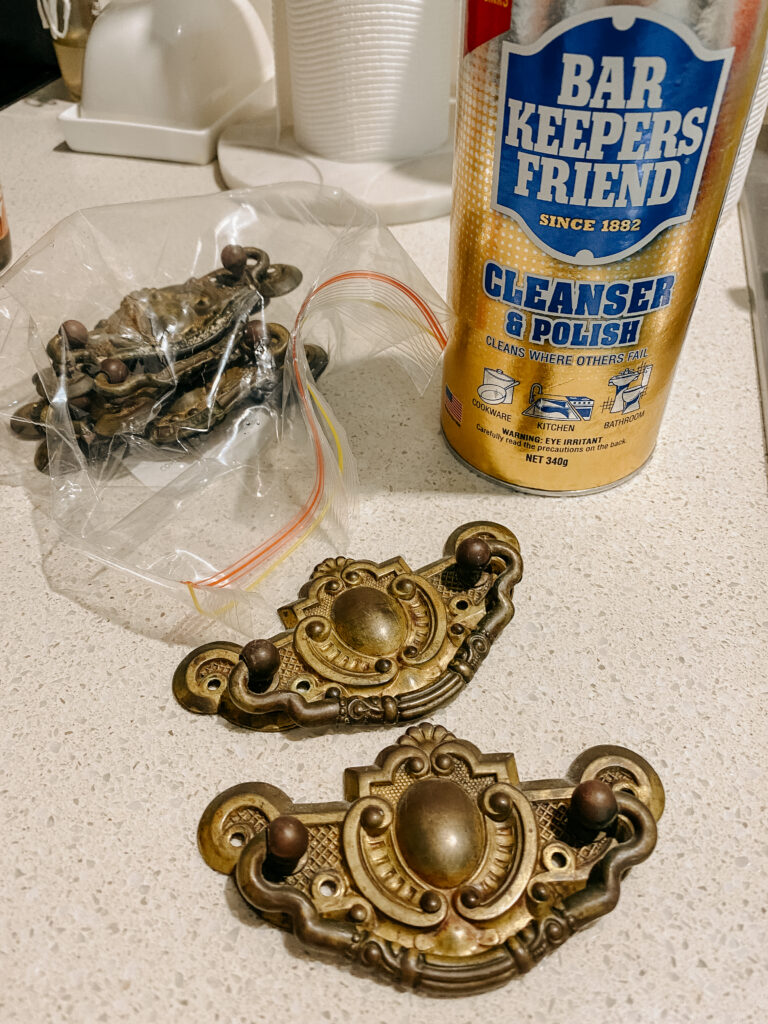
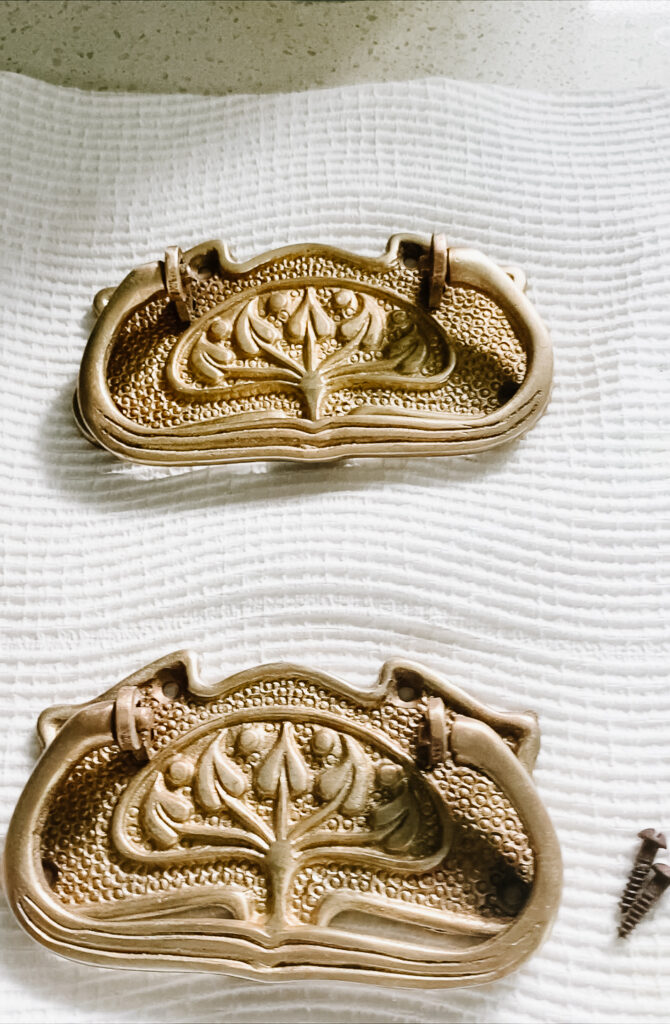
Step Two: Restoring the Original Hardware
Whenever possible, I always prefer to keep the original hardware on vintage furniture pieces.
The handles and hinges on this cupboard were still beautiful, but they definitely needed some attention to brighten them up again.
My favourite product for restoring old hardware is Bar Keepers Friend.
I simply:
- Sprinkled the product over the hardware
- Scrubbed gently using a wet toothbrush
- Rinsed and dried thoroughly
The difference was incredible and instantly helped the cupboard feel refreshed without replacing any of the original details.
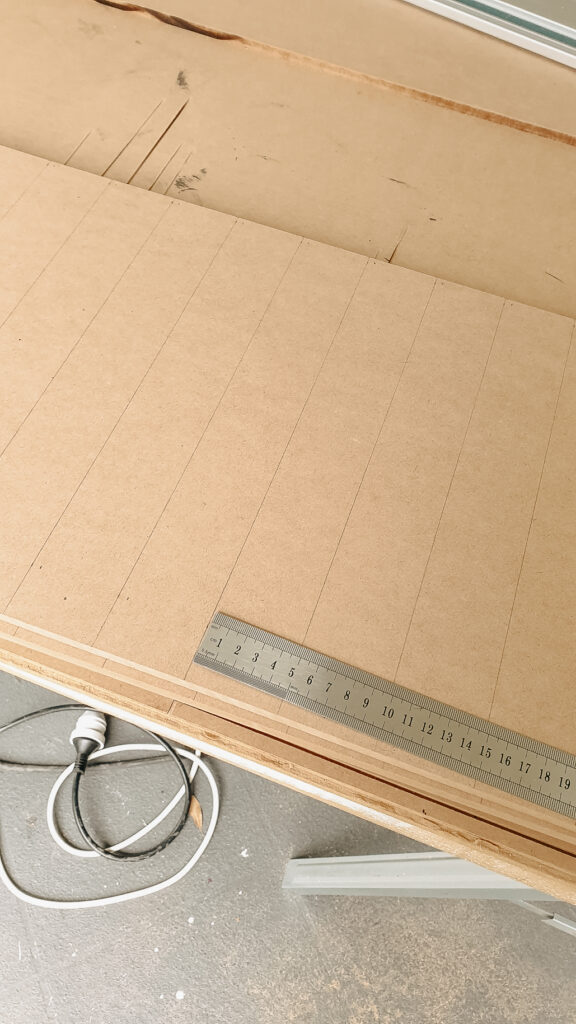
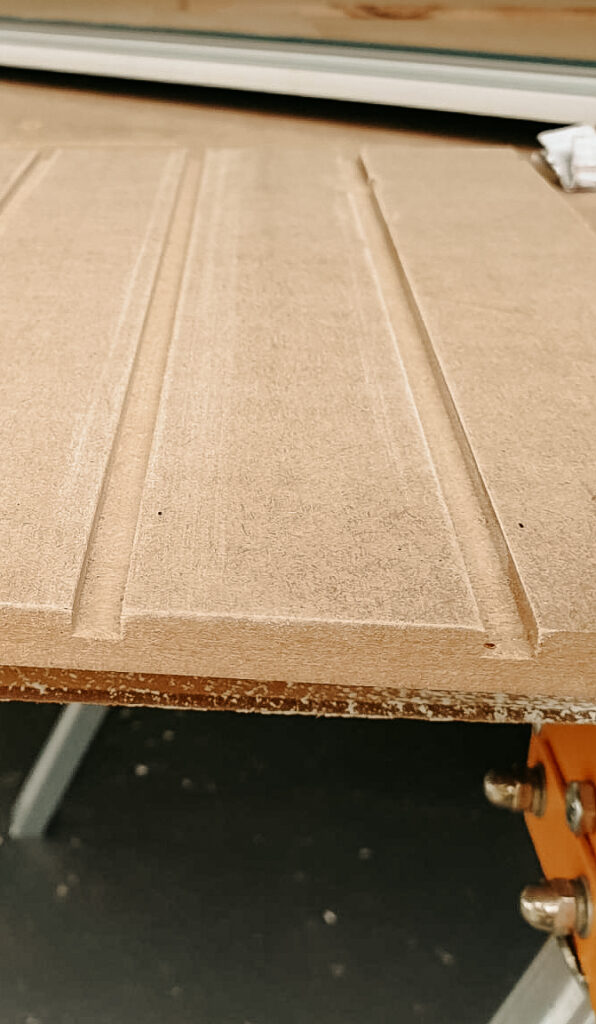
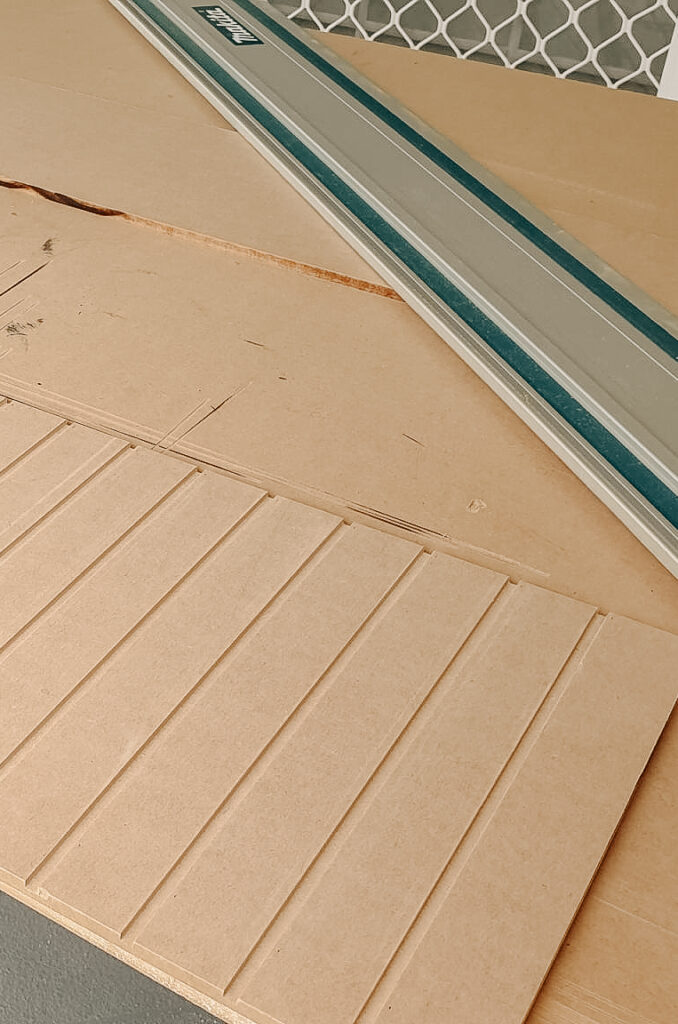
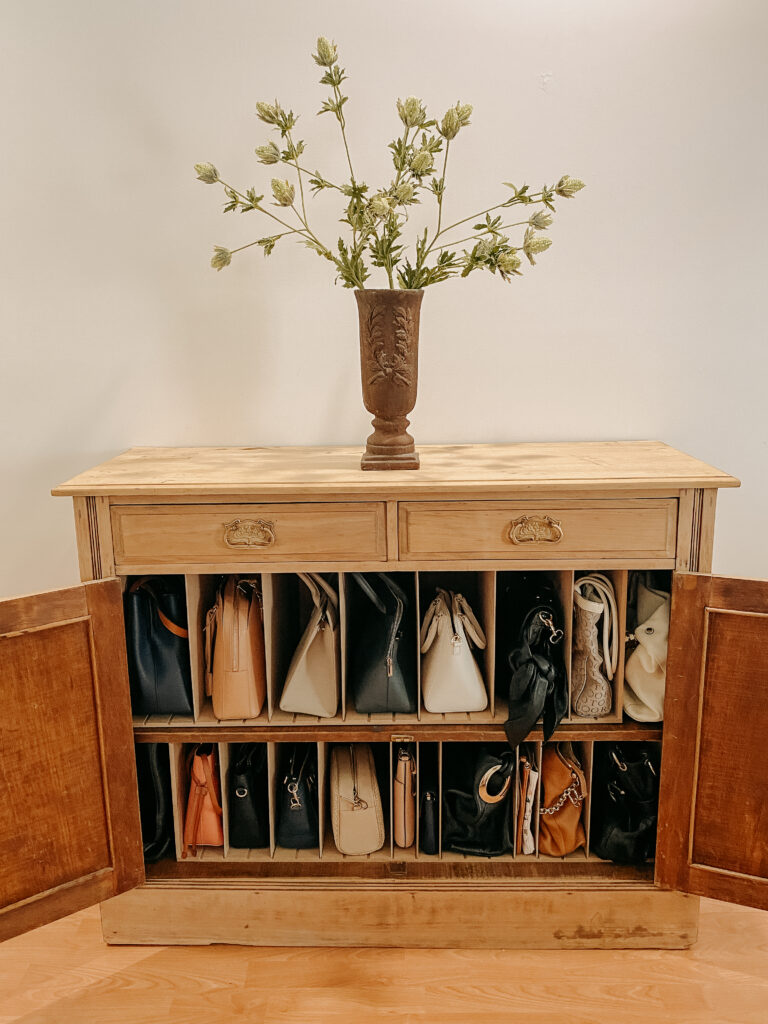
Step Three: Building the DIY Handbag Storage Inserts
Once the cupboard exterior was finished, Tony took over the construction side of the project and built the internal handbag storage system.
Using MDF from Bunnings Warehouse, he created two custom inserts designed specifically to fit the inside of the cabinet.
The materials included:
- 9mm MDF for the outer structure
- 3mm MDF for the removable dividers
Tony carefully measured the cupboard interior before cutting all the pieces using his Makita Track Saw. The outer sections were screwed together, and we decided not to include backing panels because the structure was already very stable.
To create adjustable storage slots, Tony:
- Drew lines 5cm apart
- Used a router with a 6mm straight router bit
- Routed grooves for the dividers to slide into
This meant the compartments could easily be adjusted depending on the size of each handbag.
Because the cupboard sections were slightly different sizes, each insert had slightly different measurements, but the overall construction process remained the same.
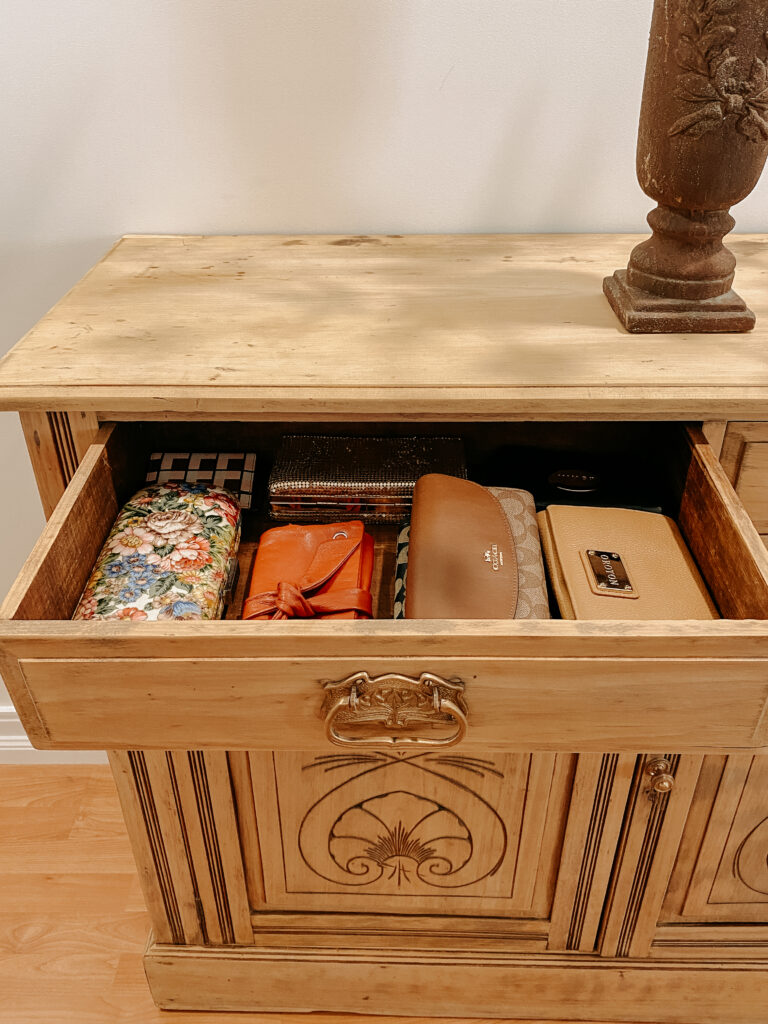
The Finished DIY Handbag Storage Solution
This DIY handbag storage project honestly exceeded my expectations.
Not only does the cupboard now look beautiful as part of our bedroom styling, but it’s also incredibly practical. Being able to see and access each handbag properly makes getting ready so much easier, and it also helps protect the bags from damage.
I also love that this project reused a piece we already owned rather than purchasing something brand new.
One of my favourite things about our master bedroom makeover was finding ways to combine storage and beauty without losing the relaxed vintage feel we love throughout our home.
Final Thoughts on DIY Handbag Storage
If you’re looking for handbag storage ideas, don’t overlook the furniture you already have. A vintage cupboard, cabinet or wardrobe can often be transformed into beautiful custom storage with a little creativity and some DIY work.
This project was relatively inexpensive, practical and completely customised to suit my needs — which makes it so much more satisfying than buying ready-made storage.
If you’d like to see how this cupboard fits into the rest of the space, you can take a look at our full Master Bedroom Makeover where I share all the details of the room renovation.
Wow, what an amazing transformation that is. That tiny is so clever.
Your handbags look so fabulous in this new storage until. Great job Anita.
Thanks Wendy. I’ll pass on your message to Tiny 😂. Its so much better than just throwing them in the cupboard thats for sure.